anderson750
I'm working on it Rose
- Location
- Price, Utah
Just sell the car to me and I will deal with this headache
Just sell the car to me and I will deal with this headache
It shouldn't be this hard to find a decent machine shop in Grand Junction....Nobody wants to answer the phone, have a voice mail box that works or even open the effing doors during normal business hours!


For ignoramuses like me, why are bushing better than bearings in this application?


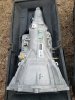
GM parts Reman 4L70E. Basically am upgraded 4L60E


It's got a great lopey idle which will be great in a car like yours. His exhaust doesn't sound great though. Too crackley.
And whoever said LS engines are cheap didn't know what they were talking about!


looking good Greg.
You look like you doThanks, Chad.... it's getting there! I've never built an LS, but have played with several old-school SBC's and it's funny how similar these are. I almost feel like I know what I'm doing.