General Tech What did you work on Today?

zmotorsports

Hardcore Gearhead
Vendor
Location
West Haven, UT
I will assume you don't charge enough for the work you do ;), but if you charged the labor rate for the quality of your work deserves, it would probably be $250 an hour

I greatly appreciate the kind words. Thank you that means more than you realize.

I wish I made that kind of money though. :cool: I'm not the most expensive mechanic out there but I know I'm far from the cheapest as well. I feel I charge a fair price but try to over-deliver on my services that I hope are far above the norm.
 

N-Smooth

Smooth Gang Founding Member
Location
UT
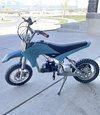
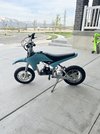
I got some more stuff done on my razor yesterday that I forgot to post. 1800W motor (stock was 500W) and controller. She rips pretty good for being a children’s toy. I got it to 33 mph and it was scary. My road tires arrived so hopefully I’ll get those on tomorrow.
IMG_9662.jpeg
 
Last edited:

zmotorsports

Hardcore Gearhead
Vendor
Location
West Haven, UT
When I see how much normal fly by night mechanics charge I assume they do "Mike quality" work, then I see the work they do and am astonished people don't tar and feather them.
I'm sure you have a loyal customer base because of the quality of your work. I wish you lived closer.

Thank you.

I have spent my entire adult life and career trying to change the stereotype that accompanies the mechanic trade name and I really want to believe there are others that perform work to the same degree I try to. However, based on the repeated comments I seem to get I think they are very few in numbers and far between.

For me being a mechanic is so much more than just what I do, it is woven into my DNA and very much a part of who I am.

I was very fortunate early on in high school that I knew in my heart what I wanted to do with my life and I was blessed to have two mentors who demonstrated to me what being a highly skilled mechanic looked like and I have spent the last 35+ years chasing that dream. I have also been blessed with a wife who is just as hard a worker as I am and has supported and encouraged me throughout our lives together.

I am very flattered by all the comments and support I have gotten from fellow forum members and hope in some small way I have been able to provide informative posts.

Mike
 

NYCEGUY01

Well-Known Member
Location
Willard, UT
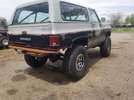
Well, another morning thrashing on the old Blazer.
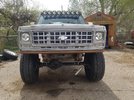
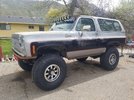
I got the springs all hung last week so this morning both axles are in, the trans and transfer case are mounted, and lastly I got her up on the 40's..

I was hoping to get it a little lower but after flexing it a bit I think this is as low as I dare go. Has super soft Deaver 4" springs with a 1" block in the rear and a 1" zero rate in the front to shove the axle 1.5" forward.

Now I can measure driveline lengths and drop them off this week at axis to be lengthened and shortened..

Slowly getting there, trying to have it driveable to take with me up to the jackpot, ID BORE race, I'll be volunteering to run a checkpoint or help with recovery etc...


20230506_130934.jpg20230506_130923.jpg20230506_131000.jpg
 

JeeperG

Well-Known Member
Location
Riverdale
Bed is getting polished up, finish it up this coming weekend.
PXL_20230507_221518478.jpg
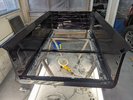
I used some deck sealer on the bottom side of the bed wood and had em blacken it up, threw in some shiny bits that are waiting around for installation. I'll rub in body paint diluted with acetone on the top side as well as teak oil.
PXL_20230430_235712460.jpg
Removed all the numbers and letters off all 35 carriage bolts for the bed, took those and the bed stripes down to armour coatings to have them match the powder coat on the wheels.
PXL_20230429_192110745.jpg
 
Last edited:

SoopaHick

Certified Weld Judger
Moderator
Wife had an idea for a Mother's Day gift she wanted to give to all our friends and family that have little kids.

It is supposed to be a necklace piece that holds any flowers that the kiddos might pick and give to mom on walks/hikes.

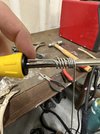
I figured I could TIG one together with just filler wire. Especially after seeing the people online selling these things for $40!!!

She wanted them to be silver in color so I decided to try it with some 1/16" ER308L since I had it available, and it's generally corrosion resistant without being too easily crushed and or cause possible skin reactions.

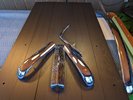
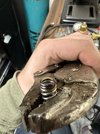
Used a screwdriver and some Vise Grips to get all the bending correct.
IMG_0357.jpeg

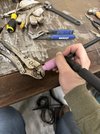
Then ran the Torch with as much Pre and Post Flow as the machine would allow to prevent it from corrupting then manually pulsed the arc at roughly 20 amps to keep from burning up the material.
IMG_0359.jpeg

I was cutting it real close temperature wise (Blue/Purple is right on the verge of burning the Chromium out) but managed to pull it off.
IMG_0361.jpeg

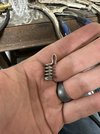
I left the top hook unwelded until she finds the necklace that these will hang on so I make sure the hole size is large enough.

IMG_0355.jpeg

Overall the wife is very happy with them and it's only cost me 2 hours of work.
 

zmotorsports

Hardcore Gearhead
Vendor
Location
West Haven, UT
Finished up the service on the Allison MD3060 transmission and Eaton rear differential in our 2003 Monaco Dynasty last night.

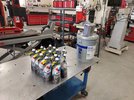
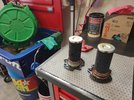
All fluids and filters for both the transmission and rear axle at the ready. OE Allison filter kit for the deep sump.
coach1.jpg


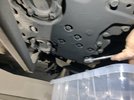
Removing the drain plug from the sump.
coach5.jpg

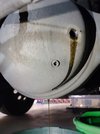
While the transmission was draining, I pulled the fill plug and drain from the Eaton differential to also allow it to fully drain.
coach8.jpg

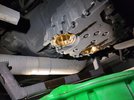
Crossmember moved out of the way and the filters, caps and all fasteners removed for cleaning and reassembly.
coach10.jpg

Filter caps ready for cleaning and disposing of old filters.
coach11.jpg

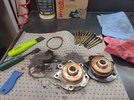
Gaskets being removed, fasteners cleaned and preparing for final assembly.
coach12.jpg

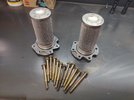
New filters, gaskets and O-rings all installed and ready for installation back into the transmission.
coach13.jpg

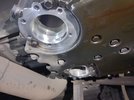
Gasket mating surface cleaned and ready to accept the filter housings.
coach14.jpg

Filters installed and all twelve fasteners torqued to spec. which is 38-45 ft/lbs. I usually shoot for 38-40 ft/lbs. on these filter caps as the Allison engineers have done a good job using both gaskets and O-rings in the design and I have never seen one of these leak.
coach15.jpg

The Eaton differential has been filled with 14 qts. of 75W-90 synthetic gear oil. These soft sided gear oil packages actually make it easy to squeeze the fluid into the diff. with little to no waste at all.
coach16.jpg

Thanks for looking.

Mike
 

anderson750

I'm working on it Rose
Location
Price, Utah
Finished up the service on the Allison MD3060 transmission and Eaton rear differential in our 2003 Monaco Dynasty last night.

All fluids and filters for both the transmission and rear axle at the ready. OE Allison filter kit for the deep sump.
View attachment 159626


Removing the drain plug from the sump.
View attachment 159630

While the transmission was draining, I pulled the fill plug and drain from the Eaton differential to also allow it to fully drain.
View attachment 159632

Crossmember moved out of the way and the filters, caps and all fasteners removed for cleaning and reassembly.
View attachment 159634

Filter caps ready for cleaning and disposing of old filters.
View attachment 159635

Gaskets being removed, fasteners cleaned and preparing for final assembly.
View attachment 159636

New filters, gaskets and O-rings all installed and ready for installation back into the transmission.
View attachment 159637

Gasket mating surface cleaned and ready to accept the filter housings.
View attachment 159638

Filters installed and all twelve fasteners torqued to spec. which is 38-45 ft/lbs. I usually shoot for 38-40 ft/lbs. on these filter caps as the Allison engineers have done a good job using both gaskets and O-rings in the design and I have never seen one of these leak.
View attachment 159639

The Eaton differential has been filled with 14 qts. of 75W-90 synthetic gear oil. These soft sided gear oil packages actually make it easy to squeeze the fluid into the diff. with little to no waste at all.
View attachment 159640

Thanks for looking.

Mike
Once I hit the summer break for racing, I need to change the oil on my twin screws. Do you ever send of oil samples for analysis?
 

Corban_White

Well-Known Member
Location
Payson, AZ
Mike, the big rig service is interesting. Whats the story on the custom frame for the radio flyer in the first pic? looks like a fun project.
 

zmotorsports

Hardcore Gearhead
Vendor
Location
West Haven, UT
Mike, the big rig service is interesting. Whats the story on the custom frame for the radio flyer in the first pic? looks like a fun project.

It's a project I started for our recently arrived grandson. Corban posted a link to the build so as I make progress I'll keep it updated. It's currently stalled out due to side jobs filling the shop and a few personal maintenance tasks filling in the gaps but I'll get back on it here shortly.

Thank you.
 

Yota

Active Member
Location
Ogden, UT
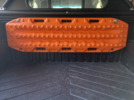
I decided to mount my new Maxtrax to the front bedrail on my Tacoma since they fit so nicely between the wheel wells. I found this idea over on Tacomaworld and it only ended up costing $7.36+tax.
tempImagePGwc3q.png
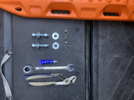
2x 1/2" x 3" carriage bolts
4x 1/2" fender washers
2x 1/2" hex nuts
2x 1/2" wing nuts
I ground off two sides of the carriage bolts so they fit inside the bedrail. The first set of washers sit against the bedrail with the hex nuts to lock the bolts in place. The next set of washers and wing nuts mount the boards up. The 3" bolts ended up being a little long but would be perfect for a couple more boards.
tempImagesbgdZG.png
 

N-Smooth

Smooth Gang Founding Member
Location
UT
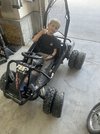
Our go karts have had bald, flat tires for months. The manufacturer used some janky sizes in what I assume was an attempt to get me to buy their tires for like $40 each. Nawwwwww. I went down an inch in diameter to get these bad boys for $20 each. The kids are happy!
IMG_9724.jpeg

I think I’m going to try some mower tires on the other kart at $16 a piece- just for science.
 

zmotorsports

Hardcore Gearhead
Vendor
Location
West Haven, UT
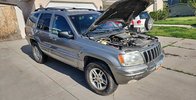
The next project actually rolled into the shop on Monday evening but I was neck deep in yard work so I didn't get a chance to begin work on it until last night.


I have done some work for this gentleman on numerous occasions as he was a client when we had our speed shop and has also brought a few things to me over the last couple of years in our new shop. He just took possession of this Jeep a short while ago as he bought it with engine issues and really didn't get a chance to drive it before now. Once he got the powertrain back in running condition he quickly realized he had a pretty good case of death wobble and called to ask for advice seeing as how he is new to this Jeep thing. I recommended a few things to check and shortly after he called telling me he found the issue and we scheduled an appointment for him to drop it off.

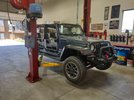
Usually these issues arise on lifted Jeeps running oversize tires as they put more stress on suspension and steering components but I thought this one would be good to document to show that it can happen to a bone stock Jeep as well.

There are several things that can cause death wobble but a common one is the track bar holes being elongated. The issue seems to begin with a track bolt coming a little loose and then the back and forth stresses elongate the bolt holes, usually in the axle bracket but this one appears to be both with the bracket at the frame end actually being a little worse. The end result is usually a nasty case of death wobble that is quite often explained as a "near death experience". :rofl: Those that have had a case of death wobble know exactly what I mean and I've driven a few that definitely got my attention. :oops:

The Jeep racked and giving the suspension a good once over. I like to barely lift the Jeep to the middle of the suspension range so the suspension is neither fully drooped out with weight hanging on the components nor sitting at ride height with the suspension in compression with a load. By having it in the middle of the range I have found it easier to roll around under it on a creeper and with a prybar check each suspension connection point to check the bushings. Then I'll raise the Jeep up in the air a few inches to check front ball joints and unit bearings before raising it further to get a full view of the undercarriage.

Everything seems to be in order with the exception of the track bar where I was able to get a bit of play at both ends. Also worth noting is that both ends (axle and frame) are completely stock with no aftermarket components. There are several aftermarket companies that manufacture heavy duty brackets for these to address issues either as a direct replacement part or as preventative as a Jeep is being built. I've done upgrades for people under both situations but it's usually after the fact vs. preventative.
tb1.jpg

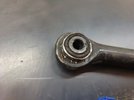
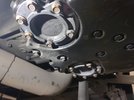
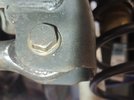
It's kind of hard to see but if you look around the 2 o'clock to approx. 5 o'clock range you can see where the head of the bolt has been moving. This is far from one of the worst cases I've seen but this is about when things start becoming noticeable that something is going on that isn't right.
tb2.jpg

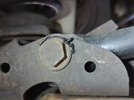
Not quite sure what is going on here as from the outside it looked like electrical tape but once I got it apart it almost took the consistency of RTV.
tb3.jpg

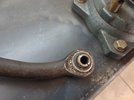
This case actually got bad enough that it wore the rubber encapsulated bushing in the track bar ends. The new owner attemped to stake the bushings in place just to buy some time until I could get it in the shop. The bushing was now firmly mounted in the track bar but unfortunately, the elongated holes in the brackets still allowed a substantial amount of movement.
tb4.jpg

tb5.jpg

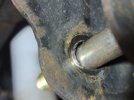
I also have found that there is just enough clearance in the new bushings and in new aftermarket track bars that the 14mm bolt can be replaced with a 9/16" bolt and therefore close up a few more thousands of clearance. I didn't think about putting the OEM 14mm bolt in the hole for a visual but I did put the larger 9/16" bolt in the hole and you can see how much the hole is elongated.
tb6.jpg

I've had some come in the shop that have been so severe that the bracket is either ripped from the mounting location or it has been damaged so badly that a complete bracket replacement is the only option. At that point I have used one of the various aftermarket brackets and welded them the Jeep after removing the OEM bracketry. This is a great option as they are also thicker than the OEM brackets, most are around 1/4" with a few only being 3/16" material. The factory bracket thickness seems to be about 10-gauge or slightly over 1/8" steel.

This Jeep fortunately was not that bad and a perfect candidate for a repair using weld washers. Now most probably know what a weld washer is as it is exactly what is sounds like, a washer welded to the outside of an existing hole to give the hole more thickness and therefore strength for the fastener. I've used weld washers as well as doubler plates on everything from race cars to Jeeps and even ATV's and sandrails as they are quite popular in the off-road and racing industries. They give the extra stength by adding thickness and therefore surface area for fasteners to capitalize on without having to make the entire brackets out of 1/4" or 3/8" thick plate. Strength without all of the extra weight is the main advantage. Those that have followed along with some of my previous work may note that when we built my son's suspension under his WJ that I machined weld washers and used them in multiple locations for mounting points.

Now the examples above were from the beginning of a project so the material is actually multiplied when using a weld washer. However, in a scenario such as this where the hole is damaged and there will be no support from the original material, I feel there is a better option. Most people I've seen do this repair just simply weld a washer to the outside of the hole in the bracket, bolt it back together and run with it. That is not the way I do this repair because it will only net you the support based on the washer being used and not to the tolerances I prefer. Most standard washers are made from 1018 or 1020 mild steel with a zinc coating and are only about .100" in thickness. This is less than the OEM material that wore away and therefore it is a repair with a relatively short shelf life.

I use a bit more intrusive method by machining a weld washer that is also taking the thickness of the OEM bracket into the equation. This takes it from a bandaid or temporary repair to a permanent repair that will be stronger and have a longer life than the OEM. It does take a bit longer and requires some machining but in my opinion, the only proper way to repair these.
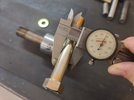
tb7.jpg

The slightly larger diameter 9/16" bolt is a much nicer fitment into the new track bar bushings.
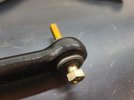
tb8.jpg

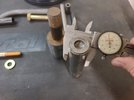
For this repair I like to reach for some old hydraulic rams that I keep a small assortment of. I've done a lot of hydraulic work over the years and I've kept the damaged or broken hydraulic rods as they are perfect for such repairs. If you look at most off-road parts suppliers that sell weld washers you will find most are machined from 1018 or 1020 mild steel. While there is nothing wrong with that, those grades are considered low carbon steel and I have found that most hydraulic rods are machined from 1045 mild steel, which is considered a medium carbon steel and extra carbon gives this grade excellent strength as well as wear characteristics. I dug through my remnants of hydraulic rods, which is getting low I might add as I haven't replaced a rod in several years. I found a complete 24" rod in that was 2" in diameter but that would require quite a bit of material removal to fit the OEM brackets. Upon further digging I found a couple of smaller drops in the 1.250" diameter which will be perfect.
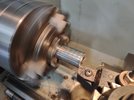
tb9.jpg

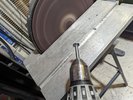
The 1.250" rod chucked up in the 6-jaw and being faced off.
tb10.jpg


More pics to follow.......
 
Top