LQ4 Build

RockChucker

Well-Known Member
Location
Highland
Installed the cam tonight. I installed my comp cams timing set to go along with it and set it up at 0°, which should have matched timing on the cam spec card. Alas, it did not. The intake centerline is spec'd at 115°. It measured out at 112.5° when I degreed the cam. This is when the fun started. The crank side of the timing set has various options to advance or retard the timing 2°, 4°, 6° or 8°. This is at the crank, so it would be half that at the cam. I needed to retard my timing by 2.5°, so I chose to change the crank gear from 0° to 4° retarded, giving me 114.5° in theory. Well it gave me a 119.5° intake centerline. I’m not sure if I did it wrong the first time, second time or if comp cam’s timing set changed but the instructions weren't changed with it.

I decided to call it a night and I’ll revisit it tomorrow night. I don’t know if the timing set is out of whack or if the cam was machined wrong. Or if everything is fine and I did my first measurement wrong.

9997B938-EECE-400C-A772-18C2229216F8.jpeg
 
Last edited:
RockChucker

Well-Known Member
Location
Highland
Ended up remeasuring. Lobe centerline ended up at 113°. That will be about 1° advanced or so from 115° by the time chain stretch is accounted for.

The double roller timing set required the oil pump to be spaced out. Which then required massaging the front engine cover. And filing the front cover of the pump.

F5CFC782-EF77-4B7A-90DE-D96EA003634D.jpeg
0D89DD68-17D6-4EAE-98E6-FA23FD71DB17.jpeg

I also lubed up the lifters and installed them. Heads are on and ready to accept pushrods and rockers.

540A5114-7ECD-400A-AF57-B4193AC044A7.jpeg
 

Greg

Make RME Rockcrawling Again!
Admin
Been there! I took a little bit of material off the heads of the bolts securing the oil pump so I didn't have to take so much material off the timing cover.
 

RockChucker

Well-Known Member
Location
Highland
Been there! I took a little bit of material off the heads of the bolts securing the oil pump so I didn't have to take so much material off the timing cover.

Are you using a factory pump? I don’t think the clearance issues would have been nearly as tight if I wasn’t using a melling replacement pump. I liked the design of the gerotor over the factory one and it was cheaper. Win! The main clearance issues I had were with the aluminum body of the pump and the front cover. Hence the cover mods.
 

Greg

Make RME Rockcrawling Again!
Admin
Are you using a factory pump? I don’t think the clearance issues would have been nearly as tight if I wasn’t using a melling replacement pump. I liked the design of the gerotor over the factory one and it was cheaper. Win! The main clearance issues I had were with the aluminum body of the pump and the front cover. Hence the cover mods.

No, using a Melling high volume pump as well and double roller timing set. I didn't go into too much detail about the clearance issues and what I did to make it work. - https://www.rme4x4.com/threads/the-hell-camino.114650/page-7#post-1117252
 

RockChucker

Well-Known Member
Location
Highland
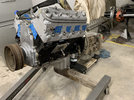
Got the motor buttoned up as far as I can/am willing to go. At this point I’m waiting to get my 5.3 out so I can pull the oil pan and supporting parts off it (windage tray, oil pickup tube, etc) to install on the 6.0. I’m going to wait to install the intake manifold and exhaust headers until after the engine is sunk into its home.

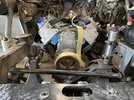
That said, I started tearing into the Jeep yesterday. First order of business was pulling the front coilovers off. I don’t know my cherry picker would be able to lift the engine high enough to get it out otherwise. It always surprises me how low this thing is at full bump. Most everything is disconnected. The only things I have left are: power steering lines, trans cooler lines, engine and trans mount bolts and remove the alternator and power steering pump. I may have to pull the headers off too. I’m not totally sure on that yet.

While the engine is out, I’ll be moving the tach emulator inside the cab. It starts sending a screwing signal when things get warm. Additionally I’ll be cleaning /painting the engine bay and cleaning up the wiring harness.
The last two projects are bigger mods, but necessary. The first is remounting the radiator. I designed a new mount 2 or 3 years ago. The original mount I built when it did the Jeep sandwiched the radiator between a crossmember on the frame. No bueno. Killed one radiator already from frame twist. I reworked it slightly to give the radiator room to move. But the new mount will be better with a single centralized mount under the front bumper. Mimicking how a TJ grill is mounted from the factory in a lot of ways.

The last major mod will be reworking the steering. I’m done with the hydro assist. The box leaks like a sieve and the steering isn’t as responsive as I would like. The volume required for the ram and steering gear is more than what the pump is really capable of. I have a spare scout 2 box that I’ll be converting to a fully manual box that will be filled with oil. To make it faster, I’m going to put the word drive and piston out of an astrovan box in it and I’ll ditch the 1.5:1 quickener I have on the Jeep. This should net me with about a 2.75-2.8 turn lock to lock. Right now it is just a little more than 2.5 turns lock to lock. Should make things less twitchy at speed. I have a stand alone servo from Woodward that will drive the hydraulics. Initially I’m going to install with my 1.75” single ended Howe ram, but plan to upgrade to a dual ended ram in the future so the steering is very balanced.
3B96EA03-70AF-4BBE-B1FA-77025C7CC674.jpeg
 

RockChucker

Well-Known Member
Location
Highland
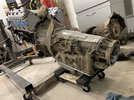
Well the motor and trans are temporarily in to allow for building a trans mount and make sure my new upper control arm mount clears everything like I thought it should. I’m going to have to get fancy with a trans pan. Turns out a 6l90 only has the deep pan like I have. And it has a different bolt pattern/length from a 6l80. I think if I get a Pontiac G8 trans pan I can section it and my existing pan to custom build a low profile pan. Like outlined here...
Here’s my clearance issue. Not insignificant.
238D83DD-CBE8-4244-B46E-F182275D552F.jpeg
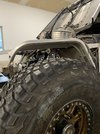
Also I laid a straight edge across the top of the valve covers. At full bump the top of the tire is higher than the valve covers. I suspected it was but didn’t ever verify when I built it.
1F9752CD-30AF-43F9-A046-BBAB26F69A76.jpeg
 

RockChucker

Well-Known Member
Location
Highland
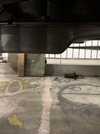
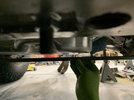
Spent some time laying under the Jeep yesterday. Pondering the deeper meaning of life and the choices that lead me here...ok not really. But I did spend a fair bit of time thinking about my trans pan to skid plate clearance issue. I don’t think it is as bad as I thought. The G8 6l80 pan should give me oodles of clearance. At least relative to all the other clearance on this Jeep 😂 To determine this, I clamped 2 1/2” worth of blocks on both sides of the frame and used a long straight edge to see where everything sits.

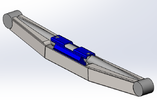
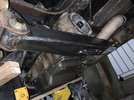
Satisfied, I moved forward with designing a new trans crossmember. Rather than totally reinvent the wheel, I’m only mostly reinventing it by heavily integrating my existing crossmember. My original design would have been great for a tube chassis, but less than ideal for a ladder frame Jeep. It was a simple piece of heavy wall 1.5” DOM with jk control arm bushings/eyes on the ends. The t case adapter was hard mounted to it. I was always slightly concerned that this was going break the 4l80 case. Luckily it never did. I did this because it was the only trans crossmember that would work with the teraflex skid plate I used to run. I couldn’t integrate an OE style mount due to space constraints. This was a perfect opportunity to redesign the crossmember to integrate an OE mount since my current skid provides more room. Rough sketch of current mount.
8C24737D-97A6-4E48-AE66-6DA639CD761C.png
The new design will integrate this into it. I’ll cut the center out where the pocket for the OE trans mount will fit. Like so:
B690E74C-EB35-452A-A417-455374BBB4D5.pngKeeps things simple and allows me to use the existing frame pickups. Plus it’s a lot of a welding and will be fun 😎

And because pictures are fun...
AE5970FE-11C5-4998-B9C6-B212F06EBAB5.jpeg
 

RockChucker

Well-Known Member
Location
Highland
Trans mount done. Man I need a welding table. It sucked welding this on the floor. Not my best welding, but it will get the job done. And never be seen as it is hidden above a massive toboggan of a skid plate.655F9193-2BF1-4400-9177-D9FF5FA6B9D3.jpeg
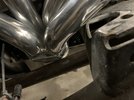
Also test fit my new headers. And low and behold they are different. Guess it wasn’t safe to assume that Sanderson can make the same header with the only difference being the primary tube diameter. The passenger side is super close to the upper link and the driver side appears to have miles of clearance Clarence. Unfortunately this is going to require y pipe modification or fabricate a new one. As far as the clearance issue with the upper link....I’m going to first look at installing a shorter misalignment spacer on the ends to move the link closer to the frame. Here’s hoping that buys me enough room. I need to clearance the engine mount a bit more too. And then patch it in when I pull the again.
45D578C3-58D1-495B-A14C-03B46B20CE91.jpeg
 

RockChucker

Well-Known Member
Location
Highland
Modern problems require modern solutions....or something like that. The clearance for that header is super close, though it doesn't actually touch the upper arm. At full bump, my track bar is sloped upwards from the frame to the axle, so I'm lucky that as the suspension starts to droop, my clearance issue is reduced as the axle shifts further right for the first inch or 2 of travel. I was messing around with my control arm, and found that I have a shave over 3/8" clearance between the heim body and side of the bracket when the heim is articulated at the maximum. I can work with that....

My thought was that I would shave the passenger side misalignment spacer down ~5/16" or so to offset the joint in the bracket. Lucky me...Midnight 4x4 has me covered already. Narrow Heim Spacers Picking up a couple of these and then I'll have to add a spacer on the other side of the heim to take up the remaining space. The heim should still have full articulation and the v band clamp should have enough clearance with the arm. I hope. Otherwise I'm going to have to modify some control arm brackets to move the arm over another small fraction of an inch...Fun stuff.
 

RockChucker

Well-Known Member
Location
Highland
The narrow heim spacers from midnight are 3/16” thick. And I got so lucky. They work! The heim has full articulation capability and the v band clears the upper arm by the hair on a gnat’s behind. I’ll need to come up with 1/4” spacer to put on the other side of the heimBD5B547A-22BE-4D7C-A14F-F7DEC400D392.jpeg
A1834EFA-99AB-49D1-90FB-0B644E10D681.jpeg
I pushed the v band all the way up onto the header, in real practice I’ll slide it further down the header to provide more clearance. Tomorrow’s project will be modifying the pontiac g8 6l80 pan to fit the 6l90...
66A4A4FD-0EB9-46A0-A8F9-8FE6CCD6FE7C.jpeg
 

Mouse

Trying to wheel
Supporting Member
Location
West Haven, UT
Is there any engine movement in the motor mounts that might affect the clearance while you're driving over an obstacle?
 

RockChucker

Well-Known Member
Location
Highland
Lucky for me when articulated the clearance is miles (relatively speaking of course). The highest the axle tucks and closest everything gets is at full bump like hitting a whoop or a jump. There is definitely movement, but it would be sinking the motor deeper into the frame, improving clearance slightly. I do wish it was easier to simulate dynamic loading to be 100% sure though.
 

RockChucker

Well-Known Member
Location
Highland
Transmission things today. Figured I’d write this up while I wait for the trans pan to cool so I can keep welding some more.

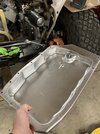
The G8 6l80 pan is going to work great. I’ll have somewhere in the neighborhood of 5/8” clearance between the trans pan and skid plate. Might be the largest clearance on the whole Jeep. 😆

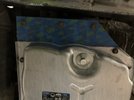
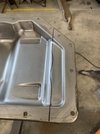
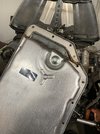
The 6l90 pan is a couple inches longer than the 6l80 pan. So here we go. Customizing things again. Of course. I cut the rear flange off the 6l80 pan and made a pattern so I could cut the right size section off the 6l90 pan to graft onto the 6l80 pan...Due to pan topography the lines didn't line up great. So I kept the 6l90 pan flange and cut a filler out of some 18 gauge. I’ll put up another pic when I’m done welding it out.

13B39DDA-C2B3-4D6B-8BB5-7128A8985EB7.jpeg
780F6EB4-2039-4B74-BA8D-162B660877E0.jpeg
59FD3010-207F-49EA-B236-BC769D4FBDBF.jpeg
 

RockChucker

Well-Known Member
Location
Highland
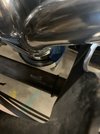
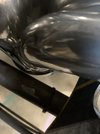
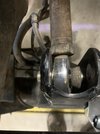
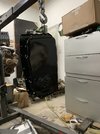
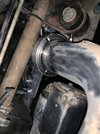
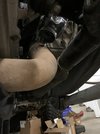
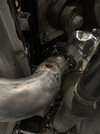
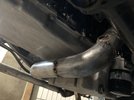
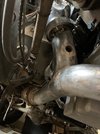
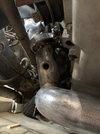
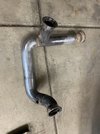
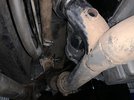
In today’s adventures I found that either Sanderson’s consistency is really terrible or the center dump block huggers are wildly different between the 1.5” primary and 1.625” primary versions. More so than I previously expected from the clearance issue with the control arm outlined above. I fit up the y pipe I had built for the old 1.5” primary headers. It’s off by 2 miles. Ok not really. But less than ideal. I got the v band halves cut off the y pipe to prep for the new ones that are different. The machining has changed in 5 years for the exact same v band clamp. Cool. The passenger side is actually pretty close and won’t need modified. But the driver side is a different story. Going to have to get tricky so it clears the driveshaft. All in all, this new setup is going to be a win. The new upper control arm bracket allows for removing the bolt without disassembling the exhaust. That was a minor oversight that wasn’t accounted for with the original bracket I used 5 years ago. It doesn’t look like it in the picture but that v band clears the upper control arm through the whole suspension cycle.
7136E116-862D-49A8-81F2-8A2FEF849BF3.jpeg
9D7D277F-B647-4C6D-895C-D2B3D58C1C50.jpeg
258645B0-5DBA-4DD0-B933-7EC314A0989F.jpeg
 

RockChucker

Well-Known Member
Location
Highland
Exhaust is finished! Tacked and welded up the stuff I fit up last weekend between helping my pops on some body mount work on his Jeep. Now the engine is ready to come back out so I can finish weld my upper control arm mount, patch in the clearanced frame horn for the passenger header and do a little rework on the brake line junction at the upper control arm joint. Then paint. Getting closer.
69C69F6F-9E6A-4485-B4B4-EB1BF56ED43F.jpeg
46D6D9E0-DF4A-4C5E-9886-D4A67660FB0F.jpeg
366E4096-9035-4DF1-8783-14E0AE6D1440.jpeg
E895B727-5368-43EF-88B6-4C6910539FC4.jpeg
93088905-05D8-48A0-AE2F-605FD2293CE5.jpeg
 
Top