Mikes First Yota Build

mhafen

Member
Location
Salt Lake City
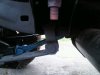
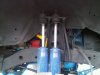
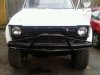
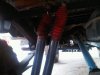
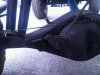
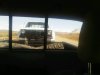
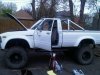
First off thank you to Steve for being a wrenching, rig swapping ball of awesomenss. I read Steves first build up thread about a year ago (the Pickup build for those of you who cant keep track of his ADD). I was blown away by his little truck. I had just bought a 1987 Samurai, loved it, but I wanted something with a little more utility to it sooo... over the weekend I went and I got myself a 1980 toyota pickup. Its already had some work done to it... twenty years ago. The interior is destroyed and the engine needs some gaskets and a tune up but it runs and for some reason I like it (half the battle right?).
My plan was to try and recreate Steves truck because... when you have a good formula why change it? The problem is that I dont have a garage #1 and I dont have welder #2. So that limits some of what I can do on my own. Not to fret. I read on Steves post that he wouldnt flat belly it if he could do it again so Im going to skip that wet sloppy mess. I can adjust the build as needed to compensate for that an it will still be awesome.

My plans include:
New 3" Spring packs F/R
New Shackles F/R
New Tcase gears (4.70)
35" Tires
5.29 dif gears
lockers F/R
OTT steering w/ toyota IFS steering box
T-case Armor
New Shocks
Ubolt Flip
Front Axel rebuild
Bob the bed
Line the bed
Strip and finish the interior (bench seat or 2 seats?)
Stereo (Deck and speakers... you cant wheel without tunes!)
Rebuild brakes (Disks rear?)
Ebrake tcase kit
New Carb (Carter, Weber, Holley?)
Remove POS Body lift (return to stock body height)
New sliders

First things first a tune-up
 

Attachments

  • Toyota.2May.Drivehome.jpg
    Toyota.2May.Drivehome.jpg
    20.4 KB · Views: 12
  • Toyota.2May.Drivehome2.jpg
    Toyota.2May.Drivehome2.jpg
    19.6 KB · Views: 15
  • Toyota.2May.Drivehome3.jpg
    Toyota.2May.Drivehome3.jpg
    22.8 KB · Views: 13
  • Toyota.2May.Tuneup.jpg
    Toyota.2May.Tuneup.jpg
    52.5 KB · Views: 22
  • Toyota.2May.Tuneup2.jpg
    Toyota.2May.Tuneup2.jpg
    52.1 KB · Views: 14
Last edited:

Taco4life

Registered User
Location
Bountiful
5.38 dif gears

Sweet find, I am looking forward to this build. I don't know why you posted so many pictures of your dog... Unless his name is Toyota then thats cool I guess :ugh: if your into that kind of stuff I guess... Also I have never heard of 5.38 gears, I would go with 5.29's. But I like your plans should be an awesome rig when finished I love the old First generation trucks!
 

Rot Box

Diesel and Dust
Location
Smithfield Utah
I went and I got myself a 1980 toyota pickup.
Good work! First gens rock!

My plans include:

New Carb (Carter, Weber, Holley?)

None of the above ;) You simply cannot beat a stock carb on these trucks. Raise the needle slightly until the fuel drops to the bottom 1/4 of the float bowl window and you're good to go.

That said if you ditch the stock carb let me know I'd love to take it off your hands--The round bores are getting really hard to find these days :D Keep your progress posted. Imo the best item you have on your list is hi-steer and that would be my first chunk of money spent. Anything above ~3" of lift (especially with flexy springs) make these trucks very unpredictable when braking especially if the torque bar is removed.

Andrew
 

mhafen

Member
Location
Salt Lake City
I put up pictures of Cutie (the dog) because she came with me to pick it up and deserves a little recognition!
Steve also said that the truck would be pretty unstable with the lift above 3. I have to get new shackles to shorten it up. The rear at the moment has a 5 or 6 inch shackle. the front has a lift spring on it but I cant tell how big. Stock shackle. I figure if I can find some springs that are three inches they will flatten out to about 2.25 or 2 over time and with a shackle thats 3-4 inchesl long it would equal 2.75-3 inches of lift. The break in period would be pretty long and at times Im sure unpredictable but the end state would be pretty good.
Id love to have fuel injection but I dislike computers on cars... for some reason. Its not even performance I just feel like it takes some of the control away from the owner. My sammi was injected and I just didnt feel comfortable wrenching on it afterwords.
The first chunk of time and money is going toward getting the engine where I want it. New gaskets and seals will be the first round. Then the radiator will be replaced and new hoses put in. So far Im in 75 bucks for the engine (thats tune up and all the seals and gaskets that I know need to be fixed). This will be the longest portion as well considering Ive never worked on a yota engine before. ... that and the truck with that pos body lift stands at 6'5''... and Im 5'7''.. More pictures to come.
 

mhafen

Member
Location
Salt Lake City
Day 1 wrenching (sort of)

Today I took out the radiator and removed all of the belts and one of the pullys. Im trying to get to the timing gasket and I cant figure out how to get the timing pully off. I figured its starting to look like rain so I should use the time to find a good way to get it off.
Anyone know a good way to do it? Ive also got to do the exhaust manifold gasket but I dont think that one will be very hard. Limited tools and space really make simple things difficult.
Here are some pictures of the wonderful 20 year old mods that were done to this thing.
 

Attachments

  • Toyota.3May.Wrenching2.jpg
    Toyota.3May.Wrenching2.jpg
    31.6 KB · Views: 13
  • Toyota.3May.Wrenching3.jpg
    Toyota.3May.Wrenching3.jpg
    29.1 KB · Views: 15
  • Toyota.3May.Wrenching4.jpg
    Toyota.3May.Wrenching4.jpg
    36.9 KB · Views: 14
  • Toyota.3May.Wrenching5.jpg
    Toyota.3May.Wrenching5.jpg
    33.5 KB · Views: 15
  • Toyota.3May.Wrenching6.jpg
    Toyota.3May.Wrenching6.jpg
    40.6 KB · Views: 14

sixstringsteve

Well-Known Member
Location
UT
first off, congrats on the rig! I'll be watching this thread closely. i'm glad to have inspired you to build a toyota. let it be known that I am not in any way the toyota expert on RME. Rot box, panos, superfly, ricsrx, and TONS of other people I'm forgetting know a lot more about yotas than me. We've all learned from our mistakes, so hopefully we can help you avoid some.

Everything I've learned about toyotas came from:
1) reading the toyota bible 2.0 found here
2) trial and error (mostly error :D)
3) the great advice and experience from guys on here.
4) reading others' build threads and seeing the ingenious things guys are still doing to make yotas even more capable.

Also, Ricsrx just bought my old '81's body (frame, sliders, bumpers, bed, etc). I'm sure he'd sell it to ya for a good price. It's already got the flat belly, fender/firewall tub, sliders, bed bob, rear bumper, long-bed conversion, new dash, and a few other things done to it.
 
Last edited:

sixstringsteve

Well-Known Member
Location
UT
It sounds like you're going to build a killer rig. You've got some great plans for it, and you'll be miles ahead of a lot of yota builds out there.

First off, don't ditch the carb, unless you're going to go fuel injected. Trust me, that carb is the best carb you can run on a 22r. WAY better than a weber, holly, etc. Just get it dialed and you'll forget it's carbourated.

regarding low front springs, read the ENTIRE rears-up-front (ruf) thread on the bible 2.0. The reason my '81 took so long to build is that I spent more time reading, learning, and researching than actually wrenching.

I've never felt the need for disks in the rear. I feel that the stock drums are plenty strong. Plus, running discs means you can't use the stock e-brake, and on a manual transmission, and e-brake is a must.
 
Last edited:

Gravy

Ant Anstead of Dirtbikes
Supporting Member
....
First off, don't ditch the carb, unless you're going to go fuel injected. Trust me, that carb is the best carb you can run on a 22r. WAY better than a weber, holly, etc. Just get it dialed and you'll forget it's carbourated.....
unless you go offroad :rofl:
35" tires, low tcase/ axle gears: sounds like you're going to wheel it hard:
fuel injection ftw!

there are tons of junkyard 22RE's just waiting for you to scoop up their fuel injection systems and give them new life.
Yank your carb, sell it to some purist that doesn't wheel very hard and offset the cost.
 

mhafen

Member
Location
Salt Lake City
I really like the work you did on your truck the problem is, and I should have listed this under my limitations, is that I live in an appartment downtown so I dont really have anywhere to store large spare parts. This also makes it so I cant leave a job unfinished or else weather or some hooligans will get into it. I want the bed and cab from your truck just can get them on and ready to go.
Also I have a 20r engine... I dont know if that makes a huge difference or not. IF it does im sure I can find a 22r for cheap.
 

Rot Box

Diesel and Dust
Location
Smithfield Utah
Yes sell me the 20R that won't work with EFI and the Carb if you choose the dark side ;) :D

What are you referring to when you say you can't figure out how to remove the timing pulley? If you are talking about the lower crank pulley there is a trick to those... Remember to remove the timing cover there is a bolt directly below the gear on the distributor that threads in vertically through the head into the timing cover. It's usually overlooked and hard to spot because it is submerged in oil.
 

mhafen

Member
Location
Salt Lake City
Aha I will look for it tomorrow Im going to start working on it around 8 or 9 am so hopefully I can get something done.. like get it running again. Is there a trick to doing timing? I figure if its anything like the sami 1.3 it has a trick to it to make it easy. So with the 20r should I get a different carb or stick with stock?
 

Rot Box

Diesel and Dust
Location
Smithfield Utah
Is there a trick to doing timing?

So with the 20r should I get a different carb or stick with stock?

Timing is easy. Once it is all back together aside from the valve cover being off--Put your crank pulley notch on the "0" mark and put the dot on your cam sprocket all the way up at the top. From there drop your distributor in so the rotor points to number 1 on the spark plug cap (10:30-11:00ish position looking at it from the exhaust side of the engine). The distributor usually will not perfectly align with #1 so its best to put it advanced (clockwise) vs. retarded (counter clockwise) from #1. If that doesn't make sense let me know I'm up way past my bedtime! :D


Yes by all means keep the stock carb if you stick with the 20R but I consider the float level adjustment MANDATORY for any offroad use. The stock carb is the next best thing to EFI on the R series motor when properly tuned. If you choose to go the FI route you will need a 22R/RE motor...
 

mhafen

Member
Location
Salt Lake City
Im going to stick with the carb. I kind of like it. Its not a computer. I need to get a rubber grommet and a washer and it should be ready to run... Those peices go to the part that primes the carb when you start it... I forget the name of it.
I did an inventory of all of the interior stuff that I have and it turns out I basically have 2 interiors so I get to pick and choose the peices.
I need to get a new radiator core becuase... I dropped a hilift on mine... whoops. Im picking up new tires tomorrow (35's) Yay. I found 3" lift s[rings for a good price so I can take it down a bit from the rediculous height that its at.
I need to tub the fenders and maybe cut them... Im not sure how to do that yet go go google.
 

sixstringsteve

Well-Known Member
Location
UT
what brand are the 3" lift springs? Some brands move the front axle forward (very desirable), and some don't. If they're not alcan, allpro, marlin, or trail-gear, then they probably don't move the front axle forward much. Just a thought.

keep at it, I love how you do a little something on it every day. Before you know it it'll be done. By the way, I can't believe you found a 1st gen with such a clean body, way to go!
 

mhafen

Member
Location
Salt Lake City
My goal was to find one with a clean clean clean body. I lucked out and found this one... which is 3 trucks in one.
The springs Im not sure what brand they are... I didnt think of the axel moving. Ill have to check. I really just want to shrink it a little bit... If anything I can try my hand at building my own packs or just use the RUF idea and bum someones welding skills for a payment to be worked out at a later date.
I have found somethings that I do need to do. The shock mounts in the rear are attached to the plate that holds the leafs on... now if I do the ubolt flip I dont know what that will do... Im not sur it if will mess up the angles or create problems so I looked into new shock mounts. Im sure that I could "make it work" but thats not my goal. Doing it "right" is. But if it works well I guess that would be considered right. Now the flip side of that is I need to get new shocks so Id have to figure out what lengths to get. If Im right I want very little up travel in the front and tons of down travel and in the rear I want a balance of up and down... Please correct me if Im very very wrong.
Gym time
 

sixstringsteve

Well-Known Member
Location
UT
I think 2.5-4" of uptravel in front is ideal.

If you're wanting to do it right, I recommend springs that will move your axle forward, otherwise your tires will be stuffing in your inner fenders all the time, and that's no fun (ask Kranny about that :D).

the RUF springs work REALLY well. I don't think they end up being cheaper than a trail gear set of 3" springs, but they'll work a little better in my opinion. The only welding you'll need to do with the RUF is to mount an IFS steering box, and potentially mount the front hanger forward a bit.
 

mhafen

Member
Location
Salt Lake City
I want to pick up the springs and see how they sit. If they are the same ride height then Ill use the rears up front and move on with the modification. I was looking at the fronts and rears and I have a feeling that the hangers have been moved already my wheel base is 110.8 inches Im not sure if thats stock or not... Today I am either finding a set of 16.5 steelies at the junkyard or ordering some offline. Then Im going to get the engine together... finally. I have help today so it should go faster than normal. I ordered a new radiator (3 core) it will be here today as well. If I cant get the engine together Im thinking about calling one of those mobile mechanics to come make my life easier so I can focus on the exhaust. Once the engine is back together the goal of the weekend is to get the carb tuned and to do a flex test on the truck with the 35's so I know how much of the wheel wells to "adjust". I think the rear will be alright but the front could have some issues.
Shocks,
Im thinking about doing 12's in the rear and 14's in the front... is that the right combo? Should I match front and rear and adjust the bumpstops? The shocks will be getting taken care of later this month early next month. I dont want to skimp on them.
Next month is the T-case... Im debating just buying a whole new case just for fun. I want to get a new cross member and tcase mount. I figure doing it all, all at once is a sure fire way to ensure it is done.
July 1 is the projected date that I need the truck to run and be perfect because it has to make it to FLW MI. If the engine isnt perfect Im going to suck it up go to a mechanic end of June.
Big thanks to gravedigger for the tires, they are the right size at the right price. I look forward running them.
 
Last edited:

sixstringsteve

Well-Known Member
Location
UT
I don't think you'll have room for 14" shocks up front, unless you go through the inner fenders to mount them.

I wouldn't worry about buying a new t-case. The one you've got in there will be just fine. Just order a set of 4.7's for it, install 'em, and go wheel.

Did you already buy the tires?
 
Top