Jeep Nathan and Tanja's 99 XJ Build up

thenag

Registered User
Location
Kearns
So the "heat soak" issue did go away.

When I was in Moab I filled up with fuel with ethanol and the jeep started doing the the "heat soak" thing again almost right away. So until I check some other things and advance my timing looks like I need "real fuel"

I do need to post up some things from the Moab trip, I broke a fender flare, well not the Notch part, the part that I added to make it wide enough.

Nathan
 

Omgbecki

Well-Known Member
Location
Ogden
As far as fuel. I've experienced that I get best mileage with shell premium. I do bi weekly, monthly, and quarterly figures. My jeep hates maverick gas. I lose anywhere from 20-40 miles on a tank. I have the Banks stinger pack. Exhaust, intake, tuner. I've been doing these test for years not in the jeep and the biggest difference maker was also the last thing I did and that was the intake. My highest average was EJS bi week. Drive there, wheeling and drive back I averaged 21. Ethanol free gas is a close second but it doesn't make up for the 91 oct my jeep needs while testing work mode.
 

TRD270

Emptying Pockets Again
Supporting Member
Location
SaSaSandy
I used to haul fuel, Maverick gets their gas from which ever refinery is currently the cheapest. 95% of the time this means silver eagle, and that fuel is junk. After hauling from all the refineries and seeing what comes out I get my gas at Chevron, Tesoro or Conoco/Sinclair (same stuff) I never fuel from maverick or Phillips 66. Sometimes you get lucky at maverick and get pipeline fuel (Conoco/Sinclair) but you never know so I avoid them whenever possible.
 

thenag

Registered User
Location
Kearns
So a few years ago I got a go-pro. I have been messing around with a mount for a while. I finally got a mount I like that doesn't fall off. I have a case that has a USB cable so I can leave the camera plugged into the Jeep all the time, I use an old phone mounted in cab to control it.

(I also have about 15 minutes of Hell's Revenge that I forgot to shut off the camera, so I got a large hunk of HR with hardly any stops)

So here is a video of us going up the Golden Stairs, obviously I didn't hit it aggressively enough, my over weight XJ needed some momentum.

[video=youtube_share;Bzacm-xTLAM]https://youtu.be/Bzacm-xTLAM[/video]
 
Last edited:

thenag

Registered User
Location
Kearns
(Woo=hoo 20 pages!)

So I smashed a fender flare on the entrance to Where Eagles Dare. My flares are Notch Customs with about one inch of everglass on the inside to make them wide enough to cover my tires. The Notch part was fine, my everglass busted up a bit. One of the bolts came un-mounted too. (Notch sticks the bolts in place with everglass)

IMG_20170527_085217.jpg

IMG_20170527_085222.jpg

IMG_20170527_094809.jpg

So the plan is to make some gouges fill with everglass, sand, sand, sand, fill, sand, re-paint.

IMG_20170527_102456.jpg

IMG_20170527_140624.jpg

Some of the mounting bolts had cracks in the everglass so I goobered those up too

IMG_20170527_140633.jpg

I ended up adding about 3/4 inch to the bottom of this flare. Yes this part will break off easily but they have held up much better than I ever expected.IMG_20170528_113254.jpg

Since I was painting I painted both rear flares (I will do the fronts soon)

IMG_20170529_135609.jpg

IMG_20170529_135616.jpg

Everglass is great other than the dust.

Nathan
 
Last edited:

thenag

Registered User
Location
Kearns
So before I went to Moab in April 2017 I went to Turbo Labs and had the Jeep Dyno-ed again. The exhaust is now 2.25 all the way back and a much better design. I also added a Banks Header.

This time max hp was 136.5, that is up from 128.0 last year. Torque is about the same, 197.9 now, 194.3 last year. This is still lower than I should have.

Joe from Turbo Labs said that I need to advance my timing about 4 degrees. He also said to do a compression test, maybe something isn't right.

I finally got around to doing a compression test and all cylinders were between 110psi and 120psi. Good news I don't need to tear into the motor, bad news I still don't know why my power is down.

Joe thought the easy way to adjust the timing would be to make the distributor movable (like old engines) So I got out my timing light and figured out where my timing was. Then I pulled my distributor and ground off the ears that made it non-adjustable.

IMG_20170529_125113.jpg

IMG_20170529_125316.jpg

I am not sure if it is my timing light, or that this system is not meant to be timed (I know on my bronoco I had to remove a jumper to properly set the timing, it disabled the advance or something...) but I am not sure that it actually made a difference. the timing mark jumped around quite a bit.

It does seem to run a tad better but that may just be placebo effect.

The for sure way to advance the timing is to modify the crank position sensor... you know a task that will require many test fits of the single hardest part to get to on a Cherokee.

As far as the numbers, if you factor in elevation I am probably putting close to stock power out of the motor.

Nathan
 
Last edited:

thenag

Registered User
Location
Kearns
I often forget that I have this;

IMG_20170530_153949.jpg

So lets see what it says about the ignition system;

IMG_20170530_153247.jpg

Obviously since it is in BOLD I shouldn't go trying to rotate the distributor... So looks like I am going to have to modify the crank position sensor. although fuel timing can be affected by moving the distributor...

Nathan
 
Last edited:

RogueJeepr

Here!
Location
Utah
I remember reading about how swamp buggies switched to distributor-less ignition system's using a MSD box of some sort. Maybe look into that and see how they tune it.

Sent from my H1611 using Tapatalk
 

thenag

Registered User
Location
Kearns
So there is a thread on NAXJA on modifying a crank position sensor, so with his pictures I grabbed the new sensor that I carry as a spare. (yeah I am that guy that has a brand new Mopar Crank Position Sensor under the passenger seat for a spare...)

IMG_20170531_162903.jpg

IMG_20170531_162909.jpg

I drew an outline of the sensor on piece of metal with holes an OEM location, and figure (from NAXJA pictures) this is about what I want;


IMG_20170531_164220.jpg

First thing make a hole closer to sensor;

IMG_20170531_165842.jpg


I thought I took some pictures of the tab I made but here it is with bolt holes through it. The 1/4 bolt uses the OEM sensor hole, hopefully it won't interfere with the bell housing. *edit*(the 1/4 bolt does interfere with the mounting bolt, this is what is preventing me from sliding the sensor away from 12 o'clock... I think... I will have to drop the transmission to be sure...)

IMG_20170531_185937.jpg


To space the tab out I got a big washer, tack welded it on and ground it down.

IMG_20170531_190614.jpg

IMG_20170531_191251.jpg


Here it is all bolted together. I did not want to weld on the sensor since it is a sensitive magnet and figured welding might screw that up. I was already nervous enough drilling and grinding that close to the sensor.

IMG_20170531_192539.jpg

IMG_20170531_192558.jpg

IMG_20170531_192602.jpg


The distance from the center of the sensor to the closest hole is pretty close to 3/4 of an inch. Since I made slots hopefully I have a little adjustment.

Now I get to do the hard part, installing it into an XJ. Hopefully I don't have to do many more modifications to it.

I will post up how it goes.

Nathan
 
Last edited:

thenag

Registered User
Location
Kearns
I got my modified sensor installed. It wasn't too bad, tape on the universal joint socket to keep it stiff. Tape on the bolt so the bolt didn't drop into the bell housing. I omitted the plastic cover, I will probably modify the cover and install it when I re-build the transmission this winter. My hydraulic clutch line was more in the way than anything, although the driveshaft was blocking my view. I didn't feel the need to drop the cross member or anything.

My slots didn't work out, the sensor is as far as it can go in the hole in the transmission, and would not slide down.

My timing light showed 5 degrees advance from what it was. It did advanced the timing at idle.

I only did a short drive and I don't know that it felt much different.

IMG_20170601_155944.jpg

IMG_20170601_160940.jpg
 

thenag

Registered User
Location
Kearns
So did it help?

Yes, seat of the pants dyno made a big difference. They say at altitude you should advance your base timing anyway. If you believe the internet everyone at this altitude should do this. (I am not recommending that you do this, just saying you might look into it)

I will re-dyno it before spring. I want to get the transmission in and my new bling.

(sorry I didn't reply sooner)

Nathan
 

thenag

Registered User
Location
Kearns
So yeah This box showed up the other day...

View attachment 110306

View attachment 110307

Bling F-ing Bling!

View attachment 110308

View attachment 110309

Read all about it here, 90% more coolant capacity than OEM!
https://www.mishimoto.com/engineering/2017/07/jeep-xj-cherokee-radiator-part-1/

I have a bunch of other things to do and will install it then...

(feel free to take bets on how much stuff I need to modify to get this thing in... I have never had a part just drop right in, even cool stuff like the Ruff Stuff diff covers had to me modified to fit...)

Edit repost pics...

IMG_20171111_140720.jpg

IMG_20171111_140819.jpg

IMG_20171111_140838.jpg

IMG_20171111_140910.jpg

Nathan
 
Last edited:

thenag

Registered User
Location
Kearns
Back in June I replaced another electric door lock, I think I have done all 4 now. two of them (I think the rear doors) are real common, the other two are dealer only part. The actuator is built into the door lock so each one is about $100.00. Really if you have issues with your electric door locks on an xj just buy a set of universal door lock actuators. I like using the OEM parts but by the time you do all 4 doors the OEM parts are about $500.00. a set of universal actuators is well under $100.00.

I also had an annoying squeak that I couldn't figure out for a while and eventually drove around with the seat back down and the squeak went away. I did a little searching and found out that the rubber bumper in the seat back latch was to blame.

The parts are discontinued from Chrysler but are available. I don't think they will hold up as well as the OEM but they stopped the squeak for now.

Parts/Part #'s
View attachment 110571

View attachment 110572

View attachment 110573

I then had to do a timing set in my Ford v10. It just started making noise the day before heading to Moab, so we drove the Jeep to Moab this year. This is a huge job. All of my cam followers were in good shape. I just replaced the timing set and replaced the oil pump. This required a factory service manual and a few specialty tools. I am not going to do a writeup or anything. There are many good youtube videos on it. Really you need a service manual because there is a very specific procedure to removing cam followers, turn the crank, remove cam followers, install cam followers, etc so you don't have a piston hit a valve. The v10's never got VCT so I didn't have to pay for cam phasers so I guess that is good. If you have a Ford 3v motor, if it starts making any noise work on it right away, otherwise you will probably be rebuilding the motor.

View attachment 110574

Nathan
 

thenag

Registered User
Location
Kearns
So the big Jeep project this winter was to rebuild the Ax-15. It clunked into just about every gear and they have a reputation of the syncros wearing out, there is also a huge controversy on what oil to use, and some oils allegedly eat the brass syncros. My wife bought this Jeep before I knew her and her father was wise enough to put Redline MT-90 in it. It shifted pretty well, sometimes when it was cold it was hard to shift from 1st to 2nd.

So I actually got a pretty big list of things to do all at the same time;
Rebuild transmission
re-seal engine (I used a rear main for a 1999, my block is a 2000 and needs a different seal)
install bling bling new radiator
install Mishimotto synthetic coolant
oh and since that coolant is so expensive replace the heater core since I would occasionally smell coolant while the heater was on
and since I have the HVAC box out and have to evac the A/C anyway put in a new a/c evaporator
and several other little things.

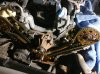
So here comes the motor and transmission

IMG_20171124_085056.jpg

This is the most "apart" I have ever had a vehicle at one time

Enigne
IMG_20171125_165345.jpg

Transmission
IMG_20171125_165340.jpg

T-case
IMG_20171125_165412.jpg

Dash (yes it is resting on the e-brake handle)
IMG_20171125_183510.jpg

HVAC box
IMG_20171125_185423.jpg

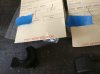
The dash is back together, but now the transmission is apart and I lost a shift fork roller so I am waiting on a part. Also the shift rail bolts are supposed to be replaced. They are a odd ball metric bolt. I ordered some directly from China. Depending on when they get here and what quality they look like I may or may not use the new ones.

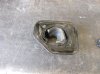
You surely need a press and some creative press setups to get to all the syncros.

I used one of my clam shell pullers and some HF bearing spliters to get it all apart and together.
 

Attachments

  • IMG_20171001_133758.jpg
    IMG_20171001_133758.jpg
    777.9 KB · Views: 19
  • IMG_20171001_133841.jpg
    IMG_20171001_133841.jpg
    1.3 MB · Views: 15
  • IMG_20171001_134443.jpg
    IMG_20171001_134443.jpg
    1.1 MB · Views: 16
  • IMG_20171103_205657.jpg
    IMG_20171103_205657.jpg
    1.3 MB · Views: 17
Last edited:

thenag

Registered User
Location
Kearns
Pics of transmission (pic in vice is starting to re-assemble it, that is why that bearing looks new...)

IMG_20171202_140828.jpg

Fun with the press (this worked btw)

IMG_20171201_171845.jpg

IMG_20171202_093731.jpg

Main shaft

IMG_20171202_104010.jpg

I managed to booger up my crankshaft bolt so I tapped it for 9/16-18 and ran a new bolt in...

IMG_20171204_161221.jpg

IMG_20171204_162417.jpg

One of the "little things" I wanted to do was make some kind of cover for my modified crank position sensor. The OEM plastic no longer fit and I figgure that I should have something there to keep rocks and bolts from getting into the bell housing.

IMG_20171205_162715.jpg

IMG_20171205_165811.jpg

IMG_20171205_165830.jpg

This piece of plastic will probably not get installed if I have to install the crank position sensor while the transmission is in the vehicle, hopefully I won't have to mess with it again. (yes I know that I should NOT install the motor/tranny with the sensor installed... I'll be careful...)

I am hoping to have it all together in Jan. This will also the be longest that this vehicle has been not running since the axle/suspension install.

Nathan
 
Last edited:

thenag

Registered User
Location
Kearns
Sooooo you'll have it put back together by New Years Day right? :D

Probably...

Honestly it depends on the bolts from China, delivery is "expected between 12/22 and 1/17". Since I don't have kids I should be able to work on it quite a bit around Christmas. If I have the bolts I imagine it will be running by 1/2/18.

Nathan
 
Top