- Location
- Sandy, Ut
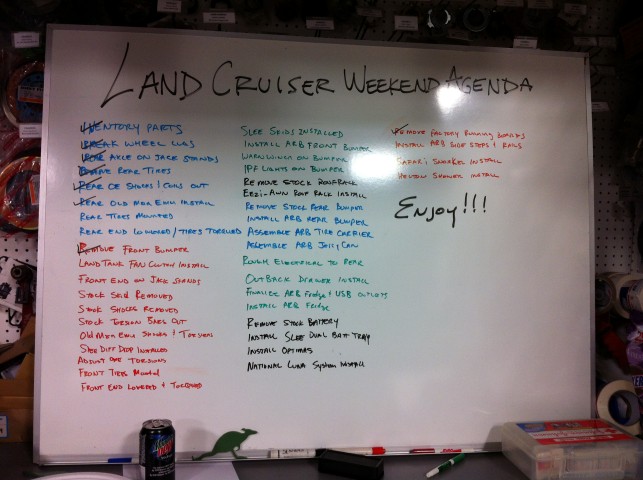
Death Star Build Part# 2: Choosing components
OK, so in the introduction of my build thread I explained my build plan based on the combination of my wants and needs. Balancing wants with actual needs can be a foggy proposition, with some items clear cut and others not so much. I spent some time looking back to my Tacoma build and use, its modifications and expanded from there. With those listed it was time to expand on each item and start detailing the specifics, brand, style, size, etc. I'm going to do my best to be un-biased here but its fair to say I choose parts not because I sell them, but I sell them because I choose them personally. At that you will note that many of the parts come from a select few manufactures. This isn't to say these are the only 'best' options, I'm not implying that in the slightest. Rather, I'm hoping my selections will prove the 'best' option for my build.
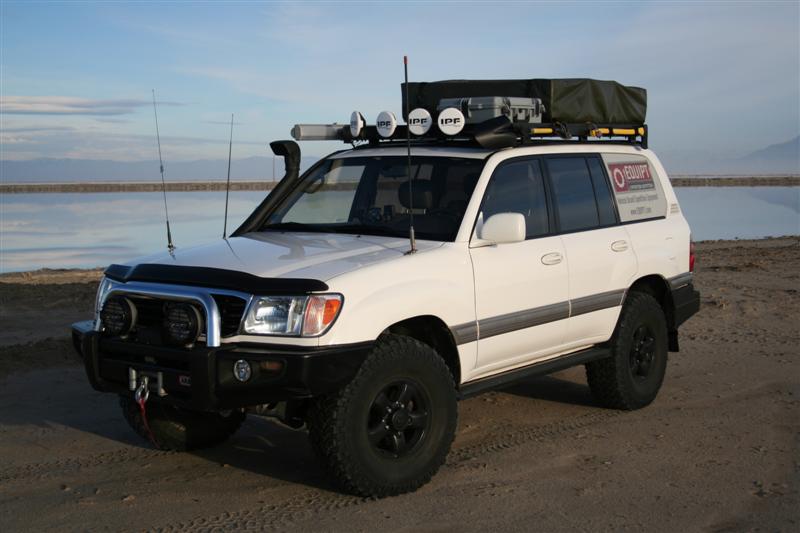
ARB Front & Rear Bumpers - While there are a handful of great 100 Series bumper options on the market, I'm a fan of the function and form of the ARB units. Having installed dozens in the past I was 100% confident they would suit my needs. ARB offers two model bumpers for the front of the 2000 UZJ100, the Sahara bar with the optional chrome upper tube and the standard combo "commercial" bar with the full upper hoop arrangement typical of the standard ARB look we are all accustomed to. I chose the traditional commercial model bullbar (ARB Part# 3413050) preferring the upper hood protection and ability to run the the ARB Side Rails. ARB rear bumpers are offered in a modular approach, you start with the base rear bumper (ARB Part# 5613210) and have the option to add a left or right tire carrier, left or right jerry can carrier, or if carriers are not fitted you run a cover panel. I chose to run the spare tire carrier (ARB Part# 5700211) on the left and the jerry can holder (ARB Part# 5700222) on the right. I chose to run the tire carrier on the left as this is a US spec LHD vehicle and I'd rather not have the tire blocking my visibility when you look back over your shoulder. The ARB rear bumper features double shear swings, strut openers and safety lock-out in the open position. The bumper has an integrated Class III hitch and tail lights and turn signals to accompany the stock lights which are partially obstructed by the spare tire.
ARB Side Rails & Step/Sliders - I was a bit torn on what to do for slider/steps, there are plenty of fantastic options on the market but I wasn't 100% sold on any of them. I've had side rails installed on my FJ40 since we built it over nearly 12 years ago now, while there have been numerous occasions I would have wished for a narrow 'rock-crawler' bumper offering more clearance and approach, there have been far more in which the side rails and heavy duty front bumper really saved the day, saving fenders, etc. Given the fact this build will likely never see a trail like Pritchett or the Rubicon, the minor loss of clearance from a heavy duty front bumper and side rails is a non-issue. With that in mind, I chose the the ARB Step/Slider (ARB Part# 4413250) which allow use of the ARB Side Rails (ARB Part# 4413260) which tie the sliders to the front bumper. My experience has shown they are a great fit and will meet the needs I have for this vehicle. If I wasn't planning to run the ARB Side Rails, I may have gone a different route with the step/sliders but I'm confident these will do the trick.
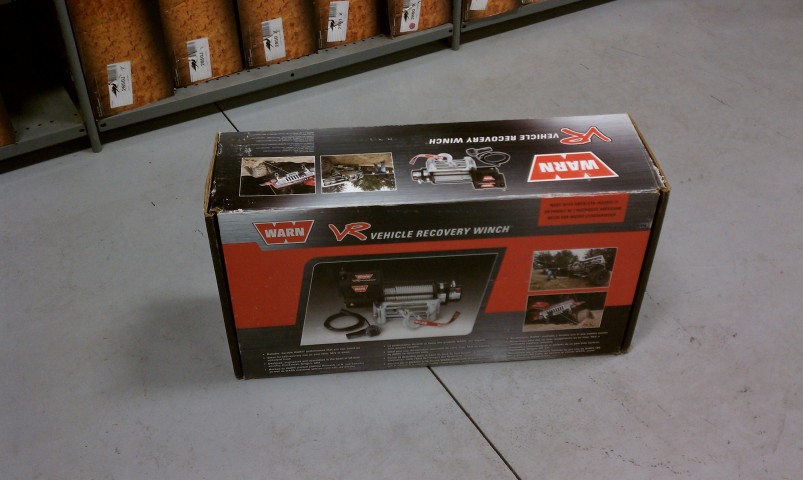
Warn Winch - My experiences both in the shop but more importantly out on the trail have always left me with nothing but respect for the Warn product line. Anything can fail but its my experience that you see fewer failures with the Warn product line and if/when they do fail, you have their rock-solid warranty to get your winch back rolling (pun intended). I've had a couple of winch failures over the years, both winches were very heavily taxed and neither left me stranded. Warn took care of me in both cases in under a week. So which Warn? I'm a proponent of choosing a winch that is at least 1.5 times the weight of the vehicle. Given a 6,000 lb dry weight I was looking for at least a 9,000 lb winch. As Warn no longer offers the M10000 model, I chose to try their value line winch in that rating, the VR10000. It offers a remote solenoid which is needed for the installation in a 'feet-forward' ARB and its housing dimensions don't require any spacers or modifications to the bumper itself.
Safari Snorkel - There are a couple of snorkel options on the market for the 100 Series platform, again bases on access and my past experience I chose the Safari Snorkel (SS86HF) for my build. It provides a true water tight fitment with clean lines and a snug mount against the fender of the 100. This new design allows the power-antenna to stay in place and it sits several inches lower than the previous model as well, win-win for my needs.
Old Man Emu (OME) Suspension - Ride quality, load capacity and height would all need to be adjusted with this build. I've put hundreds of thousands of miles on OME equipped Toyota's, again other options exist but for my planned uses the Old Man Emu setup is truly the best of breed in terms of performance, longevity and reliability. For the front I chose Old Man Emu torsion bars (OME Part# 303001) matched with the heavier front OME Nitrocharger Sport Shock (OME Part# 60001). In order to bring up the rear ~3" and substantially increase the rear load capacity I chose a 'heavy-constant' OME coil (OME Part# 2864) and again matched it with a heavy load OME Nitrocharger Sport Shock (OME Part# 60003). In order to reduce the potential for damage to the rear shocks, I chose the OME Rear Shock Stone Guards (OME Part# OME661). To prolong CV life on the front end, I chose the Slee Diff Drop Kit (Slee Part# SOF1047).
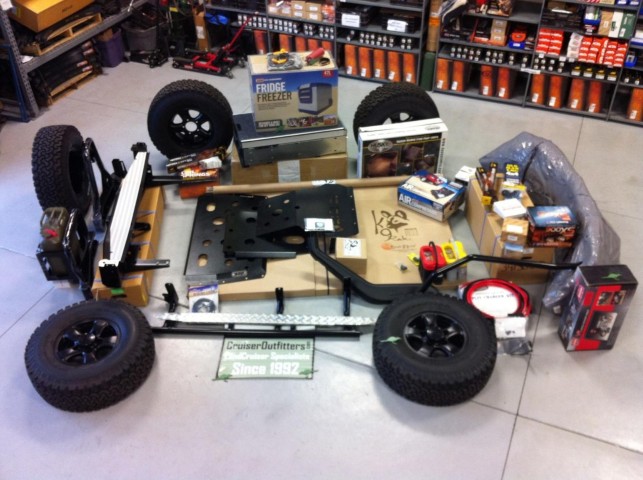
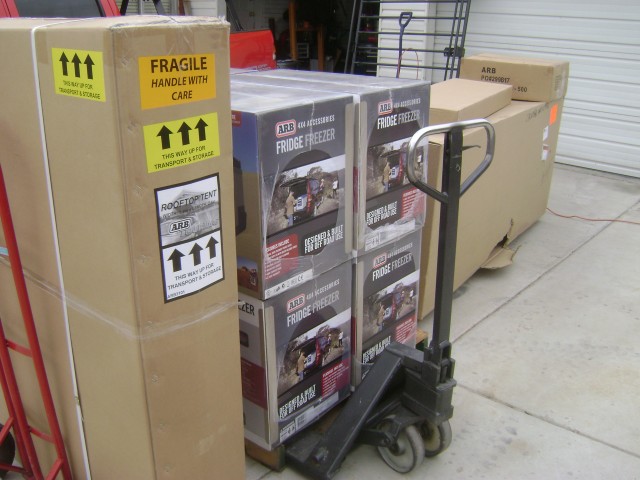
National Luna Charging System/Optima Battery - With the plans for a 12V fridge, multiple extra 12V outlets, HAM & CB radios and the potential for this vehicle to sit for several days, a dual battery system was a must. I've sold or installed a half dozen different types of dual battery management systems over the years but again I went with the same one I recommend to my customers and the same model I'm running currently in my Tacoma, National Luna (Nat Luna Part# NLS355). The National Luna Intelligent Solenoid makes for zero input operation, automatically connecting and more importantly dis-connecting the batteries based charging characteristics. Additionally, the in-cab controller allows the user to monitor the the voltage of both batteries, pair them manually, turn on or off the over-voltage and under-voltage alarms, etc, very user friendly. So running dual batteries will require a customized mounting for the auxiliary battery, while I've built a handful of custom units including the setup in my Tacoma, when a good product is on the market its often far cheaper to go that direction. Enter the Slee dual battery bracket (Slee Part# SOF1251), its 100% ready to bolt in and accept a standard full-size battery of your liking. Now to the batteries themselves, opinions here vary about as widely as tire selection. I've been running Optima's in my FJ40 for nearly 12 years, Odysseys in my Tacoma for over 5 years and a smattering of others in other rigs I've had. Given my ability to run a full size battery and my need for one standard and one reverse battery, I opted for the Optima Yellow Top in the auxiliary position and the Optima Red Top in the starter position.
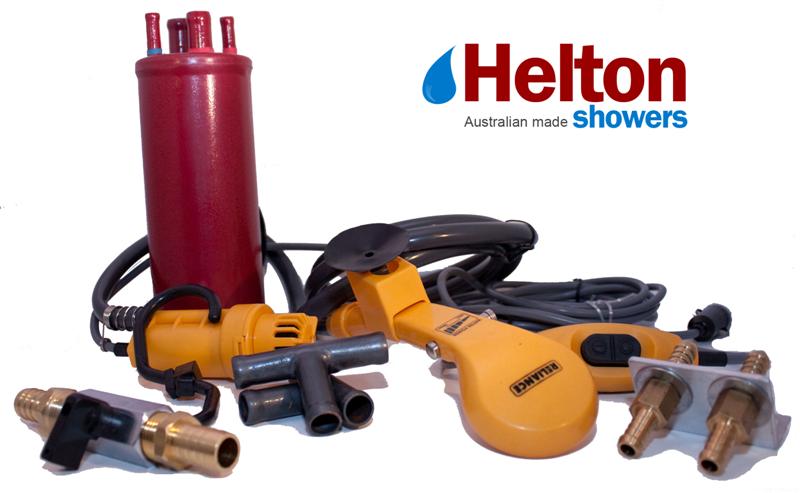
Helton Hot Water System - This is truly a case of finding a product I used personally to be so above par that I later became their US distributor. The Helton shower products use a hard mounted heat exchanger to 'borrow' heat from your engines cooling system to in turn heat fresh water. The magic happens inside of their 100% copper tube-in-shell heat exchanger which is one of the most rugged and efficient options on the market. For my system I chose the Helton Hot Water (Helton Part# HW1) Heat Exchanger. I'm running this same exchanger in both my FJ40 as well as my Tacoma and its proven a fabulous component. The Helton will be mounted somewhere on the firewall using the rubber insulated clamps (Part# HELCLAMP) and plumbed in line with the 100's heater control system. Fresh water hookups will be mounted at the front bumper utilizing the Helton supplied bumper kit, thus allowing shower operation without having to even open the hood.
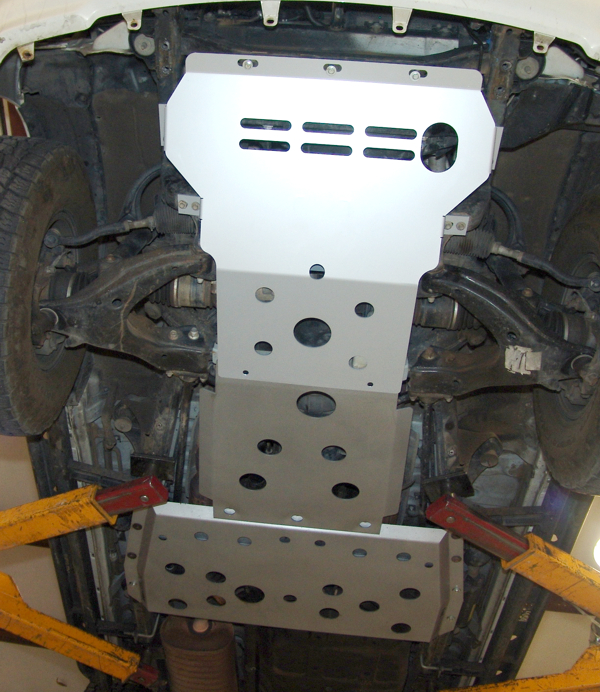
Slee Skids - There are not too many options for 100 Series skids on the market but one won't be left disappointed with the quality of the Slee Offroad option. I opted for Slee's full skid system, if there was something vulnerable under the vehicle and I had an option to protect it, the choice was made for me. The Slee kit consists of a steel belly plate (Slee Part# SOF1121) that replaces the stock transmission cross-member, and a front and intermediate skid. For weight savings I chose the aluminum front (Slee Part# SOF1157) and intermediate (Slee Part# SOF1157) skid plates.
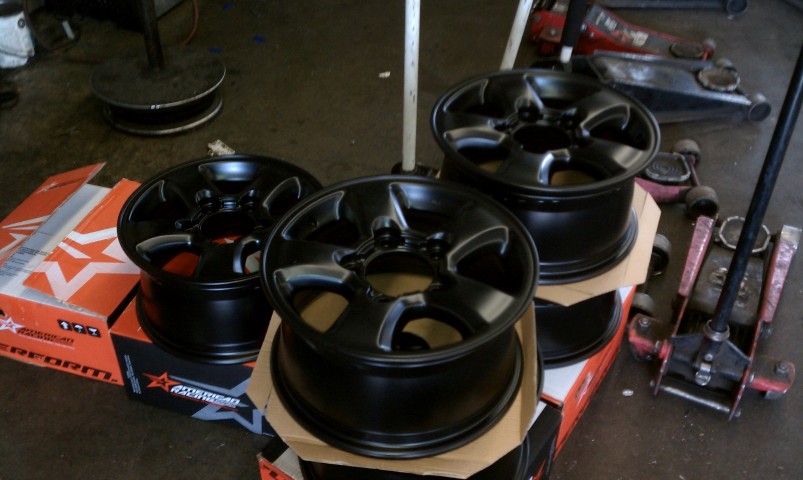
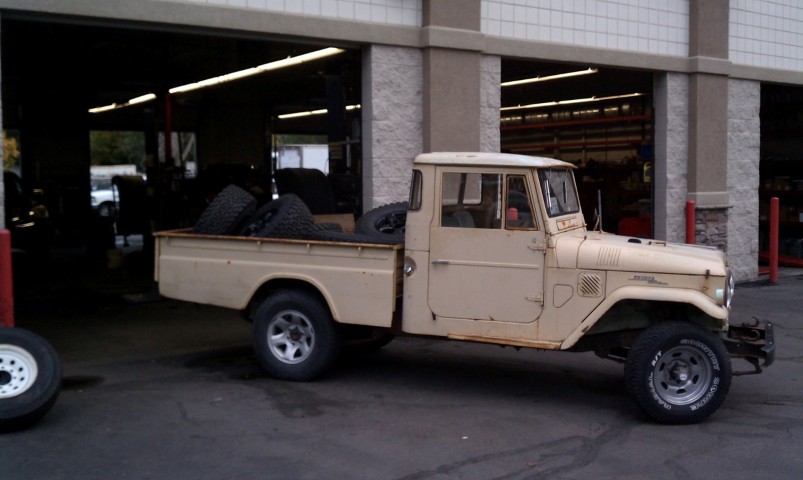
Wheels & Tire: My needs and planned uses dictated a tire that would not only provide durability and adequate traction off-road, but fantastic road characteristics as well. I've had fantastic results with the BFG All-Terrains on previous vehicle and they seem to provide stellar results for similarly built 100's as well. I decided to give them a go. There are not many options for wheels on the 100's 5 lug pattern. The truck came to me with a set of 20" Tundra wheels installed as well as a loose set of 18" Tundra wheels. Along the way I also acquired a couple of sets of 16" factory wheels, identical to those that would have came on this Land Cruiser when new. Based primarily on the tire options and second the aesthetics, I chose to go with the factory 16" wheels. Having narrowed down on the 16" wheel size it was time to choose a tire size. I solicited recommendations amongst our local 100 Series customer base and the 295/75R16 size kept popping up. It was decided, I'd run the 295/75R16 BFG AT on the factory 16" Land Cruiser wheel.
IPF Lights - I wanted a combination of long distance spot lighting as well as a broad drive lighting immediately in front of the vehicle. Given this criteria the IPF900XSDSCS Combo kit consisting of a spot as well as a driving light was a natural fit. I may switch things up a bit as new lighting options become more readily available but for the time being I think this will be a great option.
Landtank Fan Clutch - All the additional gear and payload is going to add a fair amount of stress to the stock drive train. While the stock 2UZ-FE engine and cooling system is fairly robust and very durable, one can always benefit from better cooling capability. One of the easiest ways to improve cooling on an older system is to refresh the fan clutch, either with a replacement or a rebuild. Better than a stock rebuild or replacement is the Landtank modified fan clutches which offer increased cooling performance. Landtank modified units have gained quite the reputation in the community for dropping temps back to 'normal' levels amongst heavily laded Land Cruisers. Given the planned uses of this rig as well as the hot temps throughout Utah's summers, particularly in the desert environs it ill frequent, the Landtank fan clutch is a no brainer in my opinion.
Roof Rack - Any load on the roof can be a hit on aerodynamics and thus fuel economy not to mention vehicle handling due to the weight. In an attempt to best minimize these effects I wanted the lowest profile rack I could find. The new Eezi-Awn K9 rack series offered exact what I was in need of, low profile, strong and its aluminum extrusion track design offers infinite mounting locations along the top of the rack. This rack will offer unparalleled flexibility in the way the Land Cruiser is loaded, allow for the potential of an awning or roof-top-tent to be mounted and can be removed in a matter of minutes if not in use for extended periods.
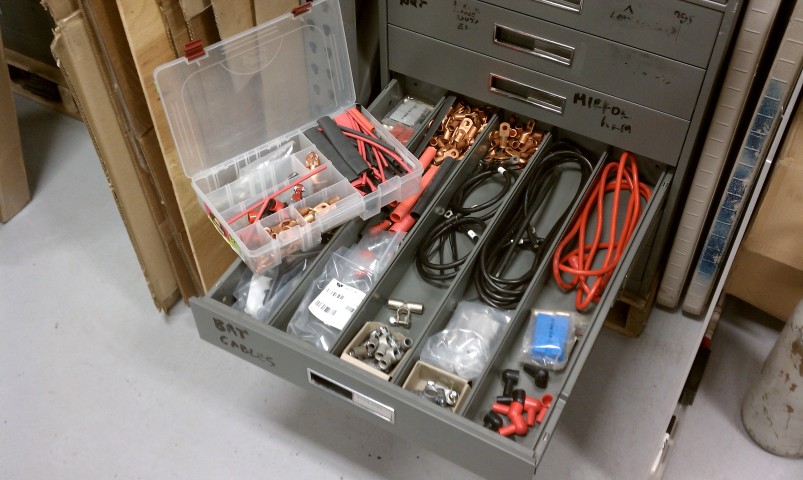
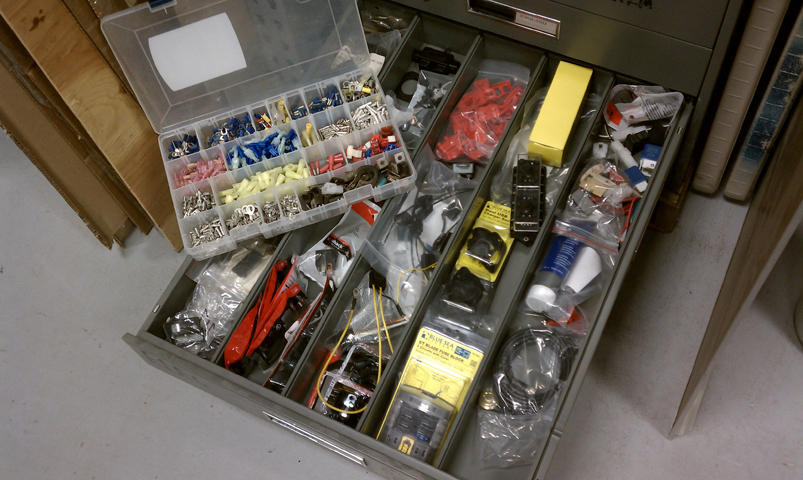
Storage - There are several high-end rear drawer systems on the market, with some fabulous customer feedback I chose to go with a relatively newcomer to the US market, the ARB Outback Solutions setup. This setup allows flexibility on where and what you mount, all while maintaining a custom fit look by using their vehicle specific fit kits. I chose to configure my setup with a roller-drawer (ARB Part# RD1045US) on the right and a roller-drawer with a roller-floor (ARB Part# RDRF1045US) on the left side. The roller-floor on the left side will allow for fridge mounting and access. I chose to mount the fridge on the left side for same reason as the tire, visibility for the driver. Along with the drawers, ARB offers a fit kit specific for the 100 Series that covers the sides and back gaps making a custom fit. The plan is to us ARB's Fridge Tie-Down Kit (ARB Part#
Next Up: Parts Parts Acquisition
OK, so in the introduction of my build thread I explained my build plan based on the combination of my wants and needs. Balancing wants with actual needs can be a foggy proposition, with some items clear cut and others not so much. I spent some time looking back to my Tacoma build and use, its modifications and expanded from there. With those listed it was time to expand on each item and start detailing the specifics, brand, style, size, etc. I'm going to do my best to be un-biased here but its fair to say I choose parts not because I sell them, but I sell them because I choose them personally. At that you will note that many of the parts come from a select few manufactures. This isn't to say these are the only 'best' options, I'm not implying that in the slightest. Rather, I'm hoping my selections will prove the 'best' option for my build.
ARB Front & Rear Bumpers - While there are a handful of great 100 Series bumper options on the market, I'm a fan of the function and form of the ARB units. Having installed dozens in the past I was 100% confident they would suit my needs. ARB offers two model bumpers for the front of the 2000 UZJ100, the Sahara bar with the optional chrome upper tube and the standard combo "commercial" bar with the full upper hoop arrangement typical of the standard ARB look we are all accustomed to. I chose the traditional commercial model bullbar (ARB Part# 3413050) preferring the upper hood protection and ability to run the the ARB Side Rails. ARB rear bumpers are offered in a modular approach, you start with the base rear bumper (ARB Part# 5613210) and have the option to add a left or right tire carrier, left or right jerry can carrier, or if carriers are not fitted you run a cover panel. I chose to run the spare tire carrier (ARB Part# 5700211) on the left and the jerry can holder (ARB Part# 5700222) on the right. I chose to run the tire carrier on the left as this is a US spec LHD vehicle and I'd rather not have the tire blocking my visibility when you look back over your shoulder. The ARB rear bumper features double shear swings, strut openers and safety lock-out in the open position. The bumper has an integrated Class III hitch and tail lights and turn signals to accompany the stock lights which are partially obstructed by the spare tire.
ARB Side Rails & Step/Sliders - I was a bit torn on what to do for slider/steps, there are plenty of fantastic options on the market but I wasn't 100% sold on any of them. I've had side rails installed on my FJ40 since we built it over nearly 12 years ago now, while there have been numerous occasions I would have wished for a narrow 'rock-crawler' bumper offering more clearance and approach, there have been far more in which the side rails and heavy duty front bumper really saved the day, saving fenders, etc. Given the fact this build will likely never see a trail like Pritchett or the Rubicon, the minor loss of clearance from a heavy duty front bumper and side rails is a non-issue. With that in mind, I chose the the ARB Step/Slider (ARB Part# 4413250) which allow use of the ARB Side Rails (ARB Part# 4413260) which tie the sliders to the front bumper. My experience has shown they are a great fit and will meet the needs I have for this vehicle. If I wasn't planning to run the ARB Side Rails, I may have gone a different route with the step/sliders but I'm confident these will do the trick.
Warn Winch - My experiences both in the shop but more importantly out on the trail have always left me with nothing but respect for the Warn product line. Anything can fail but its my experience that you see fewer failures with the Warn product line and if/when they do fail, you have their rock-solid warranty to get your winch back rolling (pun intended). I've had a couple of winch failures over the years, both winches were very heavily taxed and neither left me stranded. Warn took care of me in both cases in under a week. So which Warn? I'm a proponent of choosing a winch that is at least 1.5 times the weight of the vehicle. Given a 6,000 lb dry weight I was looking for at least a 9,000 lb winch. As Warn no longer offers the M10000 model, I chose to try their value line winch in that rating, the VR10000. It offers a remote solenoid which is needed for the installation in a 'feet-forward' ARB and its housing dimensions don't require any spacers or modifications to the bumper itself.
Safari Snorkel - There are a couple of snorkel options on the market for the 100 Series platform, again bases on access and my past experience I chose the Safari Snorkel (SS86HF) for my build. It provides a true water tight fitment with clean lines and a snug mount against the fender of the 100. This new design allows the power-antenna to stay in place and it sits several inches lower than the previous model as well, win-win for my needs.
Old Man Emu (OME) Suspension - Ride quality, load capacity and height would all need to be adjusted with this build. I've put hundreds of thousands of miles on OME equipped Toyota's, again other options exist but for my planned uses the Old Man Emu setup is truly the best of breed in terms of performance, longevity and reliability. For the front I chose Old Man Emu torsion bars (OME Part# 303001) matched with the heavier front OME Nitrocharger Sport Shock (OME Part# 60001). In order to bring up the rear ~3" and substantially increase the rear load capacity I chose a 'heavy-constant' OME coil (OME Part# 2864) and again matched it with a heavy load OME Nitrocharger Sport Shock (OME Part# 60003). In order to reduce the potential for damage to the rear shocks, I chose the OME Rear Shock Stone Guards (OME Part# OME661). To prolong CV life on the front end, I chose the Slee Diff Drop Kit (Slee Part# SOF1047).
National Luna Charging System/Optima Battery - With the plans for a 12V fridge, multiple extra 12V outlets, HAM & CB radios and the potential for this vehicle to sit for several days, a dual battery system was a must. I've sold or installed a half dozen different types of dual battery management systems over the years but again I went with the same one I recommend to my customers and the same model I'm running currently in my Tacoma, National Luna (Nat Luna Part# NLS355). The National Luna Intelligent Solenoid makes for zero input operation, automatically connecting and more importantly dis-connecting the batteries based charging characteristics. Additionally, the in-cab controller allows the user to monitor the the voltage of both batteries, pair them manually, turn on or off the over-voltage and under-voltage alarms, etc, very user friendly. So running dual batteries will require a customized mounting for the auxiliary battery, while I've built a handful of custom units including the setup in my Tacoma, when a good product is on the market its often far cheaper to go that direction. Enter the Slee dual battery bracket (Slee Part# SOF1251), its 100% ready to bolt in and accept a standard full-size battery of your liking. Now to the batteries themselves, opinions here vary about as widely as tire selection. I've been running Optima's in my FJ40 for nearly 12 years, Odysseys in my Tacoma for over 5 years and a smattering of others in other rigs I've had. Given my ability to run a full size battery and my need for one standard and one reverse battery, I opted for the Optima Yellow Top in the auxiliary position and the Optima Red Top in the starter position.
Helton Hot Water System - This is truly a case of finding a product I used personally to be so above par that I later became their US distributor. The Helton shower products use a hard mounted heat exchanger to 'borrow' heat from your engines cooling system to in turn heat fresh water. The magic happens inside of their 100% copper tube-in-shell heat exchanger which is one of the most rugged and efficient options on the market. For my system I chose the Helton Hot Water (Helton Part# HW1) Heat Exchanger. I'm running this same exchanger in both my FJ40 as well as my Tacoma and its proven a fabulous component. The Helton will be mounted somewhere on the firewall using the rubber insulated clamps (Part# HELCLAMP) and plumbed in line with the 100's heater control system. Fresh water hookups will be mounted at the front bumper utilizing the Helton supplied bumper kit, thus allowing shower operation without having to even open the hood.
Slee Skids - There are not too many options for 100 Series skids on the market but one won't be left disappointed with the quality of the Slee Offroad option. I opted for Slee's full skid system, if there was something vulnerable under the vehicle and I had an option to protect it, the choice was made for me. The Slee kit consists of a steel belly plate (Slee Part# SOF1121) that replaces the stock transmission cross-member, and a front and intermediate skid. For weight savings I chose the aluminum front (Slee Part# SOF1157) and intermediate (Slee Part# SOF1157) skid plates.
Wheels & Tire: My needs and planned uses dictated a tire that would not only provide durability and adequate traction off-road, but fantastic road characteristics as well. I've had fantastic results with the BFG All-Terrains on previous vehicle and they seem to provide stellar results for similarly built 100's as well. I decided to give them a go. There are not many options for wheels on the 100's 5 lug pattern. The truck came to me with a set of 20" Tundra wheels installed as well as a loose set of 18" Tundra wheels. Along the way I also acquired a couple of sets of 16" factory wheels, identical to those that would have came on this Land Cruiser when new. Based primarily on the tire options and second the aesthetics, I chose to go with the factory 16" wheels. Having narrowed down on the 16" wheel size it was time to choose a tire size. I solicited recommendations amongst our local 100 Series customer base and the 295/75R16 size kept popping up. It was decided, I'd run the 295/75R16 BFG AT on the factory 16" Land Cruiser wheel.
IPF Lights - I wanted a combination of long distance spot lighting as well as a broad drive lighting immediately in front of the vehicle. Given this criteria the IPF900XSDSCS Combo kit consisting of a spot as well as a driving light was a natural fit. I may switch things up a bit as new lighting options become more readily available but for the time being I think this will be a great option.
Landtank Fan Clutch - All the additional gear and payload is going to add a fair amount of stress to the stock drive train. While the stock 2UZ-FE engine and cooling system is fairly robust and very durable, one can always benefit from better cooling capability. One of the easiest ways to improve cooling on an older system is to refresh the fan clutch, either with a replacement or a rebuild. Better than a stock rebuild or replacement is the Landtank modified fan clutches which offer increased cooling performance. Landtank modified units have gained quite the reputation in the community for dropping temps back to 'normal' levels amongst heavily laded Land Cruisers. Given the planned uses of this rig as well as the hot temps throughout Utah's summers, particularly in the desert environs it ill frequent, the Landtank fan clutch is a no brainer in my opinion.
Roof Rack - Any load on the roof can be a hit on aerodynamics and thus fuel economy not to mention vehicle handling due to the weight. In an attempt to best minimize these effects I wanted the lowest profile rack I could find. The new Eezi-Awn K9 rack series offered exact what I was in need of, low profile, strong and its aluminum extrusion track design offers infinite mounting locations along the top of the rack. This rack will offer unparalleled flexibility in the way the Land Cruiser is loaded, allow for the potential of an awning or roof-top-tent to be mounted and can be removed in a matter of minutes if not in use for extended periods.
Storage - There are several high-end rear drawer systems on the market, with some fabulous customer feedback I chose to go with a relatively newcomer to the US market, the ARB Outback Solutions setup. This setup allows flexibility on where and what you mount, all while maintaining a custom fit look by using their vehicle specific fit kits. I chose to configure my setup with a roller-drawer (ARB Part# RD1045US) on the right and a roller-drawer with a roller-floor (ARB Part# RDRF1045US) on the left side. The roller-floor on the left side will allow for fridge mounting and access. I chose to mount the fridge on the left side for same reason as the tire, visibility for the driver. Along with the drawers, ARB offers a fit kit specific for the 100 Series that covers the sides and back gaps making a custom fit. The plan is to us ARB's Fridge Tie-Down Kit (ARB Part#
Next Up: Parts Parts Acquisition