General Tech What did you work on Today?

zmotorsports

Hardcore Gearhead
Vendor
Location
West Haven, UT
Continuing on.

I turned the cap around in the collet and used my small parts alignment tool to get it running true.
a5449a5f939afbe2321c57af4cfdd313.jpg


This is an easily made shop tool using a piece of bar stock and a couple of small diameter bearings that clamps into a toolholder.
718c13a0a8e8ed19776eae3695ff3d5a.jpg


95df9b8abdcfc441b774d6f072c1449e.jpg


Lastly I machined a .040” deep step turned to .499” diameter.
80a8a8b2e38bcbe55389d4cb7028dd91.jpg


1dc90ddb63a552fc261ea0f30876205c.jpg


c8484024322d6c842c96500e1d57a728.jpg


I wanted to knock the slight buildup of weld down to .625” diameter.
e3fa5a32c9063e84d9b6805e64d0884f.jpg


Moving over to the milling machine I drilled a hole across the end .300” from the end.
1168e8cab642b1384b4893d9c18eeb4c.jpg


Grabbed my 3/16” chucking reamer.
41ba825ac3b4f47d9d61ed8767953667.jpg


Slowed the RPM down and reamed the hole for a tight fit.
7bd257febd5f1e7580ad05f615f2df29.jpg


Next in the mill I found center of the .312” O1 drill rod and drilled for tapping a 10-24 thread.
0b93b261cad3b84c9fe817a5bc38a4f0.jpg


dc973b9e3c0496424a96691bbf7ee5c9.jpg


dac21a825eb20eba4f26989872e8e88e.jpg


Completed.
5507579391a1431ff648ece3e2c988e4.jpg


81ca5e4304aa1d64d4b8be3e28ffda0c.jpg


Works like a charm.
8b71356b149152c7e8d05464f313e55f.jpg


Now to build a holder.
83f79bce5c314dd3bac14d838e980900.jpg


6555ad2c61503304c8e89288707dc207.jpg


Bead blasted, painted and installed on the back splash.
edf9ddf91a1efd42aafcd3f4aaea3602.jpg


6817bfcaa7633fdb79b3d932af582691.jpg


Now everything is within easy reach.

Thanks for looking.

Mike
 

XJEEPER

Well-Known Member
Location
Highland Springs
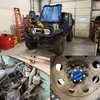
I have been looking for ever trying to find one that was rust free. This one has a couple small spots but nothing bad. I had to have a driver while I put the 64 C10 on the 95 tahoe 4x4 chassie which I finally got moved into the shop. It's going to be a good build that I'm anxious to get going. The first pic is what I got it's a one owner and has no dents, it was never used to haul things it lived in the city all of its life, the second pic is where I'm headedView attachment 125967View attachment 125965

I've got an all original white 1960 Apache shortbed stepside that I plan on resto-rodding. It was owned by my neighbor who bought it new in 1960 and drove it until he passed away. It was his only transportation (other than his tractor) and has 73,000 miles.
 

Tonkaman

Well-Known Member
Location
West Jordan
Continuing on.

I turned the cap around in the collet and used my small parts alignment tool to get it running true.
a5449a5f939afbe2321c57af4cfdd313.jpg


This is an easily made shop tool using a piece of bar stock and a couple of small diameter bearings that clamps into a toolholder.
718c13a0a8e8ed19776eae3695ff3d5a.jpg


95df9b8abdcfc441b774d6f072c1449e.jpg


Lastly I machined a .040” deep step turned to .499” diameter.
80a8a8b2e38bcbe55389d4cb7028dd91.jpg


1dc90ddb63a552fc261ea0f30876205c.jpg


c8484024322d6c842c96500e1d57a728.jpg


I wanted to knock the slight buildup of weld down to .625” diameter.
e3fa5a32c9063e84d9b6805e64d0884f.jpg


Moving over to the milling machine I drilled a hole across the end .300” from the end.
1168e8cab642b1384b4893d9c18eeb4c.jpg


Grabbed my 3/16” chucking reamer.
41ba825ac3b4f47d9d61ed8767953667.jpg


Slowed the RPM down and reamed the hole for a tight fit.
7bd257febd5f1e7580ad05f615f2df29.jpg


Next in the mill I found center of the .312” O1 drill rod and drilled for tapping a 10-24 thread.
0b93b261cad3b84c9fe817a5bc38a4f0.jpg


dc973b9e3c0496424a96691bbf7ee5c9.jpg


dac21a825eb20eba4f26989872e8e88e.jpg


Completed.
5507579391a1431ff648ece3e2c988e4.jpg


81ca5e4304aa1d64d4b8be3e28ffda0c.jpg


Works like a charm.
8b71356b149152c7e8d05464f313e55f.jpg


Now to build a holder.
83f79bce5c314dd3bac14d838e980900.jpg


6555ad2c61503304c8e89288707dc207.jpg


Bead blasted, painted and installed on the back splash.
edf9ddf91a1efd42aafcd3f4aaea3602.jpg


6817bfcaa7633fdb79b3d932af582691.jpg


Now everything is within easy reach.

Thanks for looking.

Mike
Thank you for taking the extra time to walk through every step. Not only does the skill here amaze me, but the forethought and execution in just the right order of operations. I truly love following along with your projects
 

J-mobzz

Well-Known Member
I've been helping a neighbor get one of these setup. I may hit you up if we can't figure it out.
Feel free. It belongs to my ex-wife but I’m the one that set it up and really the only one that uses it. I do 90% of my drawings in cad, import them to inkscape to convert to svg files then into the easel software to cut. This one also creates a ton of static electricity and would cause it to crash mid program. I ran several ground wires from different points on the machine as well as bought a shielded usb cable and haven’t had issues since.
 

zmotorsports

Hardcore Gearhead
Vendor
Location
West Haven, UT
Thank you for taking the extra time to walk through every step. Not only does the skill here amaze me, but the forethought and execution in just the right order of operations. I truly love following along with your projects

Thank you, I appreciate the comments. I'll try to keep them coming then.

Question for the group as this comment has come up a couple of times now.

Would it be better to keep posting in this thread as I do work in my shop or would you like to see me start a separate thread for my shop projects?

Thanks.

Mike
 

Hickey

Burn-barrel enthusiast
Supporting Member
Thank you, I appreciate the comments. I'll try to keep them coming then.

Question for the group as this comment has come up a couple of times now.

Would it be better to keep posting in this thread as I do work in my shop or would you like to see me start a separate thread for my shop projects?

Thanks.

Mike
Your posting frequency in this thread is a nice pace for the thread. I don't think it overwhelms the idea of thread, and it inspires me in my own projects.
 

frieed

Jeepless in Draper
Supporting Member
Location
Draper, UT
I fall more into the "git er done" catagory rather than "talented" but here is today's project:

So I have this 2 meter HAM radio that I mounted on the top of the dash in my truck because (1) it's really convenient there and (2) In a late-ish model truck (2013) there is absolutely no place to mount a radio without interfering with some usb port, cup holder, or do-dad. Not to mention, the whole frickin' thing is plastic. Yes, the Yaesu instructions said "don't mount where it is exposed to the sun", yeah, whatever. Fast forward 1 year and the faceplate softens enough that it will no longer push hard enough on the display connections and the screen goes blank. Still works perfectly, but the only way to see the display is to push on the faceplate with both hands; not exactly convenient.
I ordered a new front fender mount antenna which showed gread SWR's and a new faceplate for the radio but there is not much reason to replace it if the radio continues to sit on the dash.
Today's objective was to fabricate a mount that would attach to the transmission hump and present the radio vertically, just in front of the center console (also a big frickin' chunk of plastic). I'm pretty happy with my idea for a quick release mount.

First, the origami fold lines in 10ga steel
20200328_132700.jpg

next I added the quick release mechanism:
20200328_141057.jpg

The radio uses it's normal mount which just slides into the slot. (yes, if I'm upside down it will come loose, but is that my main problem at that point?)
20200328_141014.jpg

Fold a bunch of stuff, do a bunch of welds, straighten thing with an OA torch and water, throw on a really crappy paint job and you get this:
20200328_183542.jpg

Still wet.
The antenna lead will reach and I hope the power leads will as well. I'll post another pic when installed.
 

Attachments

  • 20200328_183542.jpg
    20200328_183542.jpg
    138.1 KB · Views: 4
Last edited:

frieed

Jeepless in Draper
Supporting Member
Location
Draper, UT
and I got the radio installed with the new faceplate. The previous power leads were exactly long enough. Now if I could find my spiral plastic cable management stuff.

20200329_132901.jpg

And this is why you shouldn't put the radio in the sun. The faceplate softens in the heat and the pressure from compressing the rubbery connector for the LCD deforms it. It cools in this shape and won't connect to the LCD any longer. Radio works perfectly, you just can't see the display.

20200329_155507.jpg
 
Last edited:

YROC FAB.

BUGGY TIME
Vendor
Location
Richfield, UT.
Thank you, I appreciate the comments. I'll try to keep them coming then.

Question for the group as this comment has come up a couple of times now.

Would it be better to keep posting in this thread as I do work in my shop or would you like to see me start a separate thread for my shop projects?

Thanks.

Mike

I would like to see a separate one so it's more easy to steal your ideas lol. I really enjoyed mitch burke's shop thread on here when he had a shop.
 

crosbike

Active Member
Location
Utah
Been trying to get some stuff done before my possibly busy season starts. Who knows with all this coronavirus stuff going on. Anyways I've missed welding.20200329_170228.jpg
Im super sick of hand loading non running vehicles on my trailer. I've had a badland 12k winch for basically as long as I've had this trailer but been too "busy"(lazy) to weld a receiver to the front of the trailer.
20200329_173311.jpg
Got it all burned in and redneck powdercoated.
Trying to figure out battery box and storage.
20200329_173546.jpg
Then welded a d ring for future snatch block or tie down use.20200329_173337.jpg
 
Top