General Tech What did you work on Today?

SoopaHick

Certified Weld Judger
Moderator
This has been my major summer project that has taken much more time and money then I originally estimated.

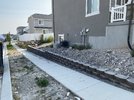
We built a new house in eagle mountain and were explicitly told that the lot would be flat once the final grade was done. But of course it was not. From one side of my back yard to the other there is about a 5' elevation drop. So to counter that I've been building a retaining wall.
E62241B9-FA36-4ABA-A934-77B576B5753F.jpeg
I'm about 2-3 more layers away from being finished. If you've ever built one before, the first layer that would be buried was a monster to put in. Eagle Mountain soil is pretty much just gravel and concrete like clay. And because of the vicinity of utility lines I couldn't use any power equipment for most of the digging.
 

Tonkaman

Well-Known Member
Location
West Jordan
This has been my major summer project that has taken much more time and money then I originally estimated.

We built a new house in eagle mountain and were explicitly told that the lot would be flat once the final grade was done. But of course it was not. From one side of my back yard to the other there is about a 5' elevation drop. So to counter that I've been building a retaining wall.

View attachment 140494
I'm about 2-3 more layers away from being finished. If you've ever built one before, the first layer that would be buried was a monster to put in. Eagle Mountain soil is pretty much just gravel and concrete like clay. And because of the vicinity of utility lines I couldn't use any power equipment for most of the digging.
That looks great!
 

1969honda

Well-Known Member
Supporting Member
Location
Cache
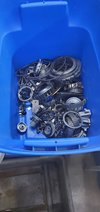
Accomplished a couple things today, first was pulling the wife's Escalade in for a LOF. I had noticed it left a small puddle of coolant recently in the driveway so while waiting for the oil to drain I looked for the culprit. Sure enough there was some orange dexcool residue on the bell housing below the heater core connections. You can see the orange just behind the last spark plug boot.

20210830_195519.jpg

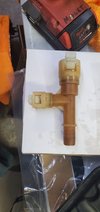
The supply side hard line o-ring was leaking from the T fitting. Oddly enough I had a new quick disconnect T in the package sitting in my tool box. I changed a couple of these on the side of the road almost two years ago and never bothered to return the size that didn't fit. Some are 5/8" on all the sides and some are 5/8", 5/8", 3/4". This one is the 3/4" variety.
Old:
20210830_195548.jpg
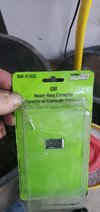
And package with pat number for the new one. I usually try to get the OEM parts for things, but last time I did this was late in the afternoon and a stayed in the side of the road so I grabbed what was available. This time I was lazy and didn't feel like driving the 20 minutes into town.
20210830_200823.jpg

The connections are pretty simple, gently push the tube you want to remove into the T, squeeze the tabs so they can open up around the bead roll and then pull the tube out while squeezing the tabs.

Easy job, very little coolant leaked out and only took about 20 minutes.
 

1969honda

Well-Known Member
Supporting Member
Location
Cache
The next project I started in on is long over due and won't get finished tonight, but hopefully within the week. I have another 04 Yukon XL that the transmission started to slip and shift harsh before I had to go over to the sand box on an extended business trip for Uncle Sam. While I was gone my wife drove it every once in a while to keep the battery charged and the fluids moving around. In June she mentioned one day that it wouldn't really go over 45 mph and the rpms would just sky rocket. 3/4 clutches had finally given up. :rolleyes:

Knowing hunting season would be close or underway when I got home, I had picked up a 4L65e off KSL to reduce vehicle down time before leaving. My buddy jpndaveo had helped me ensure I got all the right pieces and upgrades purchased last January and even tore it all down to inspect everything.
20210830_202615.jpg

20210830_200209.jpg

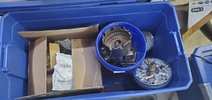
I took everything to work in bins after it was torn down and steam cleaned it all. I then wiped it all down and blew it off with the airgun, filled a bucket with clean ATF and dropped all the major hard parts in to try and prevent any rusting while I was away.
New Raybestos red frictions, steels, sprags, Corvette piston kit, bushings, boost valve kit, Transgo shift kit and other goodies were all ordered. Only things I'm not throwing at it is Kolene steels and the kitchen sink.

20210830_203400.jpg

Which brings me to tonight's job, getting all of the new little piece swapped into the 4l65e valve body. Should be finished with this tonight, then it's pull the vehicle in and remove the old 4L60e from it to do the same thing. Originally I was going I rebuild the 4L65e and just sell the 4L60 as a core, but now I'm going to rebuild the 4L60 as well. When I get that pulled it will get cleaned and the same list of goodies installed in both at the same time. That way I only have to ruin one of jpndaveo's weekends using his special tools and transmission case fixture.

Once they are both together the 4L65e will get installed and the 4L60e will get sold as a rebuild with new steels, red clutches, wide 2-4 band, shift kit and other upgrades and hopefully recoup my cost in parts for the two plus my 4L65e core.
 

moab_cj5

Well-Known Member
Supporting Member
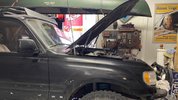
I joined the poser posse last night and installed a snorkel. I have a friend that was playing in puddles when we had the heavy rain and hydro-locked his 4.7 Land Cruiser, so that and wanting to reduce the dust in my air cleaner pushed me over the edge to want one. When Cruiser Outfitters had one left in stock, that was the motivation I needed to pull the trigger and do it now.

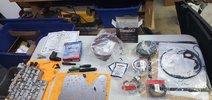
I laid out the parts on the table to ensure it was all there, and that it was the right one (per the instructions).
IMG_0513.jpg

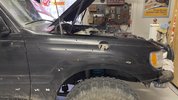
The unmolested fender ready for the drilling.
IMG_0514.jpg

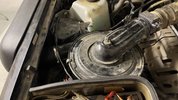
I removed the filter housing and unbolted some other stuff to make room. Then pulled the fender intake components out of the fender.
IMG_0517.jpg

IMG_0515.jpg

IMG_0516.jpg

I taped the template to the fender, marked all the holes, then removed the template and started drilling. Just one more to drill.
IMG_0518.jpg

That's a big hole!
IMG_0519.jpg

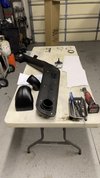
I test fit the snorkel and marked for the A-Pillar mounting holes.
IMG_0520.jpg

I removed the snorkel and drilled the final 3 holes for mounting the A-pillar bracket, then reinstalled it. This is where it got painful. I was able to get 5 of the 7 nuts and washers on fairly easily, but the last 2 are tough when you're cursed with big arms. I spewed obscenities as I contorted my body and stuffed my arm into the fender, searching for the stud locations. The over the top creeper was worth it's weight in gold for this job!
After I got all of the nuts started, I had to get back in with a wrench to tighten them. I used my 1/4" drive electric ratchet for this job so it would torque out before doing damage or breaking a stud, but still get the nuts tight enough to lock down. I spewed several more obscenities repeating the contortions and scraps and cuts to my hands and arm. If it doesn't exist, I am going to create mechanic's yoga to get myself used to bending and stretching in weird directions and positions.

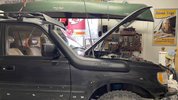
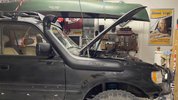
With everything tightened down, I installed the hose and clamp that connects the snorkel to the filter housing, and buttoned everything up.
IMG_0521.jpg

IMG_0522.jpg

Not a hard install by any stretch, but not one I want to repeat anytime soon. I dig the look, but am more stoked on the functionality.
 

bryson

RME Resident Ninja
Supporting Member
Location
West Jordan
I joined the poser posse last night and installed a snorkel. I have a friend that was playing in puddles when we had the heavy rain and hydro-locked his 4.7 Land Cruiser, so that and wanting to reduce the dust in my air cleaner pushed me over the edge to want one. When Cruiser Outfitters had one left in stock, that was the motivation I needed to pull the trigger and do it now.

I laid out the parts on the table to ensure it was all there, and that it was the right one (per the instructions).
View attachment 140522

The unmolested fender ready for the drilling.
View attachment 140523

I removed the filter housing and unbolted some other stuff to make room. Then pulled the fender intake components out of the fender.
View attachment 140524

View attachment 140525

View attachment 140526

I taped the template to the fender, marked all the holes, then removed the template and started drilling. Just one more to drill.
View attachment 140527

That's a big hole!
View attachment 140528

I test fit the snorkel and marked for the A-Pillar mounting holes.
View attachment 140529

I removed the snorkel and drilled the final 3 holes for mounting the A-pillar bracket, then reinstalled it. This is where it got painful. I was able to get 5 of the 7 nuts and washers on fairly easily, but the last 2 are tough when you're cursed with big arms. I spewed obscenities as I contorted my body and stuffed my arm into the fender, searching for the stud locations. The over the top creeper was worth it's weight in gold for this job!
After I got all of the nuts started, I had to get back in with a wrench to tighten them. I used my 1/4" drive electric ratchet for this job so it would torque out before doing damage or breaking a stud, but still get the nuts tight enough to lock down. I spewed several more obscenities repeating the contortions and scraps and cuts to my hands and arm. If it doesn't exist, I am going to create mechanic's yoga to get myself used to bending and stretching in weird directions and positions.

With everything tightened down, I installed the hose and clamp that connects the snorkel to the filter housing, and buttoned everything up.
View attachment 140535

View attachment 140536

Not a hard install by any stretch, but not one I want to repeat anytime soon. I dig the look, but am more stoked on the functionality.
I don't think I'd go as far as calling that fender "unmolested" even before you cut a giant hole in it... It sure looks like it's had plenty of love.:rofl:
 

moab_cj5

Well-Known Member
Supporting Member
I don't think I'd go as far as calling that fender "unmolested" even before you cut a giant hole in it... It sure looks like it's had plenty of love.:rofl:
Other than the factory holes for the flares that I taped over, it only had some superficial scratches. But, to your point, it has seen it's share of trail conditions and dust.
 

zmotorsports

Hardcore Gearhead
Vendor
Location
West Haven, UT
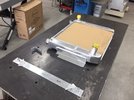
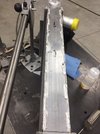
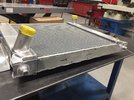
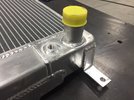
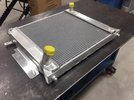
I had a fellow RME forum member bring me a radiator that needed some modifying. He is using it in a custom application and needed some additional mounting tabs welded on.

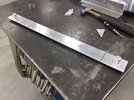
He had all of the tabs cut, bent as needed and marked where they needed to be welded.
rad1.JPG

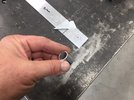
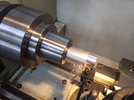
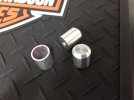
He had these two thin wall aluminum tubes cut to act as the lower mounts that would slip into a rubber mount or grommet. I didn't really like the tubing method so I grabbed some 1" 6061 that I had on hand and chucked it up in the lathe.
rad2.JPG


rad3.JPG

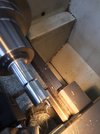
After turning down to .750" I parted off at .900" to match the dimensions of the tubing that he brought.
rad4.JPG

Much more gooder.
rad5.jpg

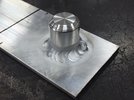
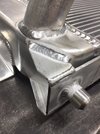
Posts in position on the lower mounting plate.
rad6.JPG

Posts welded to the lower mounting plate.
rad65.JPG

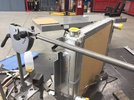
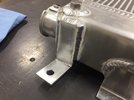
Welding one of the upper mounting brackets/tabs. My TIG support arm sure comes in handy for these types of weldments.
rad7.JPG


Lower mounting plate welded in place.
rad8.JPG

More pics in next post......
 

YROC FAB.

BUGGY TIME
Vendor
Location
Richfield, UT.
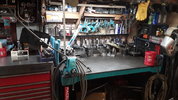
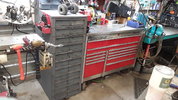
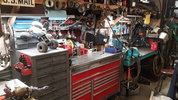
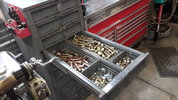
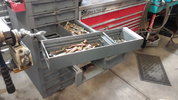
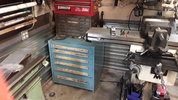
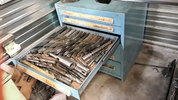
I got forced to do my yearly table top cleaning by scoring a sweet old filing cabinet that i have now turned into my new bolt bin.
20210829_202604.jpg20210829_202709.jpg20210829_202554.jpg20210829_202729.jpg20210829_202742.jpg


I love these Stanley-Vidmar cabinets. pretty sure they are good for like 400lbs per drawer. That biggest bit is 2.5"
20210829_202716.jpg20210829_202923.jpg

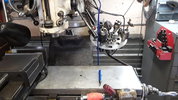
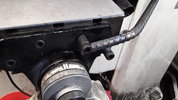
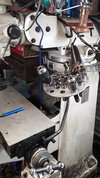
I also made a new r8 collet holder thats more easy to see.

20210828_131953.jpg20210828_131959.jpg20210828_132009.jpg
 
Last edited:

zmotorsports

Hardcore Gearhead
Vendor
Location
West Haven, UT
I got forced to do my yearly table top cleaning by scoring a sweet old filing cabinet that i have now turned into my new bolt bin.
View attachment 140589View attachment 140594View attachment 140596View attachment 140597View attachment 140598


I love these Stanley-Vidmar cabinets. pretty sure they are good for like 400lbs per drawer. That biggest bit is 2.5"
View attachment 140591View attachment 140595

I also made a new r8 collet holder thats more easy to see.

View attachment 140592View attachment 140593View attachment 140590

Very nice. I also like things clean, tidy and organized. I can't seem to work in clutter or chaos.
 

glockman

I hate Jeep trucks
Location
Pleasant Grove
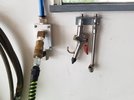
These little air tool hangers are sweet. Don't know why I put off making a couple.

20210901_174707.jpg

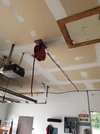
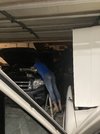
I also added a leg to my rapid air system and hung my air hose reel which took about 5 times longer than it should have due to not having the correct fittings and remembering what I needed backwards when I went to the hardware store.
20210901_174839.jpg
 

frieed

Jeepless in Draper
Supporting Member
Location
Draper, UT
These little air tool hangers are sweet. Don't know why I put off making a couple.

View attachment 140601

I also added a leg to my rapid air system and hung my air hose reel which took about 5 times longer than it should have due to not having the correct fittings and remembering what I needed backwards when I went to the hardware store.
I just drive a finish nail into the wall and poke it into the quick connect.
But what really bugs me is unpainted drywall... :)
 
Top