General Tech What did you work on Today?

ID Bronco

Registered User
Location
Idaho Falls, ID
Speaking of snow, I installed the winch and plow on our snow removal tool.
View attachment 123503
While I had the machine opened up, I completed the 3 light mod. Now all three headlights can be used at the same time.
View attachment 123504
Will the charging system handle the winch running with all three lights? I guess a trickle charge between plowing sessions would make this a non-issue but my 700 struggles on nights when I plow a lot.
 

Hickey

Burn-barrel enthusiast
Supporting Member
Will the charging system handle the winch running with all three lights? I guess a trickle charge between plowing sessions would make this a non-issue but my 700 struggles on nights when I plow a lot.
I never had a problem with the previous 500's we've had. We regretted selling the last one because the plowing performance was kick ass for our situation. The SXS sucked for plowing.
 

rholbrook

Well-Known Member
Location
Kaysville, Ut
This is the shoebox I inherited.

Love it. I picked up a dual carb intake manifold for it a few years back totally expecting to get it in a few years. If I don't, it will be a sad day for me. It needs a lot of work but the bones there. It has a bad water pump which is part of the engine mounting brackets I am told.
 

The_Lobbster

Well-Known Member
Yanked the bed off my military trailer to sell.
 

Attachments

  • 8890585C-D8C5-49AE-874A-751B5B678301.jpeg
    8890585C-D8C5-49AE-874A-751B5B678301.jpeg
    698.5 KB · Views: 26
  • 342F842E-7E29-46D0-B0B8-F0A46947D3D7.jpeg
    342F842E-7E29-46D0-B0B8-F0A46947D3D7.jpeg
    799.3 KB · Views: 26

zmotorsports

Hardcore Gearhead
Vendor
Location
West Haven, UT
I noticed that the last couple of trips this year in our coach that I had some liquid getting past the black tank valve when I’d remove the cap to dump at the campground before leaving. I wanted to get the valves replaced so the coach is all ready to go for the next travel season. Not a particularly pleasant job but figured I would pull the coach out of the storage bay and knock this task out quickly since the weather was so nice on Saturday afternoon.

Valves and center section removed.
e56cb16760a5692e848b8f94504e56c1.jpg


337ab10886eb0c89a32ead5fabf1bb76.jpg


New valves at the ready.
7ff1219d0985213237b0ba6f2e5ebf48.jpg


New valves installed and fasteners all tightened to spec.
508265b2f3a0bc9ee026b588564d0c0e.jpg


Wet bay complete.
b03770a019053ce2426b84c8d1b2e8de.jpg


I was also able to machine the bungs for the fixture that I am building for supporting axles for removal/installation. Should be able to get them welded into place and finish this fixture up within the next night or two.
7bbeeedfeb2379a44ed59dc22d0d1713.jpg


Lastly, I installed my new Nitto Terra Grapplers on my 2006 Chevy Duramax on Saturday.
7a12d8651a8a39a1c7ab4a83c98d9aa0.jpg


bb894d54a5aa8189cee5d86f739c344b.jpg


e007e32a06d2dfda527ca7558a1196fb.jpg


All in all a pretty productive day and I got several items crossed off of the white board.

Mike
 

zmotorsports

Hardcore Gearhead
Vendor
Location
West Haven, UT
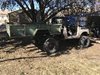
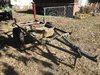
I was able to complete my axle fixture last night.

I like to “blast tack” components so I can simply weld over the top of them on final weld. To do this I bump my amperage up to nearly double what I would be welding at for the specific material thickness. Then just max the pedal and a small fusion tack will form. This is done very fast and works great when TIG welding because it will allow you to hold a component with one hand while holding the TIG torch with the other to tack.
32508e95b741dda5619257cee9fb6588.jpg


Bungs final welded.
7cbe96d34f0c53c57a625b4140af4557.jpg


2d468ccda78c71ca28e617c4ae8196ef.jpg


To prevent the tubing from bowing or pulling I place a TIG rod under the middle and clamp each end flat to the table. Basically pre-loading it to compensate for the contraction.
232d6039b8906160bd4fe3572e747c74.jpg


Bungs welded on the two slider pieces.
3332be9e776ad0be18129c693803db4a.jpg


Next I cut out the two straddle supports and blast tacked them in a couple places to make them symmetrical.
889b98bbff0ce0772969326f23f08dca.jpg


eed418d7711f45853605709284042a46.jpg


Blended and speed holes added.
1ea4a0ed685d22f515a7a04bf45d812d.jpg


Next I clamped the vertical support tubes in the mill vise and found the middle with an edge finder. DRO’s are so awesome.
c7b0bbe063fe71a9f36b1a629920554a.jpg


Cutting a 1/4” slot to a depth of .800”.
798e973d5a2941f040752b8cf52408d7.jpg


Test fit.
eecd013d7aa805728c10f471f31aa626.jpg


Tacked in position.
a11b088fca2e1ba92148313db140727c.jpg


Final welding completed.
7ca84c1fdc649334cc1eb713f4e7cf0e.jpg


7a0a0a9eb7bad5961ea63328a5484c47.jpg


13fbc47a44fbfbd0ce3f98d3ec8fc822.jpg


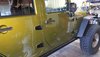
All components completed and ready to bolt together.
2ec907f3cf784991e48559fe38df8907.jpg


2857da86ef81f275afeeff6090fba75c.jpg


803622ce393a28d965a33f1f2d52d06d.jpg


77edfcfdc2c58c514f303bcb68af23a2.jpg


e34ab0d27c9e6ae969c88cc0ece83f4c.jpg


Ready for use and another item knocked off the white board.

Thanks for looking.

Mike
 

DAA

Well-Known Member
Didn't take any pics. But yesterday was broken body mount bolt goodness.

Noticed a bolt and bottom part of a body mount missing while underneath doing other stuff. Figured the bolt had just fallen out but nope. It had broken and then most of it had fallen out, leaving the broken chunk in the threads. Whatever impact broke it must have jammed it like a mother too because I couldn't get the broke piece to move. Got a good enough bite on it with an ez-out to break a socket trying to turn it but it didn't turn.

So, screw it. Drilled the whole thing out 27/64 and tapped it 1/2-13 and good to go. PITA though.

- DAA
 
Top