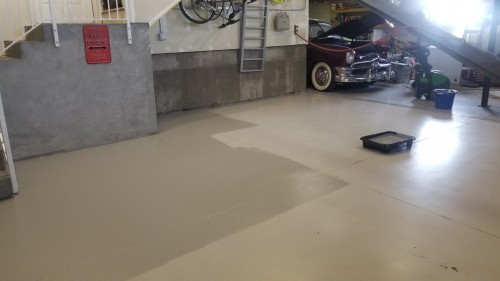
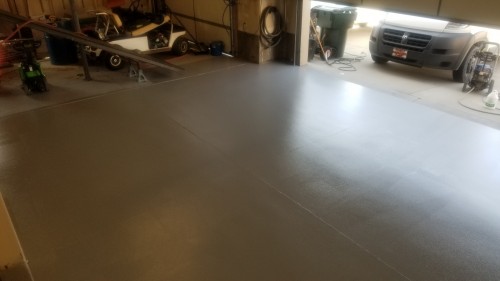
General Tech What did you work on Today?

zmotorsports

Hardcore Gearhead
Vendor
Location
West Haven, UT
I received a call from my tire guy yesterday. He informed me that my Michelin XZA2 Energy 295/80R-22.5 tires arrived that I had him order a few days ago.

I got the coach off the ground and removed the tires so I can bring them to the tire shop.

Tag tires removed. I’m glad to get rid of these POS Goodyear’s finally.
db24079e95003bf0bc3e024fbb9a612e.jpg


0692af34e630089d0bb6168960f6e1f9.jpg


Steer’s removed. The two new tires will go on the steer and the 3+ year old steers will go on the tag.
c54941bdd5ceec8d705163ecd63db053.jpg


be69e27b73f829b3967a592cce044afd.jpg


Loaded on the trailer and strapped down.
6a52fa7820c7028149e907dc5077b78a.jpg


Mike
 

BCGPER

Starting Another Thread
Location
Sunny Arizona
So far I’m into the shed about $1200. I’ve still got to get the walls stuccoed, which I will farm out. I don’t have a clue how much the tile roofing will run me but my gut tells me that won’t be cheap.

Bart, next time I’m up that way I’ll give you a call, maybe we can get a lunch scheduled.In the mean time, my place is your place, if you want a break from winter.
Nice shed BC.
Nice box. I need to do something similar at some point, what'd that run you in materials?
 
Last edited:

XJEEPER

Well-Known Member
Location
Highland Springs
Agreed. They're a PITA. We did the JK D44 that we put in my son's WJ to correct the caster to pinion angle separation and although it wasn't a technical job it was just a nasty, messy and time consuming job. That was a 10-hour day of my life I'll never get back. :D

Mike
My son is building some JK axles to swap into his XJ, so I have another C-rotation on the horizon.
 

YROC FAB.

BUGGY TIME
Vendor
Location
Richfield, UT.
ATF? Yuck. Laying on that to strap down your rig has got to suck.
Boiled Linseed FTW

I suggest atf because its thinner and soaked into the would faster. I've used mixtures of gear and motor oil on mine. After a good soak and wash it doesn't get onto you. My deck it 5 years old and sits in direct sun light all the time and looks brand new and all the oil was free.
 

cruiseroutfit

Cruizah!
Moderator
Vendor
Location
Sandy, Ut
More progress on my long term Cruiser projects. Swapped the spare on the 1966 FJ45, replaced brake master, rebuilt the clutch master, fresh battery and off to the races. Drove it for the first time in 9+ months. Gave it a good car wash and topped off the tank with some fresh fuel. Next up is intake/exhaust manifold gasket and a new exhaust system... and tires :D

20200405_184531.jpg
 

cruiseroutfit

Cruizah!
Moderator
Vendor
Location
Sandy, Ut
I then turned my attention to another project (1965 FJ40 FST) that has been sitting for many years, 2.5 of them at my house. I've spent perhaps 2 hours on it the entire time I've owned it. I doubled that tonight :D

Pulled the plugs, oiled the cylinders and turned the motor over by hand and then with the starter motor. I put the plugs back in and spent an hour pressure washing the funk off. It has perhaps a few decades of fine red dirt in every nook and cranny having lived its life in Kanab. I plan to drain the old fuel, fix the electrical, put some fresh ignition parts on it and see if it will fire up. This pic is the day my wife Candace and I went and picked it up, 7/24/17. I purchased it while on a big XO trip and told Candace "let's go for a drive " right when she picked me up at the airport :D

Screenshot_20200405-224216_Gallery.jpg

Here is where it's been for a few years now :(

20200405_213627.jpg
 

zmotorsports

Hardcore Gearhead
Vendor
Location
West Haven, UT
It was nice to have a two-day weekend again. This past Saturday was the first Saturday I’ve had off work in the past month so I made the most of it and worked on a few projects that I had been putting off.

New steer tires for the coach.
31c2150eb6edf85a9ac76a5cff95c7ae.jpg


I put my 4 year old steers on my tag axle wheels.
4a16ee52601f0648258c1ff0658d55e7.jpg


I decided to apply a coat of polish before putting them on the coach. Steer wheel done.
8585ccfd5bb81cd47cf30c291e8cb384.jpg


Tag axle tires & wheels. The one on the tight has not yet been polished. The left has.
25ea2179eb76daf62d5cbf1bb8d9d97d.jpg


Pre-polishing.
40a4b4608c76b663d8e1d2028e5ae1be.jpg


Post-polishing.
b44f167f599cb215aa41174dd1c91aa2.jpg


I had purchased new shocks for the wife’s 4th gen Acura TL (2013) about a month ago but I haven’t had the time to install them until now.

Rear seat had to be removed. Starting with the bottom cushion. Push down and pull out on the two small retainers under the bottom cushion.
88567d264bb14e73e5b099f348078c6d.jpg


0aae03fb04d6d818e6d3653cabbd3eae.jpg


After the back cushion was removed it allowed access to the upper rear shock mount fasteners.

Once the shock and coil spring assembly is removed from the rear suspension the coil can be compressed and shock replaced.
ad72493721acf4f6028654199978d15b.jpg


Moving to the front, remove the lower pinch bolt and separate the shock from the lower wishbone.
b5f5329e339cabc00c49bfb439251501.jpg


Many think that the upper ball-joint and steering joints must be separated in order to remove the front coil and shock assembly but that is not necessary. Just apply a small amount of upward pressure on the suspension once the shock is free and this allows the upper A-arm to raise and create the needed space in order to angle and tilt to remove the coil spring and shock assembly. No need to remove any additional suspension components.
fc1fcb09041c0e7afbfcb6e2b706e82c.jpg


Coil and shock assembly removed and ready to be compressed using the strut compressor.
0edcf1338b444fe58fe72bec9f2a9205.jpg


264fcc96b410efefc1708800fe8424dc.jpg


84b0a86d1f855c58373ff7018386b980.jpg


Thanks for looking.

Mike
 

anderson750

I'm working on it Rose
Location
Price, Utah
It was nice to have a two-day weekend again. This past Saturday was the first Saturday I’ve had off work in the past month so I made the most of it and worked on a few projects that I had been putting off.

New steer tires for the coach.
31c2150eb6edf85a9ac76a5cff95c7ae.jpg


I put my 4 year old steers on my tag axle wheels.
4a16ee52601f0648258c1ff0658d55e7.jpg


I decided to apply a coat of polish before putting them on the coach. Steer wheel done.
8585ccfd5bb81cd47cf30c291e8cb384.jpg


Tag axle tires & wheels. The one on the tight has not yet been polished. The left has.
25ea2179eb76daf62d5cbf1bb8d9d97d.jpg


Pre-polishing.
40a4b4608c76b663d8e1d2028e5ae1be.jpg


Post-polishing.
b44f167f599cb215aa41174dd1c91aa2.jpg


I had purchased new shocks for the wife’s 4th gen Acura TL (2013) about a month ago but I haven’t had the time to install them until now.

Rear seat had to be removed. Starting with the bottom cushion. Push down and pull out on the two small retainers under the bottom cushion.
88567d264bb14e73e5b099f348078c6d.jpg


0aae03fb04d6d818e6d3653cabbd3eae.jpg


After the back cushion was removed it allowed access to the upper rear shock mount fasteners.

Once the shock and coil spring assembly is removed from the rear suspension the coil can be compressed and shock replaced.
ad72493721acf4f6028654199978d15b.jpg


Moving to the front, remove the lower pinch bolt and separate the shock from the lower wishbone.
b5f5329e339cabc00c49bfb439251501.jpg


Many think that the upper ball-joint and steering joints must be separated in order to remove the front coil and shock assembly but that is not necessary. Just apply a small amount of upward pressure on the suspension once the shock is free and this allows the upper A-arm to raise and create the needed space in order to angle and tilt to remove the coil spring and shock assembly. No need to remove any additional suspension components.
fc1fcb09041c0e7afbfcb6e2b706e82c.jpg


Coil and shock assembly removed and ready to be compressed using the strut compressor.
0edcf1338b444fe58fe72bec9f2a9205.jpg


264fcc96b410efefc1708800fe8424dc.jpg


84b0a86d1f855c58373ff7018386b980.jpg


Thanks for looking.

Mike
What polish are you using? I need to do the whells on my motorhome.
 
Top