General Tech What did you work on Today?

zmotorsports

Hardcore Gearhead
Vendor
Location
West Haven, UT
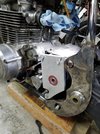
I picked up the new miller 211 to have as a backup welder at my house and its quickly becoming my favorite welder. I finished welding up my fabbed 9" housing for my CJ. I'm really surprised it burned hot enough to really Pentwater the inner C but it killed it.

View attachment 133229View attachment 133230View attachment 133231

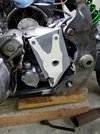
I also TIG welded up some unit bearing pockets for @xj_nate the pockets are cast and then machined which made it interesting to weld. They aren't perfect but they should hold up.... probably.

View attachment 133235View attachment 133236

Very nice work on both the housing and the bearing housings.

You'll love the Millermatic M211. I added one to my arsenal of welders about 2 years ago in which I run the smaller .023" wire in because I was tired of switching around on my MM250 from the .030" wire. I haven't welded anything thick with the 211 but on the thinner material which I bought it for it works great.

Mike
 

zmotorsports

Hardcore Gearhead
Vendor
Location
West Haven, UT
I was able to move on to the next job on my white board over the weekend. This project is for a fellow RME forum member who needed a new bolt pattern drilled in a couple of Dana 60 hubs.
7ab7de5780f32fa6c8b5410c96dbc0f3.jpg


A few holes were welded up to go from the standard 8 on 6.5” bolt pattern to the 5 on 150 for his Toyota.
d624bbdcab2f2b2c6ebc754b9bce219c.jpg


Set up on the mill and locating center.
2f2d5205c8708c07327d16f92d8e47ef.jpg


72ca93248aaa4c5839970d7d7600b449.jpg


I Progressively stepped up to 9/16” drill bit. I was worried about the welded plug areas being hardened or tempered from the welding process and sure enough I had to anneal the welded areas so they could be machined.
dc4887d524a633ad588aa5c9be9fc902.jpg


Then used the 2” Criterion boring head to sneak up on the .604” diameter holes.
c0a9dec71123a8d57b6c640bf2d116a5.jpg


87da4cef16f34913d3e4c0ee827d71a4.jpg


d41c95d721f4a7fc664b1f95d4a9e601.jpg


b8c6c7c6d0eb8de27320e0c3026d2909.jpg


Ready so he can press the new studs in.
eff2f03a2dcfe486aa3a077799df5b99.jpg


Completed and ready to be picked up.
8b38fbd52d1dec43d9651489cfb79181.jpg


Thanks for looking.

Mike
 

Gravy

Ant Anstead of Dirtbikes
Supporting Member
I fixed a broken kickstand for a customer yesterday.
He had broken the bolt off below flush then drilled and broken an easy-out in here and burned up a couple drill bits trying to drill the hardened easy-out before he called me.
IMG_20201208_120058.jpg

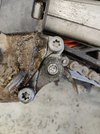
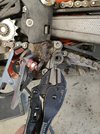
So I pulled the peg off and cleaned the bolt with suspension clean and used my smallest TIG torch at 45amps to slowly built up material until it was tall enough to grab with vise grips.

Threads were perfect. Didn't even need to chase them. Loving the control with this ProTIG 205.
IMG_20201208_120854.jpg
 

pkrfctr

Registered User
Location
Spanish Fork, UT
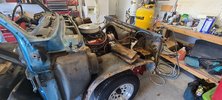
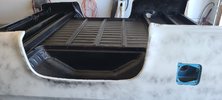
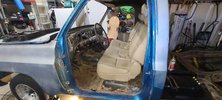
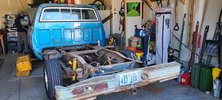
I was able to find my dad's (passed 6 yrs ago) 1979 c10. I picked it up to resto with my son for his first car. Making good progress.
 

Attachments

  • 20201011_094721.jpg
    20201011_094721.jpg
    547.6 KB · Views: 27
  • 20201016_121322.jpg
    20201016_121322.jpg
    328.2 KB · Views: 27
  • 20201205_100809.jpg
    20201205_100809.jpg
    290.6 KB · Views: 27
  • 20201128_112557.jpg
    20201128_112557.jpg
    178.6 KB · Views: 27
  • 20201120_142707.jpg
    20201120_142707.jpg
    216.4 KB · Views: 26

N-Smooth

Smooth Gang Founding Member
Location
UT
I was able to move on to the next job on my white board over the weekend. This project is for a fellow RME forum member who needed a new bolt pattern drilled in a couple of Dana 60 hubs.
7ab7de5780f32fa6c8b5410c96dbc0f3.jpg


A few holes were welded up to go from the standard 8 on 6.5” bolt pattern to the 5 on 150 for his Toyota.
d624bbdcab2f2b2c6ebc754b9bce219c.jpg


Set up on the mill and locating center.
2f2d5205c8708c07327d16f92d8e47ef.jpg


72ca93248aaa4c5839970d7d7600b449.jpg


I Progressively stepped up to 9/16” drill bit. I was worried about the welded plug areas being hardened or tempered from the welding process and sure enough I had to anneal the welded areas so they could be machined.
dc4887d524a633ad588aa5c9be9fc902.jpg


Then used the 2” Criterion boring head to sneak up on the .604” diameter holes.
c0a9dec71123a8d57b6c640bf2d116a5.jpg


87da4cef16f34913d3e4c0ee827d71a4.jpg


d41c95d721f4a7fc664b1f95d4a9e601.jpg


b8c6c7c6d0eb8de27320e0c3026d2909.jpg


Ready so he can press the new studs in.
eff2f03a2dcfe486aa3a077799df5b99.jpg


Completed and ready to be picked up.
8b38fbd52d1dec43d9651489cfb79181.jpg


Thanks for looking.

Mike
Do you also have the capability of boring out to 1.5”??? If so I have a job for you 😁
 

jeeper

Currently without Jeep
Location
So Jo, Ut
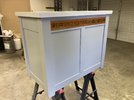
My great great ?great? Grandpa built the first sacrament table here in Utah when the settlers came over. It has been in the family since it got replaced in one of the chapels in Fillmore. It has seen better days for sure. My brothers and I have decided to restore it as a gift for my mother for Christmas. We’ve kept as much of the original wood as possible, and even used some of my grandpas tools as we have worked on it.
not quite done yet, but was pretty stoked to see it coming along.
E872B315-C56D-44ED-8113-58C057F3A0C3.jpeg
 

Coco

Well-Known Member
Location
Lehi, UT
My great great ?great? Grandpa built the first sacrament table here in Utah when the settlers came over. It has been in the family since it got replaced in one of the chapels in Fillmore. It has seen better days for sure. My brothers and I have decided to restore it as a gift for my mother for Christmas. We’ve kept as much of the original wood as possible, and even used some of my grandpas tools as we have worked on it.
not quite done yet, but was pretty stoked to see it coming along.
View attachment 133406
This is awesome! Well done!
 

1969honda

Well-Known Member
Supporting Member
Location
Cache
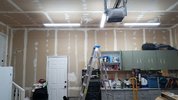
When you paint use a semi gloss/gloss white on the ceiling. Have them add as much of the brightest white pigment they can. It'll help reflect more light back down and the garage will feel much brighter. @jpndave showed me this and it makes a huge difference, plus the paint will cover a lot better with fewer coats.
 

Troop92

Well-Known Member
Location
Layton, UT
When you paint use a semi gloss/gloss white on the ceiling. Have them add as much of the brightest white pigment they can. It'll help reflect more light back down and the garage will feel much brighter. @jpndave showed me this and it makes a huge difference, plus the paint will cover a lot better with fewer coats.
Great call-out, thanks. Paint is on the list, but I'll first have to tape/mud again after I shore up the ceiling drywall. The previous owner did it all himself, and, well... Let's just say that watching a YouTube video didn't make him good.
 
Last edited:
Top