General Tech What did you work on Today?

bryson

RME Resident Ninja
Supporting Member
Location
West Jordan
A few of my chimney pipes were delayed, so I wrapped this up instead. When I insulate the rest of the shop, I’ll take some of this down, add insulation, then run another 8’ of corrugated to the ceiling.
That does look good! Is the corrugated mounted to those pieces of square tube? Is that for insulation/protection of the stick wall behind it?
 

Vonski

nothing to see here...
Location
Payson, Utah
That does look good! Is the corrugated mounted to those pieces of square tube? Is that for insulation/protection of the stick wall behind it?
Any sort of heat wall/barrier has to be a non-combustible material (with a min. thickness) and so do the stand-offs attached to the wood. There are exceptions, like if using brick or whatnot.
 

zmotorsports

Hardcore Gearhead
Vendor
Location
West Haven, UT
I can't seem to get time to work on the old square body Chevy of JJ's (NYCEGUY01) this week. I took on a few small jobs thinking they'd be filler but they took over my entire week. I really need to focus on the square body this week and get it completed.

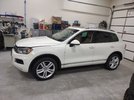
I had a client call me last week to see if I could hurry and get their VW Touareg in the shop to fix an oil leak that was driving them crazy so I obliged and had them bring it by Friday night after I informed them that I had received the parts that I had ordered. This way it could cool and I could start on it first thing Saturday morning while the wife had a family party in the house. I thought it best I be in the shop doing something productive. :D

This is a 2011 VW Touareg with the 3.0 liter V6 TDI (diesel) engine with about 134k miles on it and my first modern VW that I have worked on. When they asked me if I could fix it I just figured it's nuts and bolts so it can't be that much different than anything else. Evidently they were somewhat frustrated with the dealership they had it at the week prior. The right bank valve cover had been leaking and needed the gasket replaced plus I picked up three sealing washers for the injectors on that bank. I do not trust disturbing those injector sealing washers and having them reseal so I always replace them any time I disturb an injector on anything.

Lights set up and fender covers in place along with tools in the tool cart and ready to begin. I also recorded this process and posted it to my YouTube channel so hopefully it will help anyone else dealing with a similar issue.
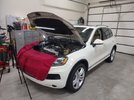
vw1.jpg


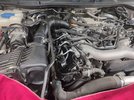
Air box lid, MAF sensor and air box to intake duct removed to gain access to the right bank. Next was to disconnect the fuel return lines and move them out of the way.
vw2.jpg


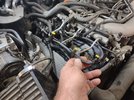
Started disconnecting connectors and moving wiring up and out of the way.
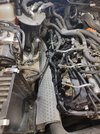
vw3.jpg


Wiring from the injectors as well as injector high pressure lines removed. I always keep a few small bungee cords readily available to hold either wiring and/or brackets back out of they way. Here you can also see where the oil was dripping down onto the intercooler duct work from the leaking valve cover.
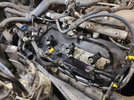
vw4.jpg


Wire loom mounting brackets out of the way and ready to start removing injectors. The worst part of the entire project was the upper rear wire loom bracket that bolted down to the top back of the valve cover. It had a bolt that attached to the valve cover and another bolt at the rear corner perpendicular to the valve cover right above the turbo housing. It required sorting through several tools until I found the one that would work to remove the bolt and slide the bracket about 2 inches rearward to allow the valve cover to be removed.
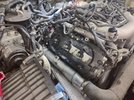
vw5.jpg


All three right bank injectors removed. As I was removing the injectors I also noted that the rear injector cover plate was loose so I think that was contributing to the oil residue on the upper portion of the valve cover.
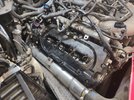
vw6.jpg


Injectors actually look quite good. From a small amount of reading I had learned that these engines were known to have those sealing washers leak and incur combustion blow-by past the sealing washer and carbon the lower section of the injector body but these showed no evidence of any combustion leak so I was pleased to see that.
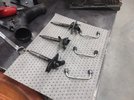
vw7.jpg


Valve cover removed and you can see at the front lower corner where I'm pointing where oil had gotten past the valve cover gasket.
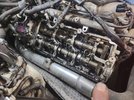
vw8.jpg


Here at the lower rear of the head you can see the evidence of where the valve cover gasket was leaking and allowing oil all the way to the edge of the flange on the head.
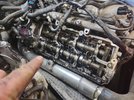
vw9.jpg


These injectors came out quite easily with a slight twist and pull motion. I had anticipated having to extract them with a slide hammer so I purchased an injector removal tool but ended up not needing it on this particular job. It would have threaded on to the injector supply thread and the weight of the tool slid back striking the end to remove the injector.
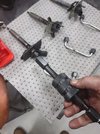
vw10.jpg


Move pictures to follow......
 

zmotorsports

Hardcore Gearhead
Vendor
Location
West Haven, UT
Continuing on with the valve cover gasket replacement on the VW Touareg.

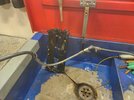
Valve cover as well as wire loom brackets and fasteners in the solvent tank for a thorough cleaning.
vw11.jpg


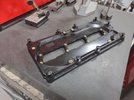
Double checking to ensure the valve cover is not warped before installing the new gasket and starting reassembly.
vw12.jpg


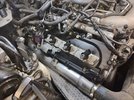
Valve cover and injectors reinstalled. Also wire loom brackets in place ready to accept the wiring.
vw13.jpg


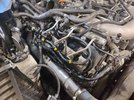
Everything reassembled less the intake duct and air box lid. I noted the air filter was in poor condition but I could not locate one on a Saturday afternoon so I listed it as needing to be replaced. Very surprised the dealership missed the air filter in their "23-point inspection". Maybe this is part of the reason the owner was unhappy with the last visit.
vw14.jpg


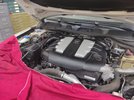
Fully assembled less the engine cover and fired up.
vw15.jpg


Engine cover cleaned and reinstalled.
vw16.jpg


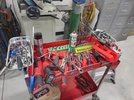
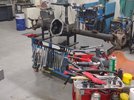
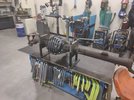
Messy tool cart during the repair process. My second cup of coffee got me through the day.;)
toolcart.jpg


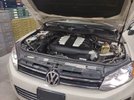
Fender covers removed and tools put back in the toolbox before closing up the hood.
vw17.jpg


Client notified and awaiting to be picked up.
vw18.jpg


All in all a pretty straight forward job and pleased client.


Thanks for looking and now back on to the square body Chevy stepside.

Mike
 

zmotorsports

Hardcore Gearhead
Vendor
Location
West Haven, UT
I always just assumed the dealers would reccomend a new airfilter whether they looked or not. They always do on my company trucks..lol

Same here. Usually they just recommend an air filter whether needed or not but this was falling apart and in extremely poor condition yet they didn't mention it to the owners. They asked about the burning oil smell and the brakes squealing in reverse and was simply told "oh, they all do that." :thinking: Don't think I buy that. I didn't have time to look at the brakes and told them they'll have to bring it back at a later date but they were mostly wanting the oil leak fixed at this time.

I'll get back on your truck starting tonight. I'm picking up inner oil seals on my way home and should be able to start reassembly of the front axle as I was able to get everything disassembled and cleaned on Friday night.

Mike
 

DaveB

Long Jeep Fan
Location
Holladay, Utah
Spent some time this morning "fixing the furnace". The furnace was running through the ignition cycle then once the burners kicked on and the fan started it would instantly shut down and start the cycle all over again. It was doing this non stop. I cleaned the flame sensor which didn't help then I thought of testing the batteries in the digital thermostat. The batteries were not dead but weak. Once I got new batteries in it became clear why it was doing what it was doing. The room temp was above the turn on value but the displayed temp was below turn on. The thermostat would turn it on, then once the fan came on it figured out the temp was already good and shut off. I guess I should replace the batteries every fall before furnace season. Very glad it wasn't the furnace going out.
 

zmotorsports

Hardcore Gearhead
Vendor
Location
West Haven, UT
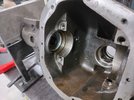
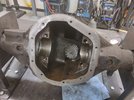
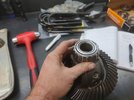
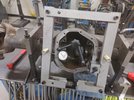
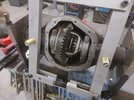
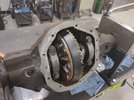
While I was waiting for the client to pick up their Volkswagon on Saturday afternoon I did have a chance to tear the Dana 44 front axle down and give the housing a thorough cleaning.

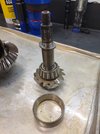
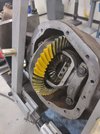
No crush sleeve here, pinion preload uses shims.
c101.jpg

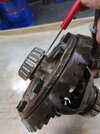
Also, you can see that in the old style of Dana 44 axles the carrier shims are located under the bearing on the carrier vs. the new style Dana 44's where the shims are outside of the bearings and races. These are a bit more time consuming to setup and definitely require the use of set up bearings or you'll be destroying the bearings for every test fit up.
c102.jpg

Cleaning the housing and removing the sealant from the cover surface.
c103.jpg

Here you can see the pinion depth shims as well being under the inner race on this old style Dana 44 vs. under the pinion bearing on the actual pinion of the new style Dana 44's.
c104.jpg

Cleaned and ready to start test fit procedures and checking clearances.
c105.jpg

Stay tuned..
 

zmotorsports

Hardcore Gearhead
Vendor
Location
West Haven, UT
I worked a bit later than normal last night but I was able to get quite a bit completed on the Chevy Dana 44 front axle.

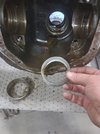
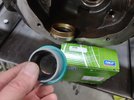
I had to pick up new inner axle seals and first order was to remove the old and install the new.
seals1.jpg

Seals installed.
seals2.jpg

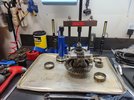
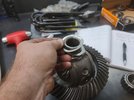
I then removed the old carrier bearings.
bearing remove.jpg

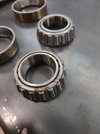
These were in poor condition and definitely needed to be replaced.
c106.jpg

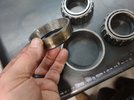
Races showed signs of pitting as well.
c107.jpg

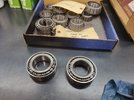
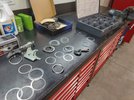
Time to dig out the box of set up bearings again and match them up. Most of my lettering has worn off. :( Guess I'll need to relabel these again.
setup.jpg

Pressing the new inner pinion bearings into place on the new pinion.
c108.jpg

Shims installed under the inner pinion set up race and pinion installed. I can already tell I need to remove a couple thousandths of shims from the preload stack as with the pinion installed there is not much in the way of pinion preload.
c109.jpg

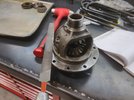
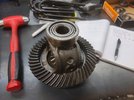
Prepping the carrier to receive the new ring gear.
c1010.jpg

More pics to follow.....
 

zmotorsports

Hardcore Gearhead
Vendor
Location
West Haven, UT
Continuing on..

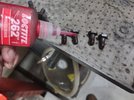
Applying red Loctite to the ring gear bolts.
c1011.jpg


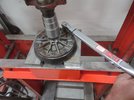
Torqueing the ring gear bolts in place.
c1012.jpg


Installing the original carrier shim stack under the set up bearings for initial test.
c1013.jpg


c1014.jpg


Race set in place and ready to install in housing for first test fitment.
c1015.jpg


Spreading the case to accept the carrier.
c1016.jpg


Carrier installed.
c1017.jpg


More pics to follow.....
 

zmotorsports

Hardcore Gearhead
Vendor
Location
West Haven, UT
Last of last night's pictures.
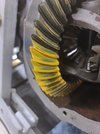
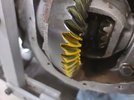
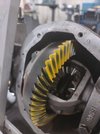
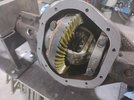
I wasn't pleased with the first markings. Pinion was a bit too shallow.
c1018.jpg


On the coast side it is more evident that it is riding high up on the tooth near the face.
c1019.jpg


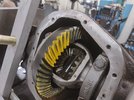
Second setup was much, much closer but now ever so slightly deep. At least I think I know where the final shim stack should be.
c1020.jpg


c1021.jpg


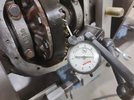
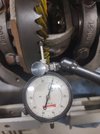
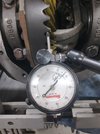
Backlash was good @ .007".
c1022.jpg


I think tonight I should be able to put it together for one more test fit with just a couple thousandths less pinion depth and everything should fall into place then move on to final assembly.

Thanks for looking.

Mike
 

zmotorsports

Hardcore Gearhead
Vendor
Location
West Haven, UT
Finished up the front axle for the square body last night. I had to dig my selection of shims out as I couldn't get EXACTLY what I was shooting for knowing the first run was just a bit too deep of pinion and the second try was much too shallow. I was trying to find a shim stack to net me only .002" less than the initial setup.


Finally found what I was looking for.
k101.jpg

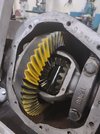
Third setup in action. Painted the ring gear to run what I was hoping was the final pattern check.
k102.jpg

BINGO! That got me just what I was looking for.
k103.jpg

Set up the dial indicator and zeroed it out.
k105.jpg

Looks perfect @ .007" back lash.
k106.jpg

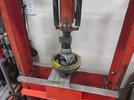
Pressing the new carrier bearings in place with the correct shim under them while the outer pinion bearing is heating up on the bearing heater.
k107.jpg

Yoke and seal at the ready as soon as the bearing is heated enough.
k108.jpg

Carrier torqued in place and spec's engraved on the ring gear.
k109.jpg

The sealing surface was a bit dinged up so I applied a thin layer of RTV before the gasket.
k1010.jpg

Cover installed and torqued in place. Front axle is ready to stab back under the truck.
k1011.jpg

I was hoping to be able to stab it in the truck tonight but it looks like I'll be doing snow removal duty instead.

Thanks for looking.

Mike
 

zmotorsports

Hardcore Gearhead
Vendor
Location
West Haven, UT
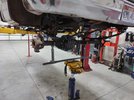
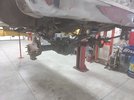
I didn't get much done on the K10 last night as I got out of work late but I was able to get the axle stabbed under the truck after installing the new front leaf springs and hardware.

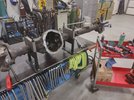
When my son stopped by after work I had him help me lift the axle from the fixtures on my fabrication table to the adapter on my transmission jack that I made a few years ago. This axle adapter has been a game changer for dropping and installing solid axles and I should have built it many years ago. Being able to stand and guide the axle into position while pumping the jack with my foot makes short work of axle removal and installation, especially when working by myself.
K101.jpg

Jack out of the way and the axle fully installed in the truck.
k102.jpg

I picked up some grease seals for the hubs last night so I should be able to put the rest of the axle together now and then get going on the rear axle regear and suspension.

Thanks for looking.

Mike
 
Top