General Tech What did you work on Today?

jeeper

Currently without Jeep
Location
So Jo, Ut
I thought les Schwab was bad when changing brakes, as they claim that rotors and calibers have to be changed also… but mike even changes knuckles and axles too!!!


Good catch on that detent ball. That’s crazy.
 

I Lean

Mbryson's hairdresser
Vendor
Location
Utah

N-Smooth

Smooth Gang Founding Member
Location
UT
What Carlos said. They have to be thrilled to have somebody with your skills. Knowing the back story of your experience with working too much I think that sounds like it would be great for you.
 

Tonkaman

Well-Known Member
Location
West Jordan
And then talking to this boss he says it’s hard to get the employees to show up on time, sometimes no-call/no-show at all, and then they will show up the next day.
That’s just island life. Everyone I’ve known that has done work in Hawaii has been recruited there because the local population can’t be bothered to work when the surf is good. That’s why so many general contractors doing work there are from the mainland and bring all their own guys.
 

NYCEGUY01

Well-Known Member
Location
Willard, UT
Cup holders....
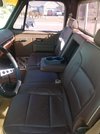
I bought this seat a while back for my 85 squarebody but ended up using buckets instead. Seemed like it would be a good upgrade for the 78 stepside.
Its a rear seat from a 2018 crew cab with the Hi country package. Dark brown leather with tan trim.
The brackets were pretty simple to make and its mounted on factory squarebody sliders so it bolts in and out of the cab like the factory seat...
So far Im liking it...


seat.jpg
 

N-Smooth

Smooth Gang Founding Member
Location
UT
Between having a cold and a sore back I slept like garbage last night so I didn’t work today. After sleeping in late I decided it’s a perfect opportunity to do stuff I hate doing on my own time 🤣

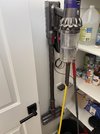
I put an outlet in the pantry to charge the sucky-sucky thing. Pretty easy since there’s one on the other side of the wall but also quite nice to have.
BFA23A72-58DF-40C1-BF98-2538F844A04F.jpeg
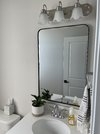
Hung a mirror in the half-bath. The wife told the builder she didn’t want the glued-on, giant mirrors that came with the house. I just nodded and rolled my eyes. This one would’ve been a super easy install if the mounting holes weren’t 1/2” low on one side. I never thought I’d have to check something like that. Oh well, it looks nice I guess.
7DD7ED7D-F411-4EAB-972B-5BDCF7F71F34.jpeg
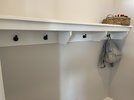
Added hooks under the shelf the mud room. Nothing crazy but still relatively time-consuming to do it right.
A64508A8-BD1E-48B0-BAB4-B33B4BDB04C9.jpeg
Happy wife happy life or whatever. She said thanks and I just said thank me later 😉
 

zmotorsports

Hardcore Gearhead
Vendor
Location
West Haven, UT
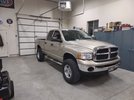
I was able to finish up the 2005 Dodge 2500 last night.

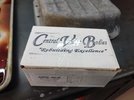
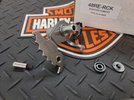
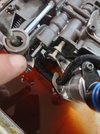
Rooster comb/bullet kit from Central Valve Bodies arrived. Donny Lester is who I believe created the bullet for these many years ago and that is who I purchased the kit from off of eBay.
d1.jpg


Kit comes with the bullet and spring to replace the ball and spring detent that damages the very outermost area of the bore. It also comes with a new rooster comb as the one in this truck had excessive wear in the area at the Park position. Also came with a new seal, washer and e-clip.
d2.jpg


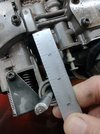
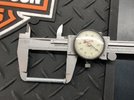
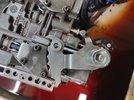
Saw this little trick on YouTube where a guy used a piece of 3/16" brake line to create a means of holding the bullet and spring in the bore while lining everything up to install the rooster comb. Pretty slick trick and since I had about a 6" length of 3/16" brake line left over from the square body I did a couple of weeks ago I thought I'd give it a try. Works fantastic. Figured I needed just under 2" long length of tubing.
d3.jpg


Ended up just shy of 1.9".
d4.jpg


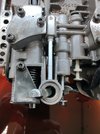
Newly made tool holding the bullet and spring in the bore.
d5.jpg


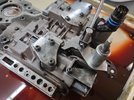
Next this allowed me to ensure the throttle valve lever was properly aligned with the stop and the manual valve was aligned to accept the lever from the rooster comb.
d6.jpg


Next set the rooster comb in place and when everything is lined up press downward and it pushed the piece of tubing off the detent bullet and the rooster comb takes its place. Then use a magnet to grab the tubing from under the rooster comb and finish assembling the rooster comb with seal, washer and e-clip.
d7.jpg


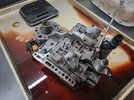
Don't forget to install the parking lever before stabbing the valve body back into the transmission. I also applied a small amount of Sil-glyde to the o-rings on the electrical connector to aid in assembling through the bore in the case without tearing or damaging the o-rings.
d8.jpg


I lubed up the accumulator piston with some petroleum jelly and put it in the bore and then the accumulator spring in place on the valve body then it is ready to install.
d9.jpg


More pictures to follow.....
 

zmotorsports

Hardcore Gearhead
Vendor
Location
West Haven, UT
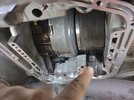
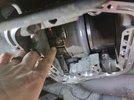
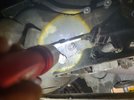
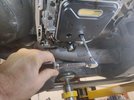
Prior to installing the valve body I figured I would check the band adjustments. With 164k it couldn't hurt. Both front and rear bands were pretty close.

Here is the rear band adjustment.
d10.jpg


Front band anchor.
d11.jpg


Front band adjustment on the outside of the case.
d12.jpg


After the valve body is installed and torqued to spec. I installed the new filter and then the pan and buttoned everything up.
d13.jpg


Everything back together, fluids filled and back from a road test and ready for the owner to pick up.
d14.jpg


Thanks for looking.

Mike
 
Top