Willys Crawler 2.0 aka The Bastard

Greg

Make RME Rockcrawling Again!
Admin
The LQ4 looks like it'll fit just fine! Seems to be plenty of room for the radiator and fans. I'll probably run the Camaro water pump, balancer and accessories just for a little more space. Currently has a truck balancer and oil pan on it.

Started a separate thread to document the engine rebuild.
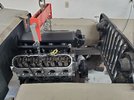
20210218_145827.jpg


Here's the oil pan and the frame.... the engine could come up a bit more and still clear the hood. The truck pan is a couple inches deeper than the Camaro oil pan. Hopefully the transmission will fit without hitting the floor and I can get close to a flat belly. That also depends on where the t-case ends up sitting!

20210218_151109-X2.jpg
 

Greg

Make RME Rockcrawling Again!
Admin
I've been juggling a few different things, not enough time in the day to make any real progress. Anyway, got my floor plates and was able to move forward on the cage build. I started by bolting the floor plates down and welding the tube in place, then worked up to the windshield frame and the 'A'. I choose to make the A out of 1 5/8" and spread it pretty wide, hoping it will beef up the A pillar substantially. I like how wide & beefy it looks.

i-h7PXWJX-X2.jpg

i-2SSKqp6-X2.jpg


And the side view, the A pillar is really kicked back... and I like it! :D
i-5Pm45cw-X2.jpg
 

Greg

Make RME Rockcrawling Again!
Admin
Does that give you enough clearance for your forehead when you're sitting in the seat? Doesn't feel like you're in a Miata?

I like how far back the B pillar is.

Tons of room! It helps that I cut the floor back 6" into the bed of the tub, so everything can move rearward and take advantage of the stretch at the door even more.

I've been fitting up the seat, sitting in it and triple checking head clearances. I have plenty of space to move around, even if things get rowdy. Leg room is good and the seat feels like it has good support of both legs and back.

The B pillar back that far is another product of moving things back. Opening up the seating area really makes a difference.
 

Bart

Registered User
Location
Arm Utah
I like those bungs with the hex ends. Sure makes tightening jamb nuts easier. You are moving quickly on this.
 

Greg

Make RME Rockcrawling Again!
Admin
I like those bungs with the hex ends. Sure makes tightening jamb nuts easier. You are moving quickly on this.

Yeah, the adjustments with the hex ends sure are easy. I feel like I'm getting too many things going on at once these day, the engine, cage & suspension are each big projects on their own. Hopefully on my next round of days off I can get the engine in the machine shop and out of my way, then focus on the cage and get the links started. It would be nice to have a roller within the next few weeks, but I'll be waiting on shocks($$$) for awhile. I'd like to add some big poly bump stops to the frame, just in case there's ever a shock failure and to help with bottoming out. I'll set the poly bump stops up so the tires are close to the sheetmetal and give them a little room to stuff before tires rub.


^too quickly, he’s making me look bad 😂

Well, hurry up! :cody:
 

Greg

Make RME Rockcrawling Again!
Admin
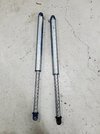
Speaking of the suspension, I picked up a pair of used Fox 2.0 14" air shocks from @Jinx and @Paul R helped get them in my hands. I'm planning to use them for mockup and fitment. The ORI's that I'm planning to run have a wider shock mount spacing than these Fox shocks. Maybe I'll just add a spacer or 2? I'll probably keep these around in the future as spare/backup shocks, just in case.


20210216_183132.jpg
 

Greg

Make RME Rockcrawling Again!
Admin
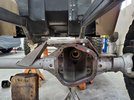
So the front axle upper link... I cut up a truss that I didn't use for the rear axle. My plan is to weld it all together and secure it to the axle at the tubes. I might add some additional plate to the axle housing itself, long as I can ensure a good, strong weld to the cast.

I really want the front upper link on the drivers side so I can run the exhaust down the passenger side.

The truss should clear the frame at full bump how it is. Any input?

20210206_162716.jpg

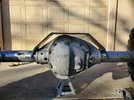
Also worked on the rear axle, welding the beefy truss into place. I had it built by a local fab shop to my measurements, keeping it as close to the housing for as much up travel as possible. It's 3/8" plate, 4 1/2" wide.

20210204_160355.jpg
20210206_143208.jpg

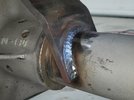
I also welded some tie downs onto the rear axle, they're a little low to clear bumpstop pads... but I think they're too low and going to get beat up.

20210217_140253.jpg
 

Pile of parts

Well-Known Member
Location
South Jordan
I really want the front upper link on the drivers side so I can run the exhaust down the passenger side.

The truss should clear the frame at full bump how it is. Any input?
Mine is the opposite of yours. Passenger drop axle with a very similar, simple, truss. The outside leg on my truss actually comes down straight where the tube presses into the pumpkin rather than flatten out over the old spring mount. My upper link is on the passenger side as the exhaust runs back on the driver's side. There was not much room for the truss, pan hard mount, lower link mount and ORI mount on that short section of tube. I mounted the pan hard mount on the front of the axle tube and even angled it forward for more clearance. The lower link mount is mounted flush with the bottom of the axle tube. It is boxed top and bottom and the top essentially became the mount for the strut. Everything is packaged im there tightly but after a ton of cycling things, I felt confident and went for it. Turned out great. Sorry I don't have a better picture. Hopefully you get the idea.

IMG_20200314_154119960_HDR~2.jpg
 

Greg

Make RME Rockcrawling Again!
Admin
Mine is the opposite of yours. Passenger drop axle with a very similar, simple, truss. The outside leg on my truss actually comes down straight where the tube presses into the pumpkin rather than flatten out over the old spring mount. My upper link is on the passenger side as the exhaust runs back on the driver's side. There was not much room for the truss, pan hard mount, lower link mount and ORI mount on that short section of tube. I mounted the pan hard mount on the front of the axle tube and even angled it forward for more clearance. The lower link mount is mounted flush with the bottom of the axle tube. It is boxed top and bottom and the top essentially became the mount for the strut. Everything is packaged im there tightly but after a ton of cycling things, I felt confident and went for it. Turned out great. Sorry I don't have a better picture. Hopefully you get the idea.

View attachment 135117

That does help! I understand what you're describing. I think if I can reinforce my joints well enough, tieing it into the tubes on both sides will work and provide plenty of surface area. I may weld that flat plate onto the cast spring perch for even more strength, as well as onto the top of the housing.
 

Mouse

Trying to wheel
Supporting Member
Location
West Haven, UT
I like to build the axle mounts and links with the axle in full bump rather than ride height. I've seen people go as far as using scrap metal to hold the axle up against the frame (tack welded) - allow link building and such around the engine, trans and frame. The best advantage with this method is everything is built clear at full bump rather than working later to remove the obstacles.

Any plans to weld the tubes to the center differential housing?
 

Bart

Registered User
Location
Arm Utah
I'm glad you mentioned that you were going to tie into the cast housing. I didn't do that originally on the rear of the Willys buggy and ended up ripping the truss off the axle. That was an expensive lesson and why I will always tie the truss to the housing.
 

Greg

Make RME Rockcrawling Again!
Admin
I like to build the axle mounts and links with the axle in full bump rather than ride height. I've seen people go as far as using scrap metal to hold the axle up against the frame (tack welded) - allow link building and such around the engine, trans and frame. The best advantage with this method is everything is built clear at full bump rather than working later to remove the obstacles.

Any plans to weld the tubes to the center differential housing?

Yeah, I plan to build the links and track bar at full bump... just working on the trusses first. I need to figure out where the shock mounts and shocks will end up as well.

I'd prefer to have the engine/trans/t-case in place before building the links, but I don't know that its going to happen.

I wasn't planning to weld the tubes to the center section, but if I was going to now would be the time. It wouldn't take much... just one more thing. The rear wouldn't be fully welded, as the truss is already in place.

I'm glad you mentioned that you were going to tie into the cast housing. I didn't do that originally on the rear of the Willys buggy and ended up ripping the truss off the axle. That was an expensive lesson and why I will always tie the truss to the housing.

Yeah, I think tieing it all in is smart... spread those forces out over more area, reducing the stress.

I remember seeing the front upper link mount starting to tear of Parker Garrets (RIP) buggy at a UROC event in St George years ago. The link brackets were welded right to the housing and started to peel back. He was between courses and I spotted it while walking by. He was able to repair it before the next course and avoid a catastrophic failure.
 

Greg

Make RME Rockcrawling Again!
Admin
I was planning to knock out the rest of the roll cage on my next round of days off, but caught a pretty nasty cold and haven't been feeling well, so that didn't happen. Today I was feeling decent enough to spend some time out in the shop with the Willys. I didn't really do too much other than dropping the Flatty down to full bump and checkout out the engine, suspension & steering clearances.

I did recieve some needed parts to help keep setting this thing up.... weld-in engine mounts & some stainless steel shorty block hugger headers from Ebay. The headers were only $70! I wasn't sure they would clear, as the frame is super tight but they look like they'll be just fine. I used a similar header on my El Camino and they've been good so far.

i-BtJZ58P-X2.jpg


i-SCzRnRS-X2.jpg


I dropped the mockup 5.3 into the engine compartment to fit it all up. I'm hoping to run the exhaust on the drivers side under the oil pan and connect with the passenger side, then out the back. That will give me room for the upper link and driveshaft on the drivers side.

i-gHBJtCP-X2.jpg


i-5TJLPLm-X2.jpg


With the Bastard at full bump, I checked clearance at the front axle & truss, rear axle & truss and laid out where I'd like to have the urethane bumps sitting. I'll be running ORI's that have a built in hydraulic bump stop, but I want these as a fail safe. The rear axle tube clears the frame with 1 3/4" room, the truss clears the floor of the tub with 1", etc. The front has more frame clearance with the big kickup.

i-KBRXR5b-X2.jpg


i-Hwf2Pc5-X2.jpg


i-MWxdkbd-X2.jpg


i-rwnqGgD-X2.jpg


The engine isn't leveled or perfectly centered, just mocked up... but it's good enough for now. There is just enough room at full bump in the front to squeeze the truss in there, in addition to the upper link.

i-qzSWx47-X2.jpg
 

Greg

Make RME Rockcrawling Again!
Admin
I picked up some killer WFO Customs highsteer arms from @STAG but after bolting on in place, they won't clear the frame at full bump. I need to find a high steer arm that will line up with the factory TRE hole, so I can run the steering mount lower. Any ideas? These arms won't work like that.

i-cCB7cnJ-X2.jpg
 

Greg

Make RME Rockcrawling Again!
Admin
Looking at these arms - Barnes 4WD High Steer arms - another customer asked the same question....

Q: "I'm wanting to make sure these arm will work on a 78-79 Ford High pinion Dana 60 axle with stock knuckles? Im wanting to run double ended full hydro and use the arms in a double shear setup with my stock tie rod holes."


A: If it's a kingpin style dana 60 then they should work for you to set up some sort of double shear set up with DOM sleeves in between.

Now I'm not using a '78-79 axle, but a newer Kingpin axle. I believe the knuckles are still the same. Any reason those arms wouldn't work for me?
 
Top