

You are using an out of date browser. It may not display this or other websites correctly.
You should upgrade or use an alternative browser.
You should upgrade or use an alternative browser.
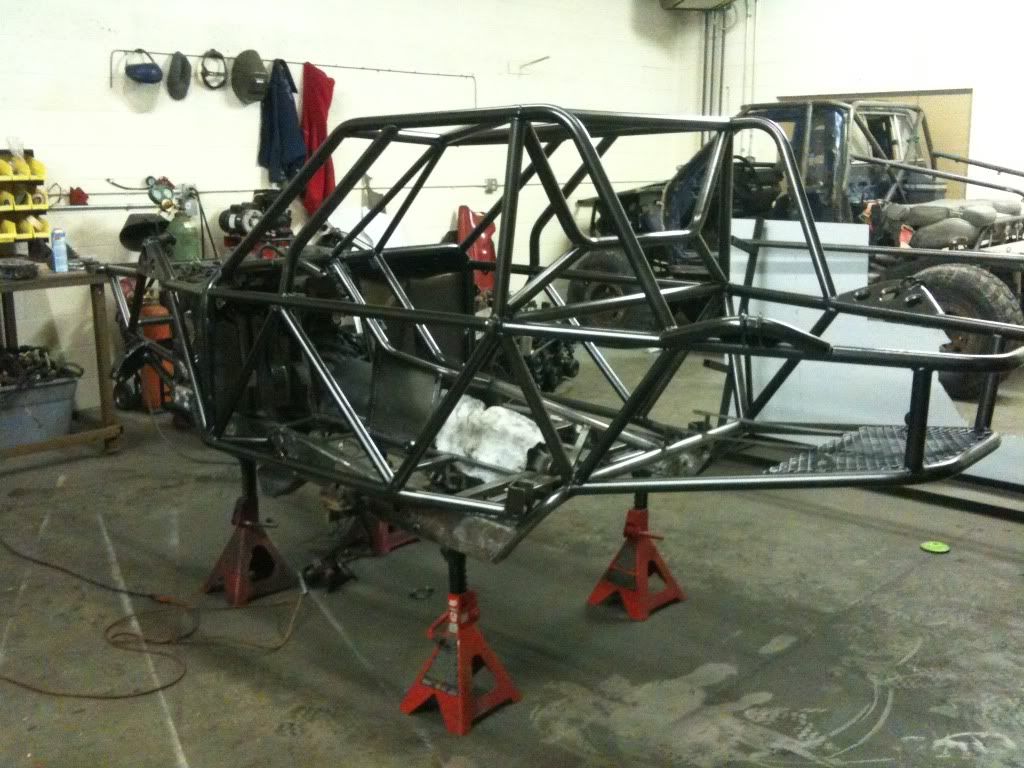
Another toyota build....
- Thread starter Panos
- Start date
sorry off topic put I have heard you put together a audio system for crawlers do have some info?
Like this one?
")
http://www.rockymountainextreme.com/showthread.php?t=78709
exactly thanks
Panos
12Volt Specialist
- Location
- Salt lake City
sorry off topic put I have heard you put together a audio system for crawlers do have some info?
yes, just like the link carl posted up. If that one is sold give me a call. Ill hook you up, I just got shipment in.
Panos
12Volt Specialist
- Location
- Salt lake City
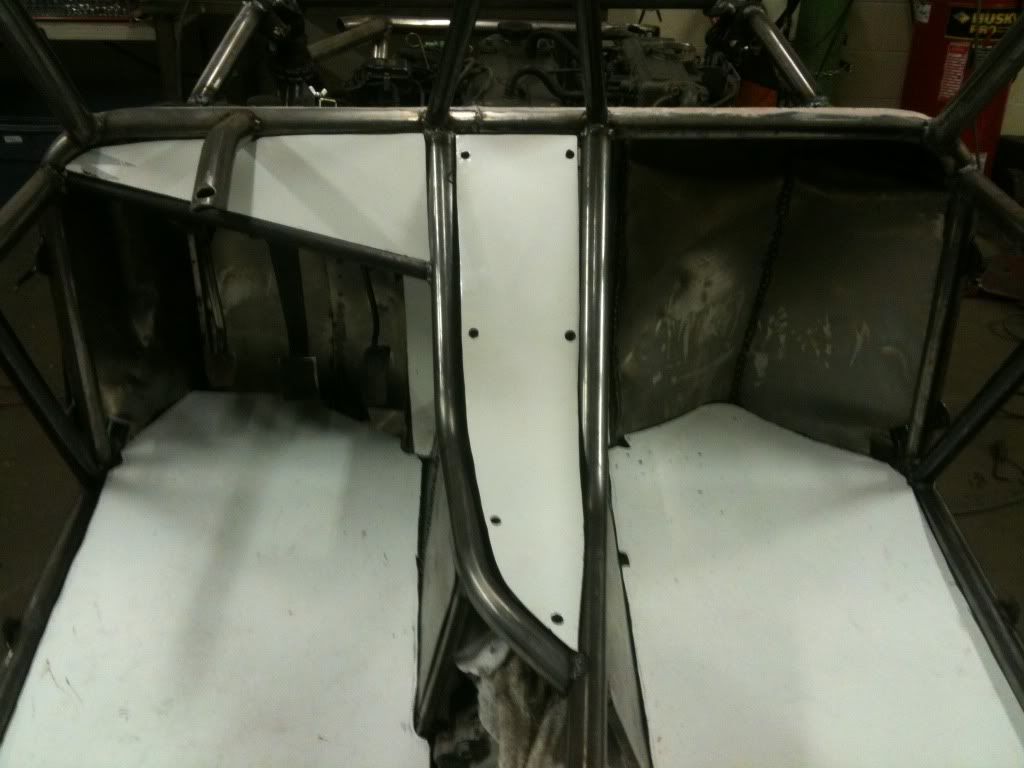
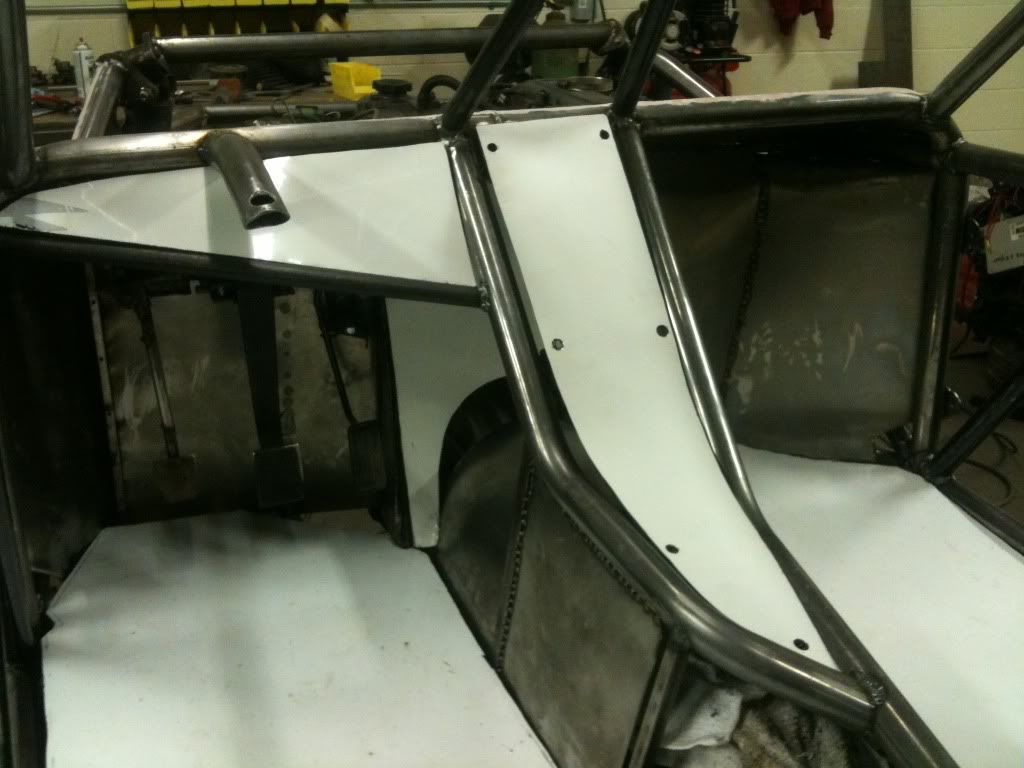
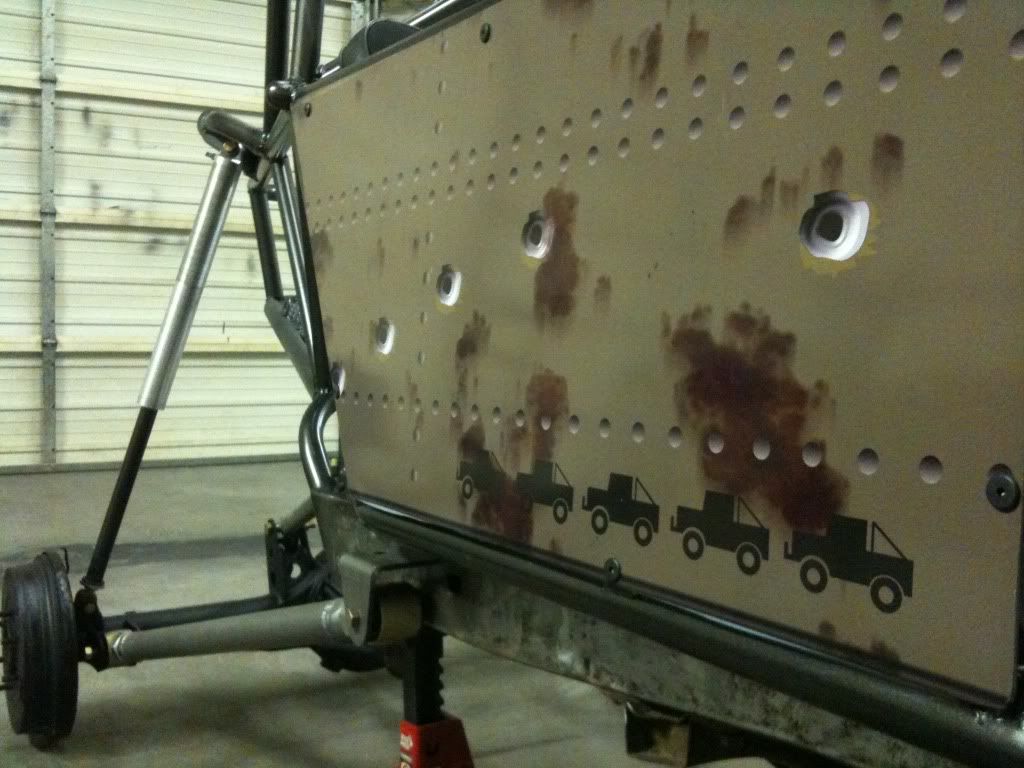
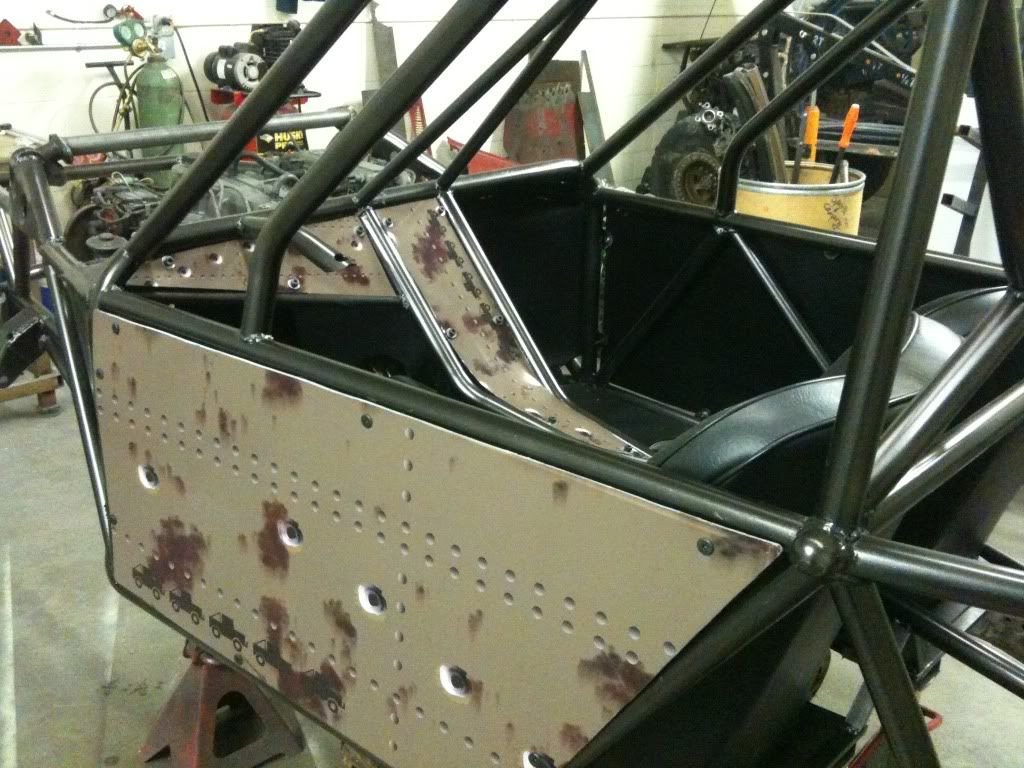
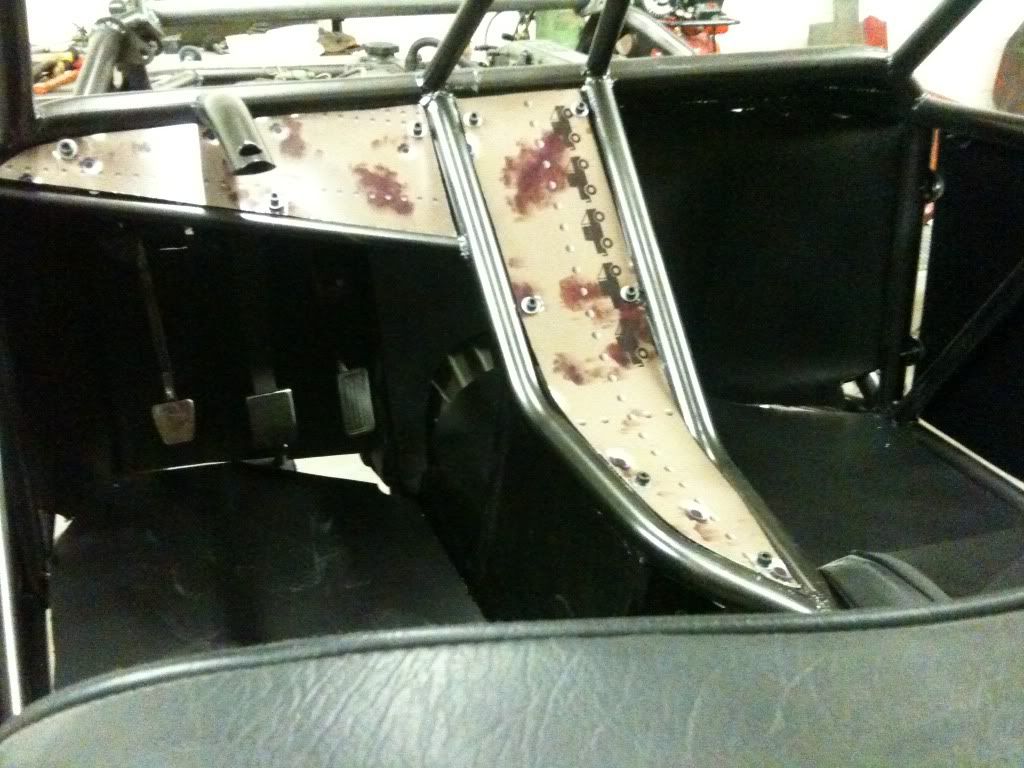
worked on my dash and center section, i guess you can call it that. I used a material called alumilight. It is like DiBond but instead of having a solid core it has a waffle like core. it is about a 1/4 " thick and super strong. more so than DiBond. I probably should have used it on the floor..oh well. the center section required a lot of tweaking, it has a good bend in it and also twists at the end. if that makes sense. I need to cut some holes for the shifters and do some sort of boot system still.
iamsparticus
Take your Rig to the Edge
- Location
- Ogden,Ut
looks cool, i like how its all original where do you find all these crazy materials?
Panos
12Volt Specialist
- Location
- Salt lake City
grandmaster
Let the build Re-begin
- Location
- St. George, Utah
Where's the shop? I'm going to try and run by sometime this week.
Panos
12Volt Specialist
- Location
- Salt lake City
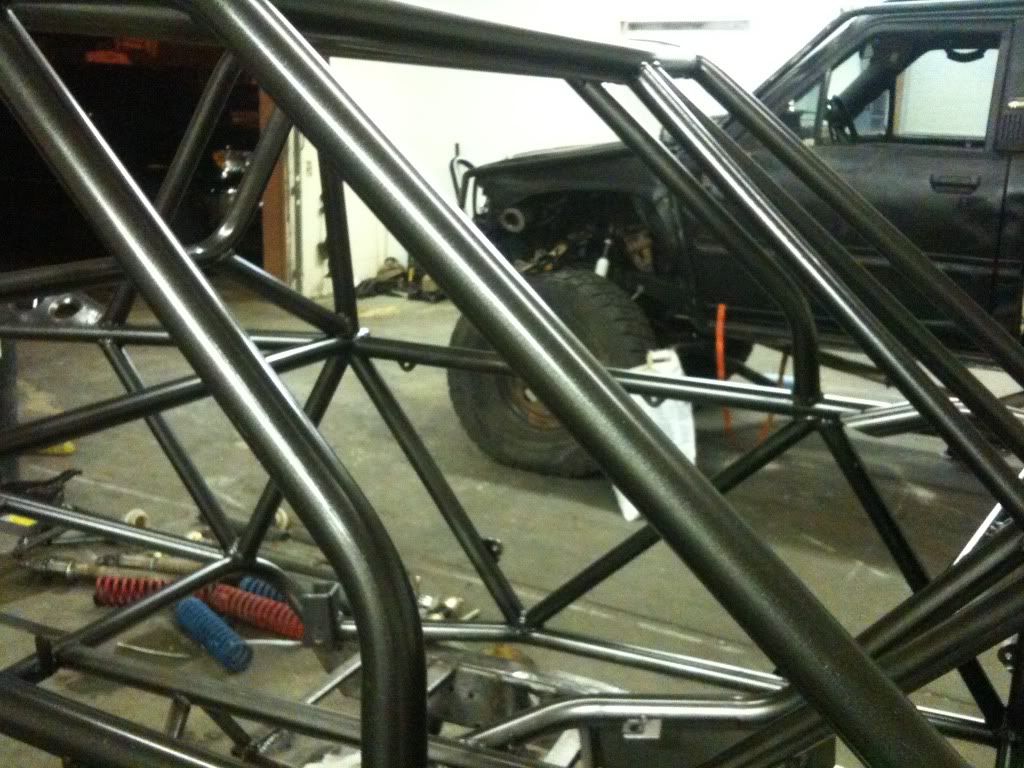
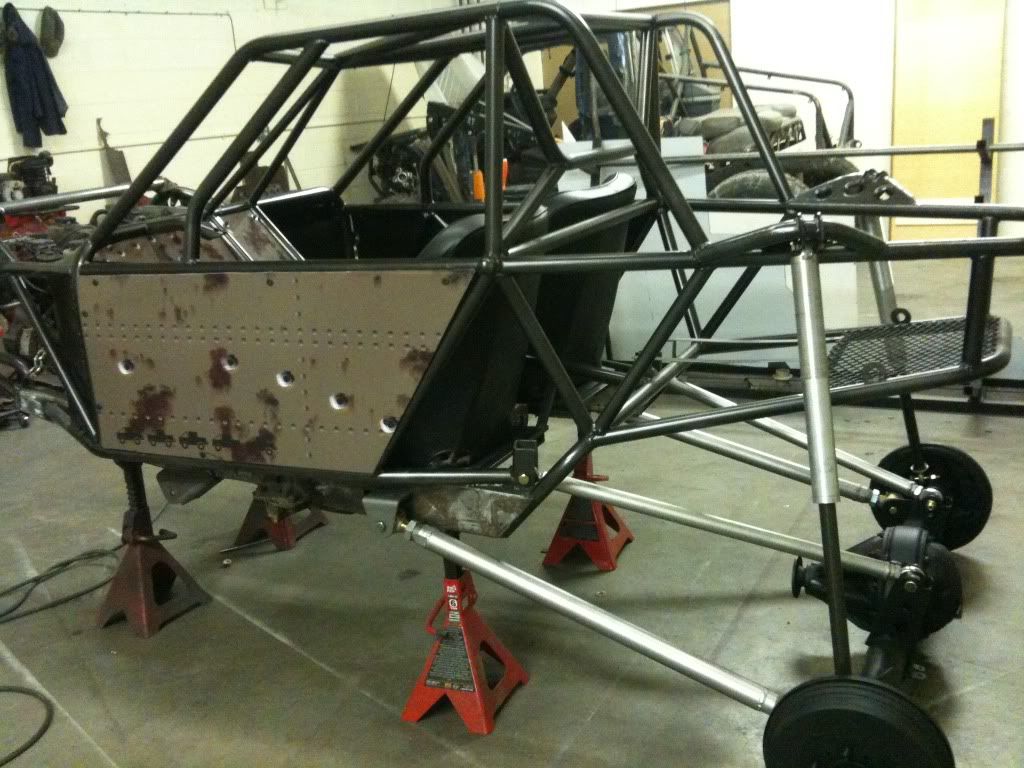
painted tonight. I ended up going a different color. its a black with a semi metallic flake in it. I am sure the pics wont do it just, but I really like how it tuned out. I ran out of paint before I could finish.
Panos
12Volt Specialist
- Location
- Salt lake City
go for it, I got it at lows. this i the color, I tried about five similar colors but ended on this.
http://www.rustoleum.com/CBGProduct.asp?pid=30
http://www.rustoleum.com/CBGProduct.asp?pid=30
mikeytheboarder
Registered User
Nick wow I had no idea your a mad scientist now???? You move to St Geezy and this is what happens??? I am very impressed you have done a great job on this and I can't wait to see it. Looks like I will have to come to Moab this year just to see this thing. Good job bud!!!
Panos
12Volt Specialist
- Location
- Salt lake City
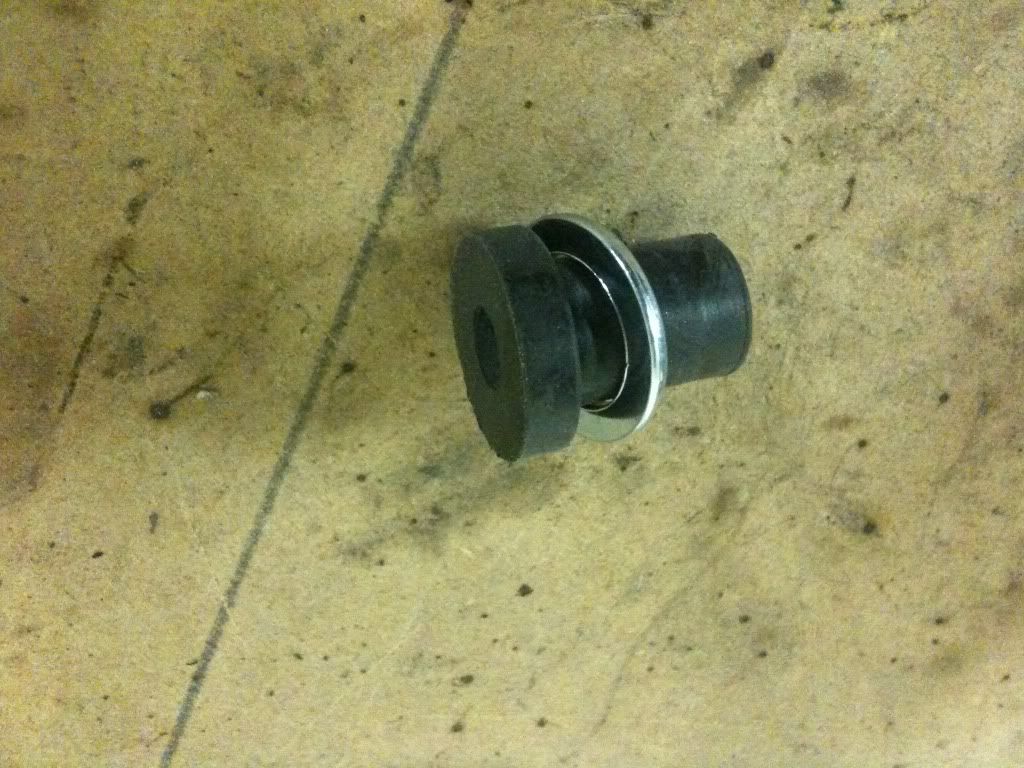
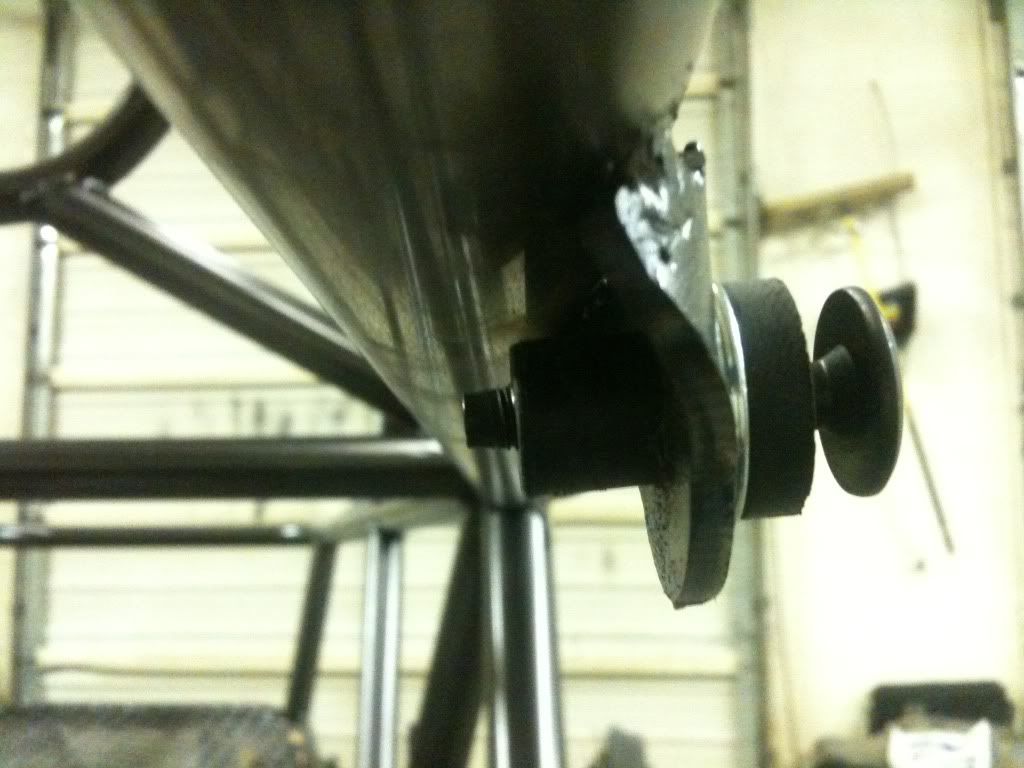
I have been in SLC for the past week and a half and have not made much progress. But I did get to make my panels and have them wrapped. I did the dash panels the same wrap. So I had a dilemma when it came time to mounting my panels. I have never done it before and didn’t know how others were doing it other than the kits from Polly and alike hardware. I knew I wanted some sort of rubber washer or something between the tab and the panel to cut down rattles and other vibration noises. So I went to ACE and looked around for about half an hour and found the perfect! Solution. What I found may not be new to anyone but I thought it was pretty trick. it is a rubber sleeve with threads inside and a washer like head on it; all rubber except the treads. The rubber pushes through the tab all the way until the head stops it and creates a flat rubber surface for the panel to sit against. Then I marked and drilled the holes in the panels.
Now the cool part about these is that when you screw a bolt into them they expand on the side through the tab creating a really solid way to mount the panel. i have pictures I am sure that all may sound a little confusing.
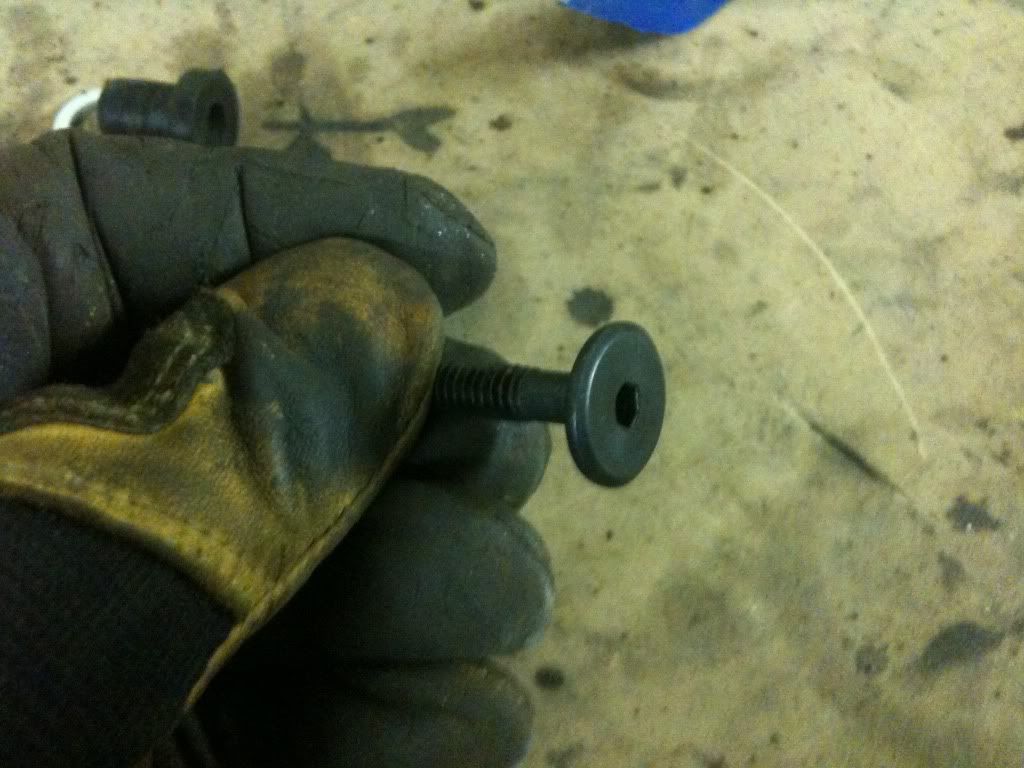
Ok, don’t laugh. but the hardware I used is called furniture hardware used in tables and other such furniture. I decided on this style of bolt because it had a large diameter head that was an Allen type and was incredibly flat. The size was 1/4 20 X 2" even came black oxidized.
So in conclusion this way of mounting the panels turned out beautifully! And works so well I would recommend it for anyone.
Now the cool part about these is that when you screw a bolt into them they expand on the side through the tab creating a really solid way to mount the panel. i have pictures I am sure that all may sound a little confusing.
Ok, don’t laugh. but the hardware I used is called furniture hardware used in tables and other such furniture. I decided on this style of bolt because it had a large diameter head that was an Allen type and was incredibly flat. The size was 1/4 20 X 2" even came black oxidized.
So in conclusion this way of mounting the panels turned out beautifully! And works so well I would recommend it for anyone.
Panos
12Volt Specialist
- Location
- Salt lake City
sorry jeep guys, but this is an all toyota build so i had to put a jeep tally on the side hahaha
I always used a dzus type fastener like these.
http://www.jegs.com/i/Moroso/710/71350/10002/-1?parentProductId=748742
into these
http://www.jegs.com/i/Moroso/710/71400/10002/-1?parentProductId=748742
to attach my body panels.
Your way looks good also. Love the wrap and the rig is looking good.
http://www.jegs.com/i/Moroso/710/71350/10002/-1?parentProductId=748742
into these
http://www.jegs.com/i/Moroso/710/71400/10002/-1?parentProductId=748742
to attach my body panels.
Your way looks good also. Love the wrap and the rig is looking good.