wheelewagon
Active Member
- Location
- West valley
This is my write-up on doing A ram-assist / Hydro-assist on two different JKU's. With the help of Skippy with alljeep.com we did one on My 2012 and on Mrs skippy's 2008. Although almost the exact same, there are A few differences in the two. When I was searching around on how to, I didn't find anyone who has done it on their 2012+. We didn't reinvent the wheel here, but hopefully I can give you some extra tips and tricks I did and found along the way.
NOTE'S
PARTS
tools
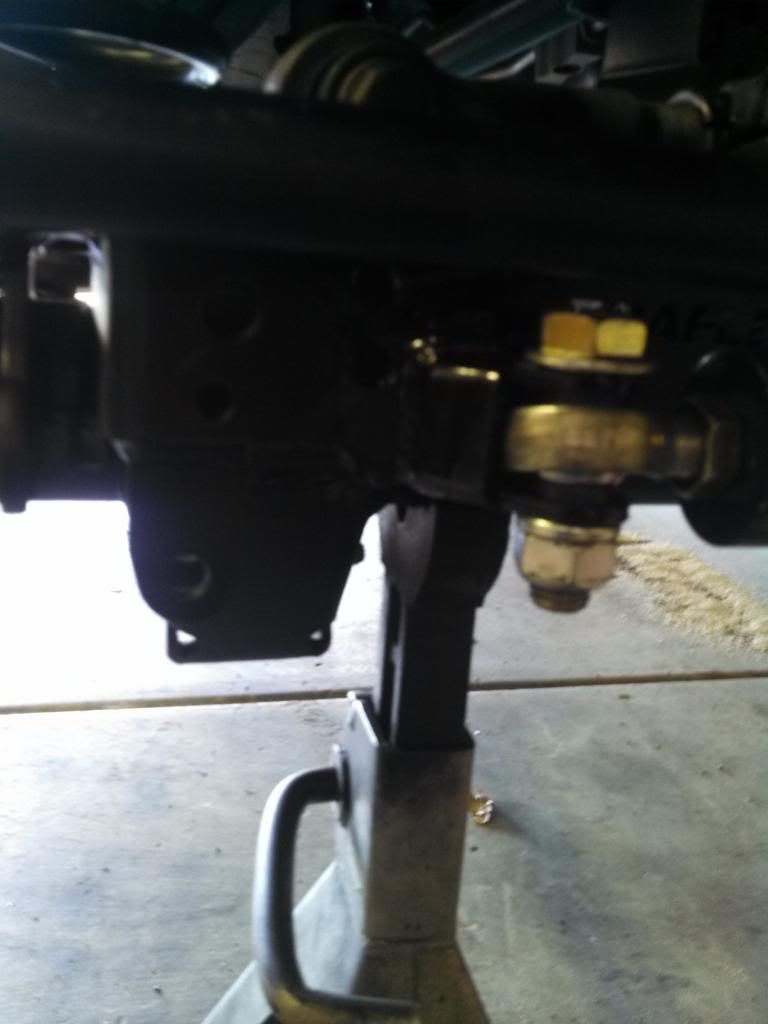
Well lets get started here. Sorry in advance for any crappy pictures or anything. Let me know if there's anything you'd like me to try and get A better pic of, or better explanation on. So 1st thing is get your jeep parked on A good flat surface with your wheels straight (not your steering wheel, seeing how we all know your wheel straight may not match your actual steering straight). Get your front end up on jack stands. Note: We put it up on jack stands so we could remove the tires to be able to work on the knuckles because we flipped our steering. This will also be good when bleeding the system.
Now go ahead and open up the hood. Remove your intake tube, slide up and out your coolant reservoir, and disconnect your battery if you desire. I'm to lazy so I didn't, but is usually A good precaution especially when welding. Moving all of this just gives you more room to work and makes life easier.
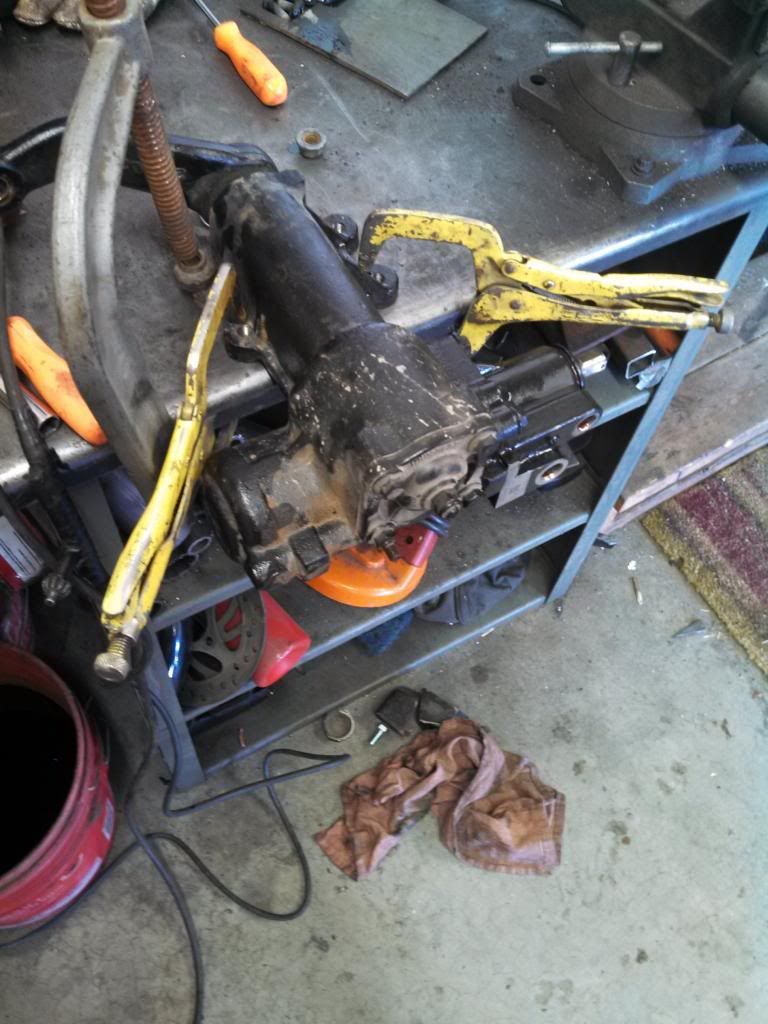
With that removed you can now remove your power steering box. You do this by disconnecting the 2 lines running into the top you can either access from the top kind of or through the fender if you have your shroud removed. You may want to mark them to make sure they don't get switched on reinstall. But I believe the 2 are different sizes so you shouldn't get them switched. There is one bolt that holds tension to your steering shaft. You may have to rotate your steering wheel 180 degrees to access it. Critical note here, make sure if you do rotate your steering, after you put your box back in and get it all hooked up you rotate it back. Then you can unbolt the 4 bolts that run through your frame to the box in the driver wheel well. 2 of them are behind your spring you may get lucky like me and not have to move anything to get to them. Or you may not like Skippy who we had to pry his spring back to get to them. You can also flex your suspension one way or the other to access them as well. If you have 2 people you can do the lines and the mount bolts at the same time. Now from up top with some twisting and turning you can pull your box up and out. You can try to take some precautions to keep the power steering fluid from running all over the place here but your probably going to still make A mess.
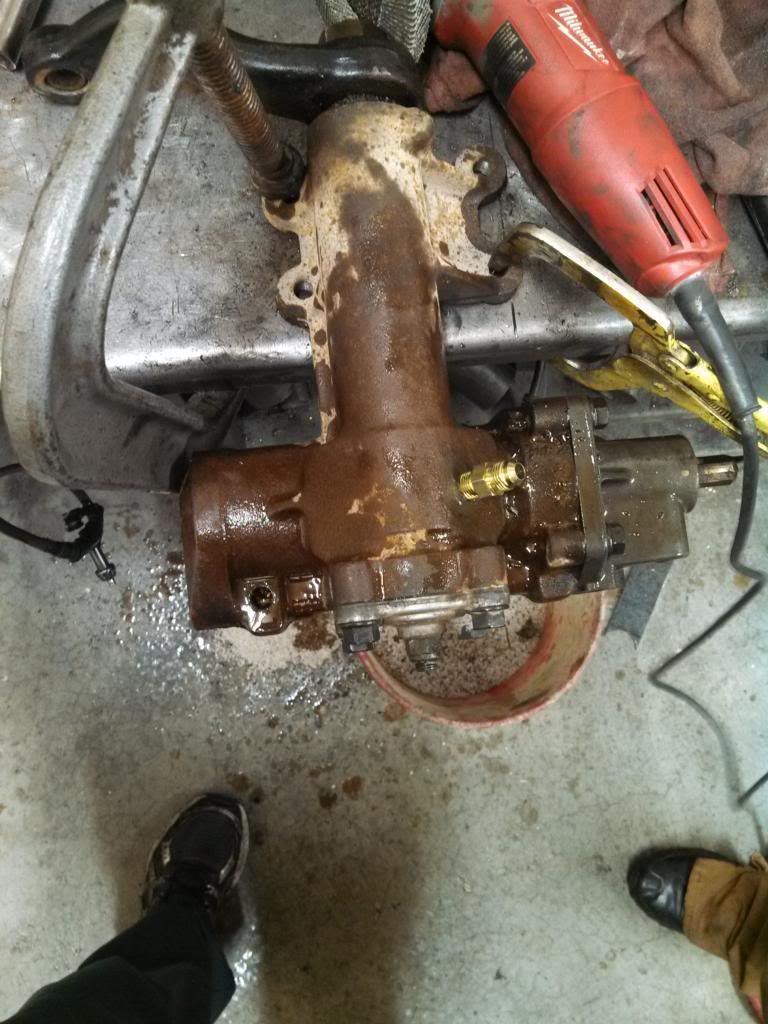
Now you can mark and drill your box. We found it really easy to just clamp it down to A flat bench. This way you can drill both holes in one clamped position. The first hole you have to drill is on the opposite end of your steering shaft on the little square face. The second is on the big chamber just under the the cap with four bolts and the back lash screw. Your goal on the first hole is to drill center on the square face and center line of the chamber radius you can see that runs behind the square face (If that makes sense:-\). The second hole looked to me like you just have to drill any where on the big chamber. We drilled ours about center down the chamber from how it sits on the vehicle and about 45 degrees from the drive shaft out put. It is A good idea when drilling these to first center punch them, then drill them with A smaller drill, then drill them with the 7/16 drill. On the flat face you can see how much cast you can drill before breaking all the way through the body. I taped my drill to know how far I could drill safely. Here's another key to this. There is more cast you can drill through on the newer jk box then the older, so pay attention! The second hole just breaks through to the open chamber. We used an air hose to keep blowing the chips away from the holes to keep them from getting into the box. After we drilled we also stuck the nozzle into one of the stock port holes, plugged the others with our fingers and gave it A good blow turning the open holes into power steering fluid volcanoes. But, it got the chips out.
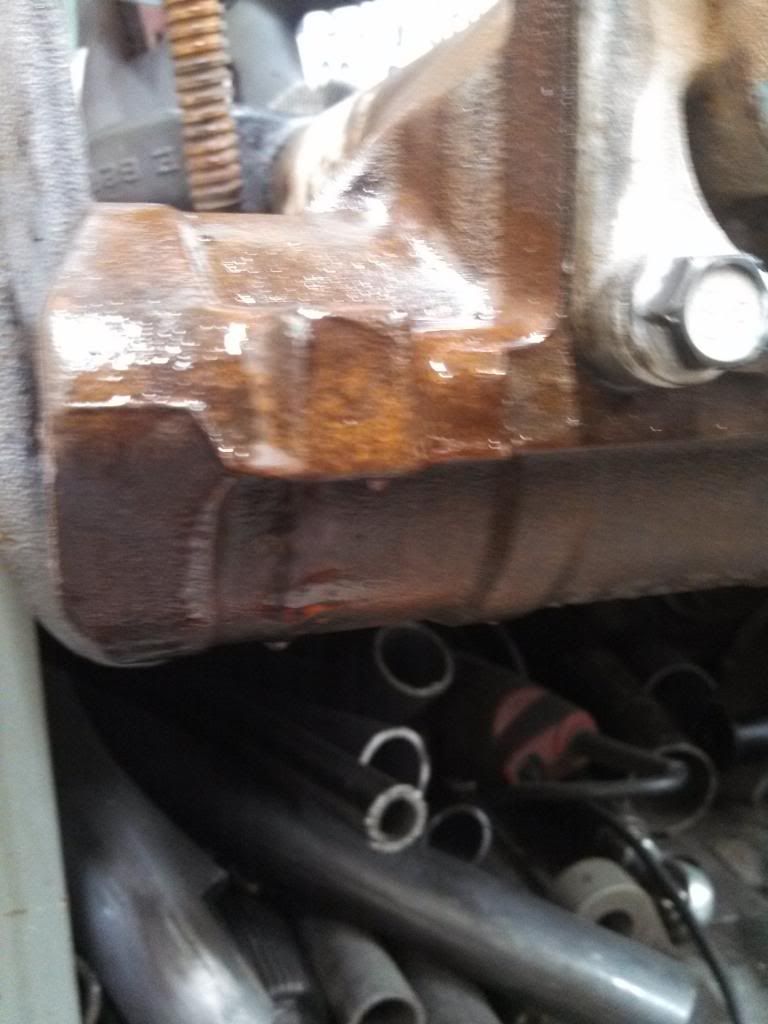
This pic is of the newer jk box
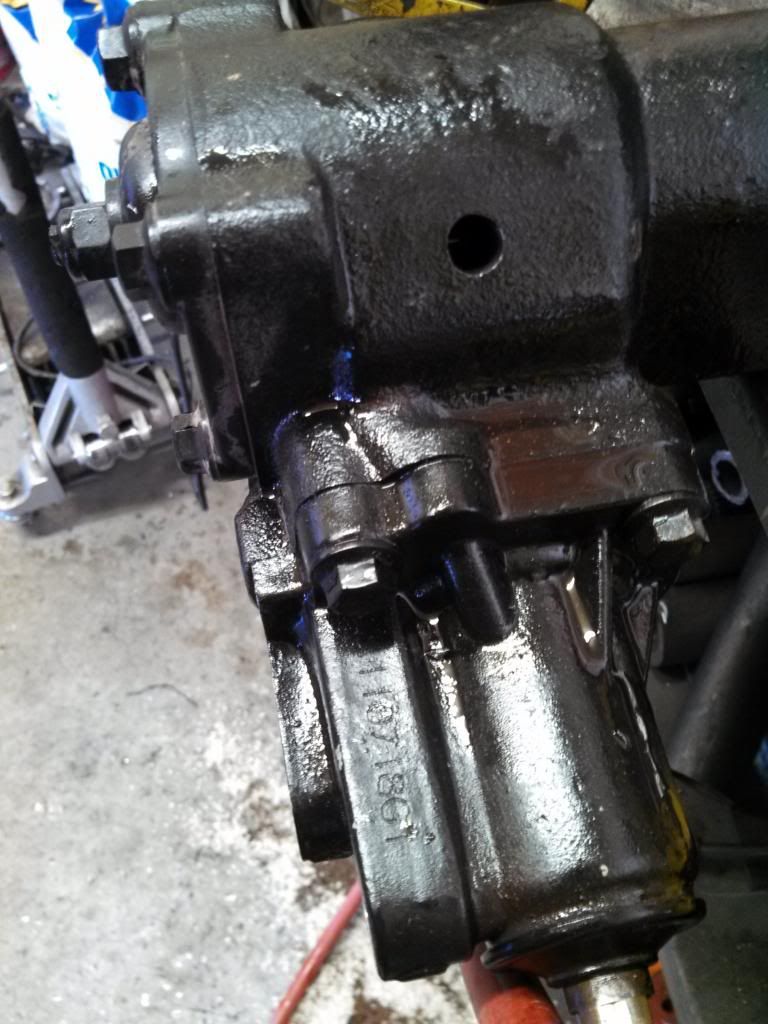
this of the older
The older box is flat after the chamber you drill into where as the newer one has that same square shape that goes on the other side of the chamber as well
here's some pics of the drilled holes
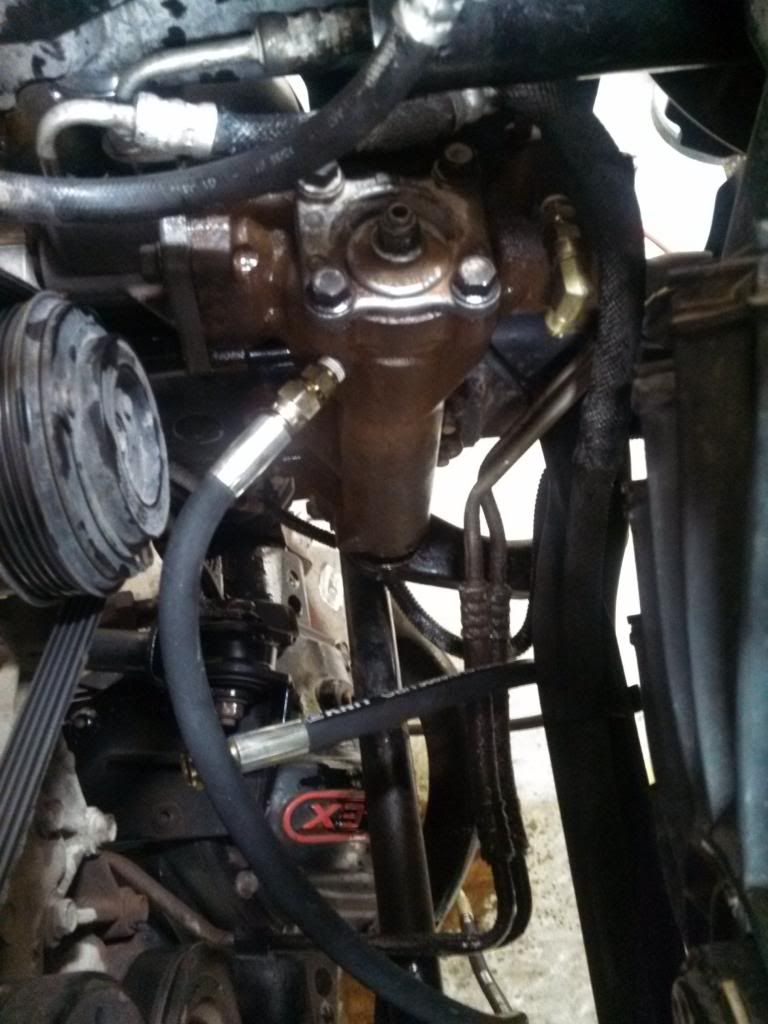
After drilling the box, you can tap the 2 holes. We put grease on the tap to help hold onto the chips from going into the chambers. Once you've tapped them with A normal 1/4 pipe tap, you can modify that tap or have another one you've ground down the length of threads on to tap the box deeper. Once you've done that you can install the fittings and remount your box. The fittings and lines we used came in the kit. The kit comes with some 90 deg fittings you may want to use to help clear the line from the coolant reservoir. I know you're not supposed to use those 90 fittings because they can be restrictive, but they came in the kit and am not to worried about it. I was able to squeeze my reservoir around the line, but on skippy's wife's we used one. Or you can take your lines int evco or somewhere and have them cut the straight fitting off and put an angled jic fitting on.
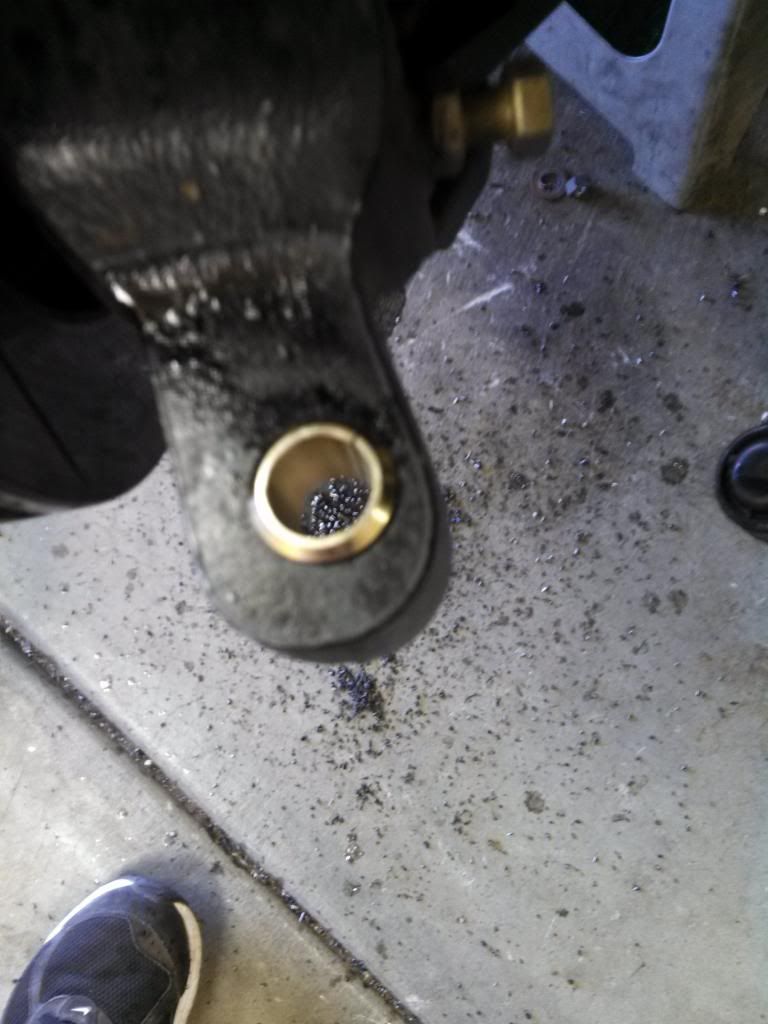
At this point we flipped our steering around to the top side of the knuckles. So skip this paragraph if you're not going to. Remove your tires if you haven't already, unbolt your stuff out of your knuckles, drill out the tapers with the 7/8 drill bit, put the new taper inserts in, and put your stuff back into the top side of the knuckles. Pretty quick and easy. The other thing we did at this time was move the track bar on the frame side to the furthest down hole, and on the axle side to the furthest up hole. Don't tighten down the nuts on the tie rod yet because you'll be removing it again to finish welding on your ram mount (unless you use A clamp style mount).
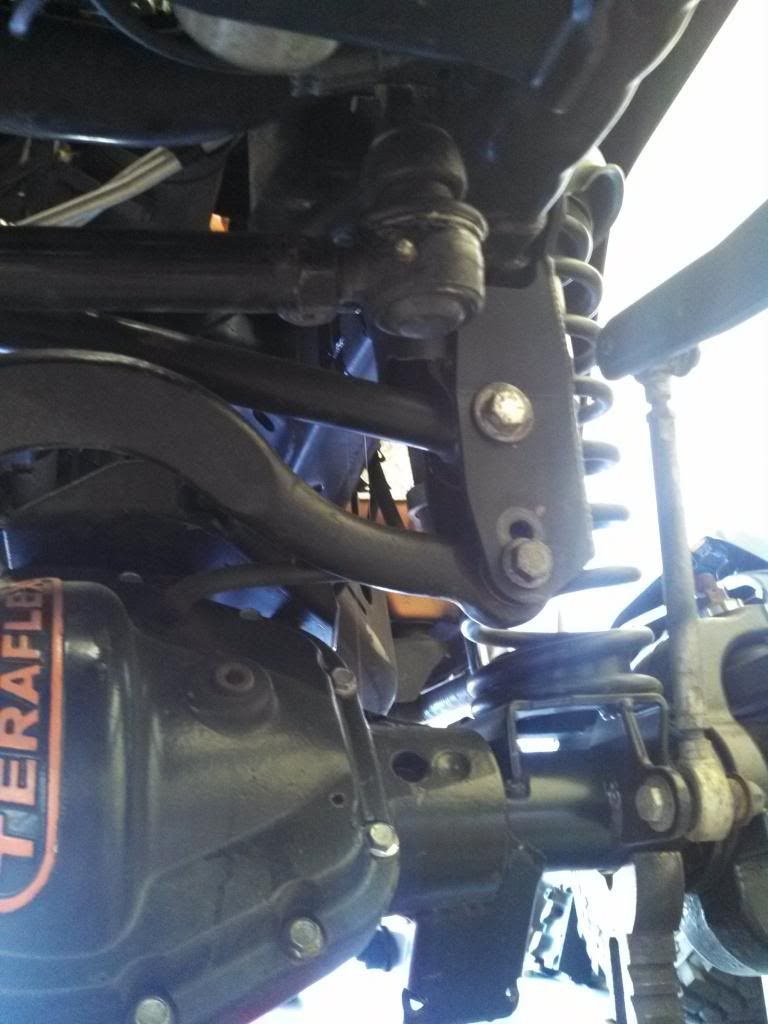
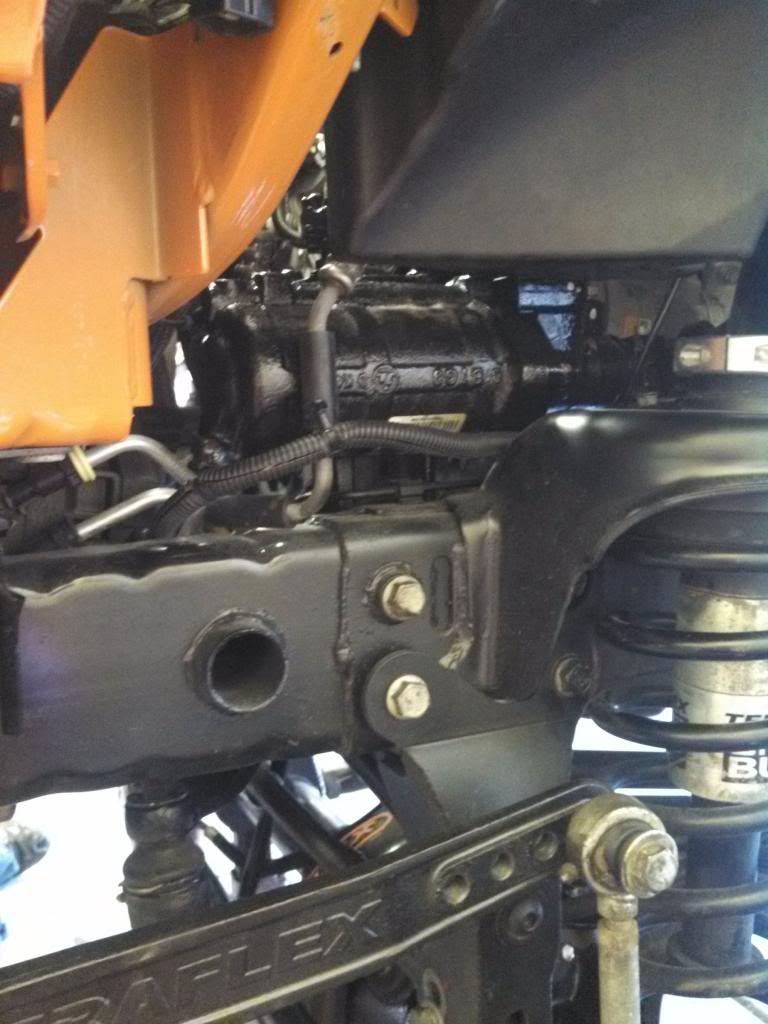
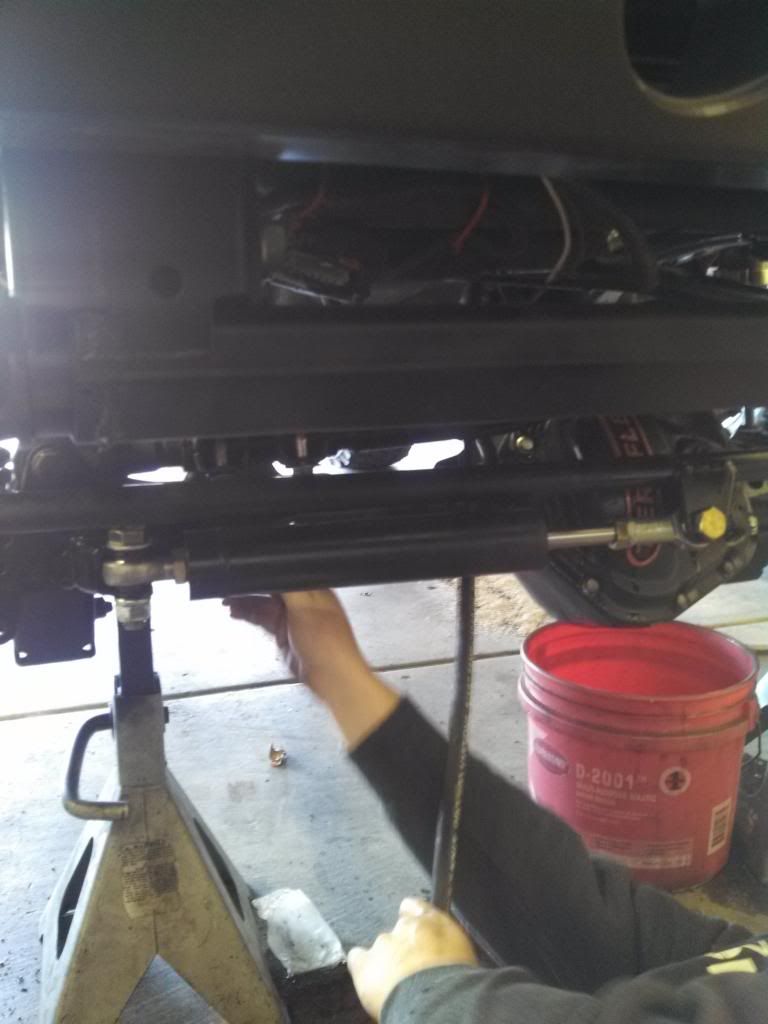
Now to mount the ram. We came off the axle on the bracket where your steering dampener use to mount. We just cut and modified the brackets that came in the kit and used them. It worked really well I felt. For the tie rod mount make sure your steering is straight, I can't stress this enough. Pull the shaft of the ram out 4", bolt the non moving side of the ram in the bracket you just mounted. Bolt the moving side into another bracket from the box of goodies and bring the shaft bracket up to the tie rod. While using A second set of eyes play with the angle of the bracket back and forth to raise and lower the ram. Do this till you both agree it is parallel with the tie rod. The more perfectly aligned you get the ram with the tie rod the smoother it works. Once you've got that down, mark it, cut it, put it back up and tack it into place. Now take your tie rod back off and finish welding the bracket into place. Now you can paint it all up and bolt everything back together.
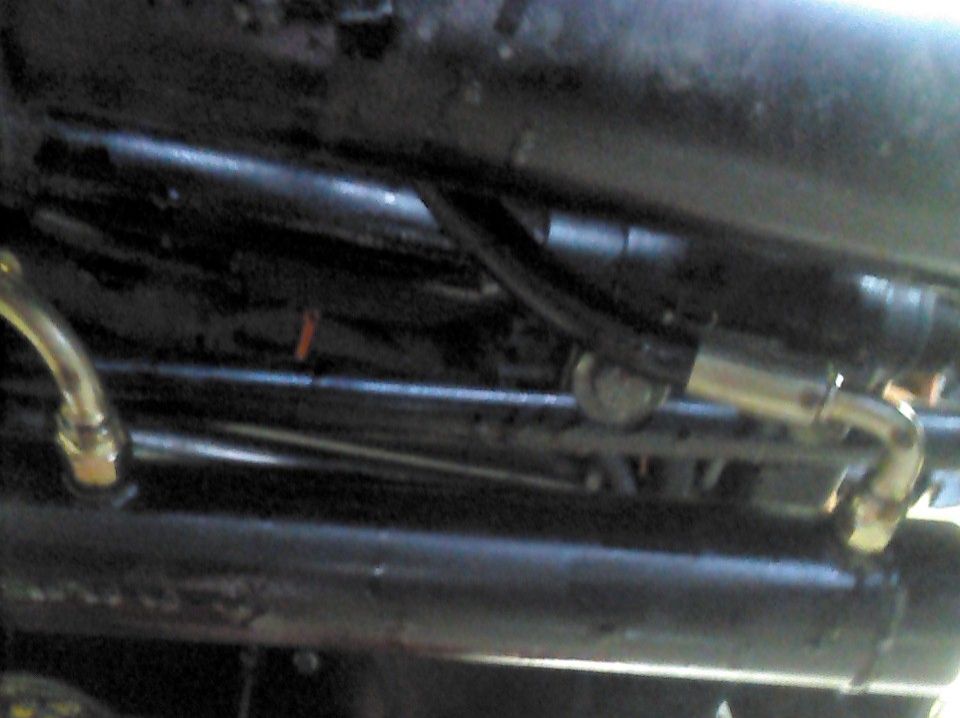
I will have to look at mine and see which line goes into which side of the ram to save you guys some headache. We just bolted the lines up, then with the shaft end of the ram unbolted one of us turned the wheel while the other checked if the ram moved the same way as the tires turned. If not flip the 2 lines on the ram. Not A big deal but can save some time if you already know.
At this point you're going to want to take A step back, breathe and calm down because you now have Hydro assist and your excitement may be out of control... Make sure everything is bolted back up and tight.
I haven't added the cooler to it yet. So when I do, I'll edit this thread to reflect.
If your not doing A cooler at the same time or not doing one at all, you can now start to bleed the system. You do this by filling your reservoir all the way up. Then start up the jeep and turn your steering wheel all the way one way then all the way back the other. You'll do this about 1,000,000 times (or really close to it). Your pump will make A whole bunch of horrible noises, this is normal. It's just the air getting out. While doing this, stop and add fluid. Once you get to where you feel it's pretty good, get it out and drive it. That's going to be the best way to get the rest of the air out. Just put some actual pressure to the system.
As with all mods, the best way you can go test it is by jumping it. This project actually goes really fast and easy. Neither me or Skippy could believe how well it went.
NOTE'S
- We also flipped our steering to the top side of our knuckles on our CRD-60's to get more clearance and help bump steer. I'll go over that very quickly as well.
- Be prepared to make A mess with this project
- I am not responsible for anything you may damage or ruin, always mod with caution
- It's good to have two people for this project
PARTS
- Rock Assault Ram Steering 2X8 kit I ordered through alljeep.com ( http://alljeep.com/Trail-gear-ram-assist-kit-2-8 ). Call for best pricing
- Derale 18" single pass heat sink cooler
- 3 taper inserts from Teraflex if you're going to flip your steering
tools
- An assortment of standard and metric wrench's
- Assortment of standard and metric sockets
- not needed but nice to have A good impact gun (just makes things quicker and less strain)
- A few qt's of power steering fluid
- jack and jack stands
- Grinder with cutting wheel, wire wheel, and flapper wheel
- welder
- some grease
- cutting fluid
- air nozzle (optional)
- 7/16 drill
- 2 1/4 pipe taps (Or possible modification of 1 after first tapping of both holes)
- 7/8 drill if you're going to flip your steering
- hand drill
- flat head screw driver
- pry bar
Well lets get started here. Sorry in advance for any crappy pictures or anything. Let me know if there's anything you'd like me to try and get A better pic of, or better explanation on. So 1st thing is get your jeep parked on A good flat surface with your wheels straight (not your steering wheel, seeing how we all know your wheel straight may not match your actual steering straight). Get your front end up on jack stands. Note: We put it up on jack stands so we could remove the tires to be able to work on the knuckles because we flipped our steering. This will also be good when bleeding the system.
Now go ahead and open up the hood. Remove your intake tube, slide up and out your coolant reservoir, and disconnect your battery if you desire. I'm to lazy so I didn't, but is usually A good precaution especially when welding. Moving all of this just gives you more room to work and makes life easier.
With that removed you can now remove your power steering box. You do this by disconnecting the 2 lines running into the top you can either access from the top kind of or through the fender if you have your shroud removed. You may want to mark them to make sure they don't get switched on reinstall. But I believe the 2 are different sizes so you shouldn't get them switched. There is one bolt that holds tension to your steering shaft. You may have to rotate your steering wheel 180 degrees to access it. Critical note here, make sure if you do rotate your steering, after you put your box back in and get it all hooked up you rotate it back. Then you can unbolt the 4 bolts that run through your frame to the box in the driver wheel well. 2 of them are behind your spring you may get lucky like me and not have to move anything to get to them. Or you may not like Skippy who we had to pry his spring back to get to them. You can also flex your suspension one way or the other to access them as well. If you have 2 people you can do the lines and the mount bolts at the same time. Now from up top with some twisting and turning you can pull your box up and out. You can try to take some precautions to keep the power steering fluid from running all over the place here but your probably going to still make A mess.

Now you can mark and drill your box. We found it really easy to just clamp it down to A flat bench. This way you can drill both holes in one clamped position. The first hole you have to drill is on the opposite end of your steering shaft on the little square face. The second is on the big chamber just under the the cap with four bolts and the back lash screw. Your goal on the first hole is to drill center on the square face and center line of the chamber radius you can see that runs behind the square face (If that makes sense:-\). The second hole looked to me like you just have to drill any where on the big chamber. We drilled ours about center down the chamber from how it sits on the vehicle and about 45 degrees from the drive shaft out put. It is A good idea when drilling these to first center punch them, then drill them with A smaller drill, then drill them with the 7/16 drill. On the flat face you can see how much cast you can drill before breaking all the way through the body. I taped my drill to know how far I could drill safely. Here's another key to this. There is more cast you can drill through on the newer jk box then the older, so pay attention! The second hole just breaks through to the open chamber. We used an air hose to keep blowing the chips away from the holes to keep them from getting into the box. After we drilled we also stuck the nozzle into one of the stock port holes, plugged the others with our fingers and gave it A good blow turning the open holes into power steering fluid volcanoes. But, it got the chips out.
This pic is of the newer jk box

this of the older

The older box is flat after the chamber you drill into where as the newer one has that same square shape that goes on the other side of the chamber as well

here's some pics of the drilled holes


After drilling the box, you can tap the 2 holes. We put grease on the tap to help hold onto the chips from going into the chambers. Once you've tapped them with A normal 1/4 pipe tap, you can modify that tap or have another one you've ground down the length of threads on to tap the box deeper. Once you've done that you can install the fittings and remount your box. The fittings and lines we used came in the kit. The kit comes with some 90 deg fittings you may want to use to help clear the line from the coolant reservoir. I know you're not supposed to use those 90 fittings because they can be restrictive, but they came in the kit and am not to worried about it. I was able to squeeze my reservoir around the line, but on skippy's wife's we used one. Or you can take your lines int evco or somewhere and have them cut the straight fitting off and put an angled jic fitting on.

At this point we flipped our steering around to the top side of the knuckles. So skip this paragraph if you're not going to. Remove your tires if you haven't already, unbolt your stuff out of your knuckles, drill out the tapers with the 7/8 drill bit, put the new taper inserts in, and put your stuff back into the top side of the knuckles. Pretty quick and easy. The other thing we did at this time was move the track bar on the frame side to the furthest down hole, and on the axle side to the furthest up hole. Don't tighten down the nuts on the tie rod yet because you'll be removing it again to finish welding on your ram mount (unless you use A clamp style mount).


Now to mount the ram. We came off the axle on the bracket where your steering dampener use to mount. We just cut and modified the brackets that came in the kit and used them. It worked really well I felt. For the tie rod mount make sure your steering is straight, I can't stress this enough. Pull the shaft of the ram out 4", bolt the non moving side of the ram in the bracket you just mounted. Bolt the moving side into another bracket from the box of goodies and bring the shaft bracket up to the tie rod. While using A second set of eyes play with the angle of the bracket back and forth to raise and lower the ram. Do this till you both agree it is parallel with the tie rod. The more perfectly aligned you get the ram with the tie rod the smoother it works. Once you've got that down, mark it, cut it, put it back up and tack it into place. Now take your tie rod back off and finish welding the bracket into place. Now you can paint it all up and bolt everything back together.
I will have to look at mine and see which line goes into which side of the ram to save you guys some headache. We just bolted the lines up, then with the shaft end of the ram unbolted one of us turned the wheel while the other checked if the ram moved the same way as the tires turned. If not flip the 2 lines on the ram. Not A big deal but can save some time if you already know.


At this point you're going to want to take A step back, breathe and calm down because you now have Hydro assist and your excitement may be out of control... Make sure everything is bolted back up and tight.
I haven't added the cooler to it yet. So when I do, I'll edit this thread to reflect.
If your not doing A cooler at the same time or not doing one at all, you can now start to bleed the system. You do this by filling your reservoir all the way up. Then start up the jeep and turn your steering wheel all the way one way then all the way back the other. You'll do this about 1,000,000 times (or really close to it). Your pump will make A whole bunch of horrible noises, this is normal. It's just the air getting out. While doing this, stop and add fluid. Once you get to where you feel it's pretty good, get it out and drive it. That's going to be the best way to get the rest of the air out. Just put some actual pressure to the system.
As with all mods, the best way you can go test it is by jumping it. This project actually goes really fast and easy. Neither me or Skippy could believe how well it went.
")