Midget build?

NYCEGUY01

Well-Known Member
Location
Willard, UT
My memory is fuzzy but my uncle stuck a 440 in one of these back in the 80s I think, took that out and put a 360 in instead? This was when he was Ogden high schools autobody/autoshop teacher, Last I recall seeing it was at the high school in the 90s, I remember the rear end seemed like it was all third member and big tires. It's still sitting somewhere, I want to say Milford? I'll have to ask around about whatever happened to it.

Good luck on yours.
That is awesome. I did a bunch of work on that thing,. It has a full tube chassis. I remember it had Opal GT front brakes I pulled off a car at Coys junkyard when they were still there. I spent a ton of time in highschool up in that shop. A highschool friends brother still has his old 68 Dart we learned to drag race in out a Bonneville..lol Never got to ride in the Cuda though. "Lesson Plan" was the coolest drag car...lol Pat was a great man....
 

JeeperG

Well-Known Member
Location
Riverdale
That is awesome. I did a bunch of work on that thing,. It has a full tube chassis. I remember it had Opal GT front brakes I pulled off a car at Coys junkyard when they were still there. I spent a ton of time in highschool up in that shop. A highschool friends brother still has his old 68 Dart we learned to drag race in out a Bonneville..lol Never got to ride in the Cuda though. "Lesson Plan" was the coolest drag car...lol Pat was a great man....
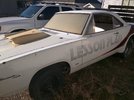
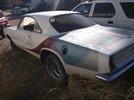
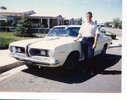
Oh wow, small world eh? I guess my truck project makes more sense now? I'm fortunate we have so many of us that enjoy the hobby. My cousin I bought the 40 from has the 67 now, he did some trade work for Pat and was given the car, minus the drivetrain, my other cousin Pat's son Jared has the drivetrain and is probably mad he wasn't just given the barracuda.
IMG_20161021_163829.jpg
IMG_20161021_163851.jpg
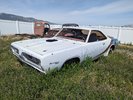
The barracuda is sitting in Grantsville now.
PXL_20220430_181226528.jpg
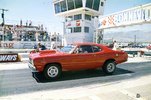
Pat also built my brother's duster, it's like the sister car to the barracuda, it's just waiting for me to get my truck out of the shop.
IMG_20160722_175126.jpg
img400.jpg
 

JeeperG

Well-Known Member
Location
Riverdale
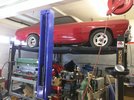
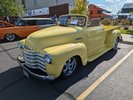
You probably recognize this topless Chevy as well then? Another uncle Pat build. Jared has it.
PXL_20220917_214004429.jpg

Anyway, sorry to hijack.....back to midget talk. 😄
 

NYCEGUY01

Well-Known Member
Location
Willard, UT
I remember that Duster Is the Yellow Chevy truck still around ?
You probably recognize this topless Chevy as well then? Another uncle Pat build. Jared has it.
View attachment 163257

Anyway, sorry to hijack.....back to midget talk. 😄
I was just gonna ask about the yellow Chevy, I seem to remember his Daughter driving it to softball practice all the time back then, Its cool its still in the Family.
 

JeeperG

Well-Known Member
Location
Riverdale
I remember that Duster Is the Yellow Chevy truck still around ?

I was just gonna ask about the yellow Chevy, I seem to remember his Daughter driving it to softball practice all the time back then, Its cool its still in the Family.
Yup, we're all sick. 😄. When Greg did the trade work for the barracuda he thought Pat would say no and he would then ask about the midget. Pat didn't say no about the barracuda. 😆. I think a bunch of my cousins got to drive the topless Chevy around. I'll have to find out about that midget, I also want to say it was originally my aunt's car. Uncle Pat was always doing things different.
 

1969honda

Well-Known Member
Supporting Member
Location
Cache
No worries about hijacking! It's always cool to reminisce about old cars and see what people have done through the years.
 

JeeperG

Well-Known Member
Location
Riverdale
No worries about hijacking! It's always cool to reminisce about old cars and see what people have done through the years.
Well and honestly it has had me really thinking about the impact my uncle had on so many students and others. He definitely mentored and taught my brother a lot, you should be able to see my brothers passion in my truck build and that goat wagon.

I'll have to see if I can source any pictures of the midget.

Pat said, this is the only car he ever regrets selling.
FB_IMG_1465500706047.jpg
 

NYCEGUY01

Well-Known Member
Location
Willard, UT
I’m gonna say Pat is absolutely responsible for fueling my sickness..lol
I believe his was actually a MGB so a bit bigger than a midget but it was just the body on a tube frame.
I’m not sure if it ever got finished, when I was in school I think it still had a 440 but needed the cage modified because it was too small for anyone to fit in the drivers seat.
 

1969honda

Well-Known Member
Supporting Member
Location
Cache
I'll get some pictures up later today but I got the tunnel bent up with help from @jpndave yesterday. I attempted to add a little bit of bead rolling to it as well. It's not horrible for the first time using that particular tool, but it'll be hidden and that's a good thing. I learned a lot in a few short minutes.
 

1969honda

Well-Known Member
Supporting Member
Location
Cache
So I'm slacking at getting pictures, but the tunnel got all bent up, with some definite issues (bnt two tabs that should have remained flat, oops). I spent the afternoon correcting those few bends with my youngest son and making more space to actually use the parking brake handle. I'll get pictures eventually and share, because that is really all any of us care about, and it helps understand what's going on.

I had ordered and hoped to make a 2005 Cobalt SS LSJ flywheel work with the amigo disc and LSJ pressure plate. The center bore of the LSJ flywheel would have to be opened up about 1mm and the bolt holes were for a 10mm instead of a 9mm bolt. Further complicating things was the 10mm holes were on a smaller PCD than the LE2 crank and flexplate. Last big issue was the M9x1.0 bolts needed in a 25mm length, they are impossible to find in anything but a socket head allen fastener. M9 in itself is like a unicorn in a sea of mustangs, good luck, but when you do find it you've found the holy grail. I'm not willing to risk using an unknown, cheap, Chinese bolt made of stainless in that application. That just isn't going to hack it on a flywheel for me.

I've ordered a dual mass factory 1.4L LE2 flywheel and clutch cover to go with the amigo disk. I'm not thrilled about the added weight, but it's not meant to be a race car. I'm sure my wife will appreciate a little bit smoother gear change, and if any kids drive it and burn up the clutch at least it will all be off the shelf parts.
 
Last edited:

1969honda

Well-Known Member
Supporting Member
Location
Cache
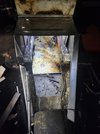
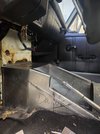
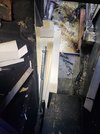
Picture dump. i forgot to get pictures of what the tunnel initially looked like after bending it up. The two vertical sides mating up to the foot boxes, I accidently bent out 90° into the footwells 🙄 I spent a little time last night with youngest son rigging clamps and 1/2" square tube up so that I could straighten those bends back out. Then we took a pnuematic flange to and stepped the wings so we can spit weld them in when complete. 20230902_085435.jpg

The next obstacle to address was the E-brake. I knew when I bent up the main shape I would be cutting some out and making a pocket for your hand to grab the brake when released. Some CAD with multiple revising and some masking tape has things about 90% finalized.

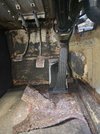
20230902_085445.jpg20230902_085720.jpgI also got the throttle pedal mount bent up, keyed slots for the locating feet cut and two mounting holes done. I need to weld a small piece of 1/2" box tube to the bottom where the locating feet protrude out. I had originally hoped and thought they were going to line up with a recess in the floor, but it ended up putting the pedal to close to the brake for my liking.

20230902_090841.jpg20230902_091242.jpg
 

1969honda

Well-Known Member
Supporting Member
Location
Cache
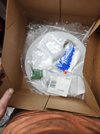
I know. I haven't updated in a couple weeks and I don't have pictures tonight. Failure. However I did get all of the pins ordered for shortening the harness, a factory DMF, flywheel bolts, some frame reinforcements cut, and started to cut out pieces to make motor mounts.

I'm trying to get at least one thing a day done, regardless of how small.
 

1969honda

Well-Known Member
Supporting Member
Location
Cache
My goal to get at least one thing done a day was thrown out the window this past week or so, but progress is progress.

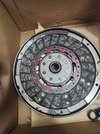
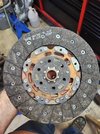
After trying a couple clutch discs, and paying return shipping on at least two, I finally found one that looks very promising. Being a DMF the stock Cruze clutch is unsprung, and I had to find a Nissan 1" x 24 spline matching disc. On top is the Cruze stock disc (short about 4 splines), then the Z1motorsports full face, 1"x24 spline unsprung disc.
16960472325857843358179542918201.jpg
16960470630016749049659006484559.jpg


I tried a couple different sprung nissan discs first hoping to find a cheap solution. The center hub on those stuck up so far from the disc surface, it was riding the Cruze pressure plate fingers before it was even bolted on. Not going to work. This new one clears and is the only full face, unsprung disc I could find.

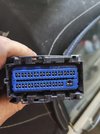
Next I had a couple Mouser electronics orders come in with new pins to cleanly shorten up the stock harness. This will be a tedious task, but well worth it and not totally out of my comfort zone.16960475763405888575504519276730.jpg

There are 73 pins per connector for the 3 ECM connectors. Out of the possible 73 positions, 72 are the same but there is 1 large pin per connector.16960483996024787700395363143534.jpgI went thru the GM connector pin outs and counted exactly how many on each connector I would need, then added additional pins to be safe from screw ups, Bewilder mistakes, and any future issues.

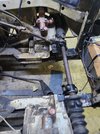
I have also slowly been cutting out reinforcement plates to cover areas the PO destroyed on the "frame". The first area is under the radiator, just in front of the steering rack. The PO cut some of the sheet metal out to fit a wider radiator. Pretty common modification on this chassis for added cooling and engine swaps. However the large holes blown thru the top with a plasma cut were no bueno in my book. I cut out a few 11 gauge patch plates and welded them in over each frame rail. Not seen is a "c" channel on the outside of each frame rail that was created, but not closed off, from the cut out sheet metal. I tied this in at the top at the same time tonight. 20230929_220648.jpg
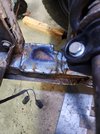
Next is to recreate the stock cross member under the steering rack mounts.16960485595855449144907805031429.jpg After that is engine mounts and a transmission mount. Once those are both made I can finalize the trans tunnel, weld it in, and make a cover for it. Then it's on to all of the other little things until complete....
 
Top