Stag’s Stealth Enclosed Camper Build

STAG

On my grind
Location
Pleasant Grove
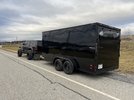
So this trailer I bought a little over a year ago, in Pennsylvania, is finally getting the treatment that I had originally intended for it; RV camper conversion.

I originally planned on getting started on this while I was living in Connecticut, but with the exception of some parts accumulation, I never really did get around to any of the build while I was there.

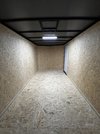
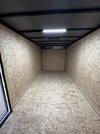
Here’s some pics again from when I first picked it up from the trailer dealer. It’s a 7’x16’ plus a 2’ V-nose, so 18’ length in the center. Admittedly, with what I had/have planned for it, I probably should have went a little bigger. I went 7’ because I figured it would be easier for the Gladiator’s mirrors to see around the sides of it. And went 16’ as I felt that’s the max that I really wanted to pull with the Gladiator.

The Gladiator did tow it fine, with all my belongings in it, from Connecticut to Florida, and Florida to Utah, however I’m sure the H2 will do better at towing it than the Gladiator did. Especially when it’s all finally built out.

6F640741-7660-495E-BB90-18B7EBC9663A.jpeg
FFCF641F-5F14-4934-90E7-09D8AF456141.jpeg
1D558E4C-8B0C-4557-BB2C-7C55C469A734.jpeg
426DEFBC-FC09-474E-A8D7-A2542258CB1C.jpeg
BD2A7008-44CC-4C41-8B14-7FC312147FD1.jpeg
 

STAG

On my grind
Location
Pleasant Grove
Once I had the trailer in my possession, I could finally nail down a floor-plan. I researched endless hours on multiple sites on different enclosed-camper-conversion floor plans and honestly I realistically didn’t nail it down until recently.

I was held a little hostage with the side man-door being as far forward as it was. After messing around with tons of floor layouts, I really wish the side-door would have been a little further back towards the rear, than it is, but it’s permanent now and I’m not doing anything about that except working around it.

I decided there were a few design parameters I absolutely wanted to stick to;

•Small-Toyhauler capability, meaning leaving enough “garage” area for dirtbikes, streetbike, or some 2-seater SXS etc. I actually know what’s going in there, but that’s a topic for another thread.

•Full bathroom, including shower and toilet.

•As much kitchen as possible with the space allowed.

•All plumbing “inside” where it is more protected from cold environments
_____________________

With the floorplan I finally decided on, this worked out to where I could have a decent sized RV fridge, kitchen sink, stovetop, oven, shower, bathroom sink, toilet, Blackwater, Greywater, and Freshwater tanks, and still have an 11’ long “garage” space. (So 7’x11’ will be left open for toys)
 

STAG

On my grind
Location
Pleasant Grove
I’ll post up build pictures and used components (a lot have came from Amazon) as I go.

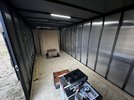
First up, was removing all of the side plywood on the walls. When I did this, I noticed that all of the upright steel wall studs were just raw, bare steel, so I painted them with rustoleum, brushed on 2-coats.
B6CF5BAC-4C66-4045-B362-00EA4A1AF560.jpeg
5C2A23CC-ACEC-4421-A7C9-331A26E7A8D1.jpeg
EBC320E8-60FC-4461-B21C-F7762209A59D.jpeg
Then I accumulated some RV parts so I could work on floorplan.

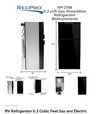
First up, RV fridge. I went with a comparatively big fridge, as I didn’t want to quickly run out of food space and specifically an RV one so it would run off either 110v AC, 12v DC, or propane.

CE205FDD-2F1C-4264-8C95-266ECEAE8C97.jpeg
A9795A33-1FED-4D9C-9C97-DA87DBCFE687.jpeg
9D46E1CF-6F24-4A59-A4E5-263781372AD5.jpeg
 

STAG

On my grind
Location
Pleasant Grove
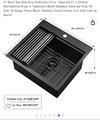
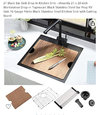
I wanted a deep, decent sized kitchen sink, as to assist with washing cookware in. I hate trying to wash a pot/pan that doesn’t fit correctly in a sink.

B3988404-A041-4063-B54B-6E92759442BF.jpeg
43398324-463B-482E-9267-51BBE10314EC.jpeg

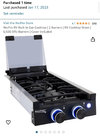
And just a small gas stovetop, just something to get by on the cold, rainy days. Available space was the major deciding factor with this one.
FE249F81-F27D-41AF-87BD-5A3EC0410D37.jpeg


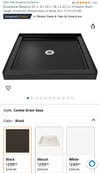
And shower. I went with this shower pan originally, but have since changed styles instead of this one.
BD9323C7-841B-40C4-880E-6447E4F0CAF7.jpeg


And honestly that’s about all I did do while in Connecticut. Shortly after all this I decided to move away from there so I just put all my belongings inside and drove across country.
 

STAG

On my grind
Location
Pleasant Grove
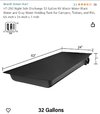
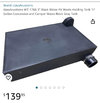
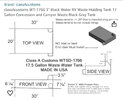
Knowing that I wanted to keep all the water tanks inside, as to help prevent them from freezing, I had to hunt a little bit for shapes/dimensions that would work. I knew I would put them under the floor of the bathroom, so that meant finding a blackwater and a greywater tank that weren’t too tall, as to not rob headspace. Good thing I’m not tall.

Chose this one for greywater (shower, sinks)
601ECD58-6F69-44F5-8A32-1341E1C8781B.jpeg
7FBB79AD-B46A-4D4C-A0C9-232128A6074C.jpeg

And this one, for blackwater (toilet)
0F15E297-C25B-4EBE-9B71-9AB8CB411B3A.jpeg
A445B1A7-103A-46E3-BC0F-C2C6EFD7135D.jpeg

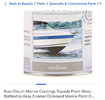
I painted the floor of the front-half of the trailer with some marine waterproofing paint.

7BDECF5E-CDE6-4F98-83DE-C06DC96CA5C6.jpeg
And laid out the tanks where I thought they should go, and started plumbing drainage so that that way, I could make sure to build around them instead of needing to modify layouts later.

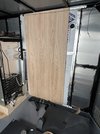
I knew I needed to sheet the wall alongside where the fridge was going to go, because I needed that sheeted before I built the wall that divided the kitchen from the bathroom. So I put foam insulation board inbetween the steel studs and sealed that off with that sheet of oak plywood that I added the mitered edge to last week.
8ECDD99D-4D4B-43FE-989B-61DC530D56D5.jpeg
3C23EBC7-B879-4E9A-AE0F-0DDD43897B08.jpeg
420F4EC6-1148-46D8-8636-B53D69A3CDFD.jpeg
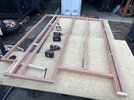
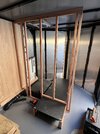
Then started the dividing wall in between the kitchen and bathroom.
CCDE9C44-15F9-4C07-B553-05887209F1F3.jpeg
71100983-7D56-4F3D-8486-8D36ECCF4EF0.jpeg

You can see I have the greywater tank propped up on supports, as it’s not a flat-bottomed tank as it’s meant to be held by its flanges. You can also see where the plumbing is going through the floor.

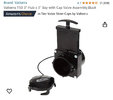
Blackwater and greywater tanks are valved separately so I can dump one without dumping the other.
 

STAG

On my grind
Location
Pleasant Grove
This will be very cool! Will you be able to control black/grey tank from outside the trailer while dumping?
Yes, ish; these valves pictured are to keep waste liquids out of the pipes and in the tanks during cold climates just to help prevent freezing issues.

But as far as outside valving goes I just have another 3” RV gate-valve for open and closed.
BC6CE55C-FBBC-42B4-A175-D64CEDB0FCFF.jpeg

From outside the trailer I don’t have selectable control for choosing between the tanks, just “dump” and “don’t dump”. But inside the trailer I would have the choice to hold one tank back or the other, before going to dump station.

I did it this way as to minimize what plumbing is actually underneath/outside of the trailer. There is only about 16” length of 3” diameter pipe and the one single gate valve. As opposed to more piping and multiple valves.

I may figure out some way to be able to open/close those valves from outside the trailer later down the road. Cable? Lever? Solenoid? Hatch door I can stick my arm through? I know it would be best to close the upstream valves before closing the outside valve, in a dump situation. But that’s something to still mull over.
 
Last edited:

STAG

On my grind
Location
Pleasant Grove
Nice! I have been tempted to do a similar build for years
This is definitely a “compromise” build. I could have went bigger and roomier, at the sacrifice of cost and more towing weight. Or I could have went smaller and ditched the toyhauler capability and really made it a roomier layout inside. I figure doing it this way is a fair compromise across all of my parameters.
 

STAG

On my grind
Location
Pleasant Grove
*Question*

For my battery bank, where I’m planning on putting them, general battery dimensions would really benefit me if I could lay them on their side. As in, the top-post terminal batteries, but laid over 90°. I really won’t have enough room to stand them up vertically.

Do lithium batteries care if they are mounted completely on their side? I am really hoping that they have no preference.
 
Do lithium batteries care if they are mounted completely on their side? I am really hoping that they have no preference.
You would need to consult the manufacturers manual, but unfortunately, there is typically a vent and at least on the lithium batteries I have, it is recommended that the vent be up. I have heard of people successfully mounting them on their side.
 

STAG

On my grind
Location
Pleasant Grove
You would need to consult the manufacturers manual, but unfortunately, there is typically a vent and at least on the lithium batteries I have, it is recommended that the vent be up. I have heard of people successfully mounting them on their side.
I haven’t chosen any specific batteries yet
 

STAG

On my grind
Location
Pleasant Grove
Medium-productivity day I guess.

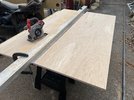
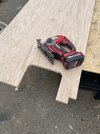
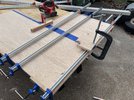
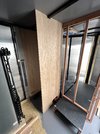
Started out buying another sheet of oak-vernier plywood, cutting it to shape, and adding supports for the weight of the fridge. I don’t have a table saw so I used an aluminum rectangle tube as a straightedge for my circular saw.

33473E5F-03F0-4396-96AB-1DD42A9F04FF.jpeg

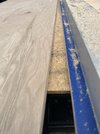
I used masking tape over top of the cut and it SIGNIFICANTLY reduced the tearout. Super pleased with that little truck and will continue to use it.
A142C68F-BEB8-4E46-BFA5-C088184A64D6.jpeg
9548D4A0-1E64-4A55-8403-0F003E4A4428.jpeg

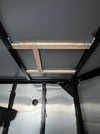
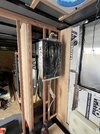
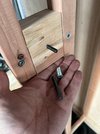
Aforementioned fridge supports. I’m probably going overkill with it but better than not enough I guess. PS all wood-to-wood connections also have wood-glue everywhere they touch, in addition to the screws.
D1BAD1C7-9281-4FB6-AE96-5478FA8DEB52.jpeg

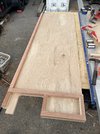
From there I used the rest of that sheet of plywood and I’m attempting to bond the edges together to get the correct size of floor that I’ll need in order for the fridge to sit on. Of course ideally this would be one solid piece but that means I’d have to buy another sheet of that plywood, and at $96/sheet I’ll try this. The joint will be 100% hidden underneath the fridge anyways so even if it’s ugly no-one will see it once the fridge is in. I’ll reinforce the joint from underneath after I get the piece cut to size but I’m leaving it overnight in order to have best chance of bonding as I didn’t use any sort of biscuit joints or anything (don’t have tool)


20E2AEA1-FC5E-4CF2-B564-05F601C74C05.jpeg

And installed the new plywood piece that will be the divider between the fridge and the countertop.
F35CB44A-21D1-491B-886C-1EBADC4D340B.jpeg

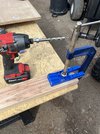
From there I took a trip to Home Depot and bought a Kreg pockethole jig to be able to add the crossmembers underneath the fridge (between the two sheets of plywood)
FABB92F9-302C-4FD5-BF06-5443A64A591F.jpeg

And then mounted the water heater where it will reside.
74C1B08D-E412-40E2-9040-0F1536CCCE2D.jpeg

I felt like the water heater is one of those things that will get mounted and dismounted several times during the building process so instead of just using wood-screws to attach it to the studs, I picked up hardware to allow me to use 1/4”-20 hardware for mounting so I can remove the hardware as many times as I like and not worry about the hole getting loose like if I was running a wood screw in and out several times in the same hole.
510AABC6-F44F-4499-B76C-E681A4A56A4B.jpeg
 
Last edited:
Top