The Rubi Q Build

I Lean

Mbryson's hairdresser
Vendor
Location
Utah
As I mentioned earlier, I found a set of used stock Rubicon fender flares. I think I paid $75 for them. They were a bit rough. I cleaned them up and filled in some scratches and then sanded them. They looked really good. I was ready to plastic prime them and paint them black. I piled them up in my garage while I worked on another project for a couple weeks. I went back this past weekend to pick up where I left off only to find one of the rears missing! Just up and vanished. The other three are right where I left them. I have a buyer for the large pocket flares I have on the jeep now, but I can't remove them and only install 3 flares.

So can anyone give me any insight on ordering new fender flares? The OEM Rubicon flares are 4.25ish inches wide. The lessor trims use flares that are 3.25ish inches wide. Mopar (maybe FCA now?) is changing factories right now for building them so they are on back order till September. That leaves me with the aftermarket world. They can be had for much cheaper, but no one seems to make a 4" wide flare. I hate the look of the tire being completely covered, but also don't want the tire to stick out too far. After reading countless reviews it seems that getting the width you order is really only luck of the draw anyways. Omix and Rugged Ridge are the same. Not sure about Crown. Those seem to be the three brands in the aftermarket world. Most do note that they are narrower than what comes on a Rubicon or Sierra. But I do see some listed as 5" wide and then 7" wide.

Anyone have a spare Rubicon flare sitting around? Didn't think to check which rear I need though.

Didn't @mesha say he had a set of Rubi flares?
 

UNSTUCK

But stuck more often.
Finally getting back to this project. I think I mentioned the burnt/melted multifunction switch wiring connector. I ordered a replacement plug and got that swapped out. All the original wiring and terminals were fine so it was just a matter of pulling them out of the original connector and swapping them to the new connector. A quick test of the switch showed all the lights and signals working as they should. While I had the column plastic off we continued the journey of cleaning out all the useless added wiring. This jeep had an alarm system installed at one point, but seemed to be missing a few items (key fobs among others). I for sure didn't want to have a non working alarm decide to immobilize us as some point so we cleaned it all out. That involved soldering a few wires back together that the alarm spliced into. I did the solder job inside the column wires while Livy tried her hand at some soldering as well. One of the wires I put back together was the engine crank wire coming from the key switch. I added a long loop to it that tucked under the dash. Later on I will go back and install a kill switch in that wire that I'll hide under the dash somewhere. That is enough of an alarm for me.

0057.JPG

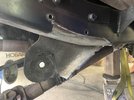
The next project to get started on was the body lift at motor mount lift. Pretty straight forward. You can see my line where I had to trim the passenger side frame bracket. Once that was trimmed the engine mounts were in and done. I almost have to assume the old mounts were not the originals as they looked to be in great shape. The Jeeps has about 180,000 miles on it.
0061.JPG

I've been pretty impressed with MORE parts in the past and choose to use them again for this project. I just wish the pucks were black so they don't stand out as much, although I didn't care enough to paint them. In they went. With the motor mounts in place I also lifted the transmission up about 3/4 of an inch. This kept my 4WD linkage in place so I didn't need to modify any of it. Also preps for a belly up pan one of these days.
0063.JPG

Having a helper sure is nice. I had her working on some of the smaller stuff while I tackled some of the more difficult items. Here she is installing hood latches. She removed the big ugly aftermarket aluminum ones and replaced them with OEM units.
0064.JPG

I lost my helper when she decided Lagoon sounded like more fun so I was left to myself at this point. You may recall the pictures I took of the headlight wiring. I needed to clean it up. The LED headlights are 24 volt units so an up converter is used to make the power. They were a mess. I removed all the wiring and started from scratch. I couldn't find any instructions so I was left guessing a bit on the theory of the converters as well as the original wiring. I knew I had high and low beam power wires on each side of the jeep. There was a smaller black wire with the other two as well. I wasn't sure about what it is for. My guess is it is the ground wire of the headlights, but it doesn't ohm straight to ground on either side. It definitely goes through some resistance at some point. I choose to leave it out and run new wires straight to ground. I mounted the two converters on top of each other on the passenger side and run wiring through the grill to the driver side. That really cleaned up the job. Only issue now is that the passenger low beam has a slightly "warmer" output color than the driver side. I'm not sure if I actually have two different lights or maybe the passenger side is going bad. It was wiring wrong from the original install so maybe it got messed up. I haven't driven it at night yet to see if I'll need to swap it out.
0065.JPG0067.JPG

I think all the added wiring to this jeep is now removed. I was totally dumbfounded at all the wiring in this jeep that was not connected to anything on either end. Besides the alarm, I can only imagine all the extra stuff this thing had throughout its life. Anyways, this picture shows the second pile of wiring to come out of the Jeep. This one is maybe a little bigger than the first.
0068.JPG

After all this I pulled the jeep out for some clean up. I took it around the block and wouldn't you know it, the turn signals are not working again. I parked it and called it a night.
 

UNSTUCK

But stuck more often.
So most of you know I packed my family up and moved to Arizona a few weeks ago. I had to fly back up to Salt Lake to pick up the LJ, trailer, and my truck. On a whim I decided to grab a Teraflex long arm LCG yada yada yada kit. There might be a “pro” in there somewhere as well. I got the shorter kit. 4” if I remember right. The LJ already has a Rock Krawler 3” short arm kit and I wanted to keep the height about the same.

45D62CD1-1FA7-43B4-BCD9-893318B1C70F.jpeg

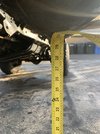
With all the parts loaded up I headed back to our new home in Arizona. Once home I had to take some pre install pics and measurements. This would prove very interesting later on.

EDB5B37B-AE25-472F-83CE-4F60BF226421.jpeg

B39EB3C6-5EEF-41CD-9980-6BEB1C189A22.jpeg

F89CF2A3-2D9F-4476-871B-6F9EFE967B5A.jpeg

I downloaded and printed the master install instructions from Tera’s website. As I dove in and stated opening up boxes, most of the boxes had their own instructions. I found several contradictions from the master. Some were complete opposite. I’m not sure I installed the front bump stops right as I guessed which instructions and parts to use. I kind of just did it the way the Rock Krawler kit did it.

Anyways, I have removed the suspension brackets on TJs a few times but I had an epiphany this time! I split each bracket in half at the back side and then just scored the welds with a cut off wheel. The brackets pretty much just popped off when I bent the halfs up. It was great.

C0268F7F-34B1-40DC-9999-90C8C1093FCF.jpeg

8202787B-C673-46FE-B08B-C78B37AD2C6D.jpeg
A flap wheel made quick work of the weld clean up.
 

UNSTUCK

But stuck more often.
Here’s a better picture showing how I cut the brackets in half and then removed one side at a time. Pretty simple really.

F59FA31F-4A6C-410B-B666-0B09BF3D4980.jpeg

I didn’t take a lot of pictures after this. Things were moving along well enough. Cut all the old stuff off and weld the new stuff on. I’m sure glad I already had a 1” body lift. Made life a lot easier. I started with the front passenger side and worked my way clockwise around the jeep. The idea here was to keep the axles located in the right spot as much as possible. At one point I had a full long arm kit on one side side and a short arm on the other side.

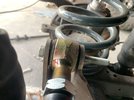
When I got to the front driver side I then realized the upper control arm bracket was for the passenger side. So I had two passenger sides and no driver side. That killed my steam on a Friday night. I was on the phone to Tera Monday and had a new bracket on my doorstep Tuesday afternoon. Frustrating, but they did good at making it right.
926546E4-6A2F-4B4E-8F41-A80FD9E3D9AD.jpeg

Wrapping things up, I moved on to the new sway bar links and mounts. I installed the mounts and then found out the passenger side link would not slide on. It was too close to the steering stabilizer mounting bracket. I had to remove the mount to clearance the stabilizer bracket. When taking the mount off the stainless steal threads galled up and snapped. That was frustrating.

213CE854-BE0A-46CB-8D37-0207939D63EB.jpeg

I grabbed another nut and it’s being held on now with a few left over threads. I’ll get to it at some point.

I rolled it out today! No exhaust so it rumbles a bit. It needs an alignment and new exhaust. That will happen on Monday. For now…

55306DBC-E638-499B-B12B-6F6D93AAE7E5.jpeg

B9ACB2CD-044E-4962-831A-67673CFFE946.jpeg

779B983F-DE68-4085-BF46-9BE7EDC31E46.jpeg

B799F975-2F49-467B-A4B1-DC7CD2DA877F.jpeg

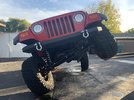
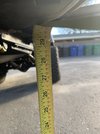
I was a bit surprised to see the flex number basically not change. The front tire hits the spring bracket and the rear lower control arm hits the frame limiting flex.

I have my fingers crossed the ride will improve. My daughter will be driving more and hopefully on the freeway. I need her to feel more comfortable doing that.

I’ve got a shakedown next Saturday. Can’t wait!!!
 

UNSTUCK

But stuck more often.
Here’s a quick update:

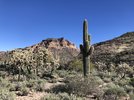
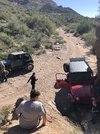
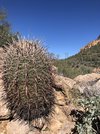
Did a nice shake down run two weeks ago. Had a blast. Took the kids with me and met up with a long time buddy that I got into jeeping 18 years ago. It was a very mild, but semiconductor trail north of Mesa. No rock crawling, but a couple good hill climbs and some cactus dodging. The last mile or so was a pretty smooth sandy wash that let us speed up a lot. The rear end is definitely the limiting factor with higher speeds. I was surprised how hard I was hitting the bump stops. Front wasnt as bad. I’m kind of thinking about Tera Speed Bumps for relative ease of install but I’ve never been too impressed with them for the price.

Here’s the few pictures I took.

449D1649-2100-4C88-8AE0-3A639C171538.jpeg00BD3C15-BEAE-4403-A772-A9678582BB06.jpeg89EDD043-7E38-43FF-84A3-86592C00DD7C.jpeg559EF1F0-F0BF-4326-8C2E-1492B608F2AB.jpeg

That last one is interesting. Just as we got back to the staging area at the end of the sandy wash and pushing it hard the oil pressure gauge dropped to zero and the warning light came on to check my gauges while sitting idling. When I review the engine the pressure climes back up. I did what I could out there to check things over. Everything looked fine. I kept the revs up and made it home. I have since installed a mechanic gauge in line with the stock gauge to try to verify if I have a bad sender or worse. So far it has not happened again, but we haven’t driven it too hard lately. Just Livy driving to school.
 

UNSTUCK

But stuck more often.
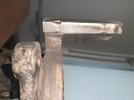
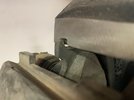
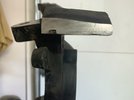
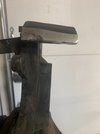
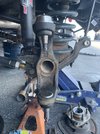
Besides the oil pressure issue the next addition I grabbed for a smoking price is a Teraflex tj high steer knuckle and tie rod. I ordered up the Tera aluminum drag link and started playing with it. I cleaned up the knuckle and then noticed some wear where the brake pads hang. What should I do about it?

EB6CF3FD-CAA1-4C59-ADE1-8BF23F5AD21C.jpeg260D50AB-461E-4C73-AE7A-5E84C49DA026.jpegB18FC91F-108D-4311-BBC8-00B8F660DEE0.jpeg

Can I mig weld it to fill in the hole and then smooth it down? Maybe it needs nothing? I’m actually very surprised by this. How does this kind of wear even happen. Lots of mushrooming on the brake pad as well. These parts came off a low mile jeep.
 

bryson

RME Resident Ninja
Supporting Member
Location
West Jordan
My guess is that the Jeep the knuckle came off of had a sticking caliper or something causing the pads to bind against the rotor and cause all that wear. I don't think I'd be comfortable using it as is, but I also don't know how to fix it (I'm not sure exactly what the knuckles are made of or if they're weldable...?) Maybe call up TF and see what they say?
 

UNSTUCK

But stuck more often.
Their website is calling it ductile iron, which I believe is a more difficult weld. I may just try welding it like I have welded other cast parts in the past. I’m not too worried as I’d just be filling a hole and not joining parts together.
I also thought about brazing it but that may be too soft and just wear down? I don’t have access to stick or tig now to use a better filler.
 

UNSTUCK

But stuck more often.
Welding up the high steer knuckle turned out to be no big deal. I filled in the grooves and ground them smooth.
5BA3DF86-E1A3-46A5-8D78-114AFC0A7509.jpeg

With the knuckle off I replaced the ball joints on both sides. There was just a bit of play in the old ones. These should last a while.
25E62565-8906-4D33-92DD-C895DCD28EC2.jpeg

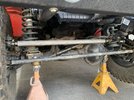
This is how it looks all out back together and ready for a test drive. Notice the track bar. Why in the word does Tera not address this on the 4” lift. It’s a huge issue. The test drive was bad. Bump steer like crazy. Hit the throttle and the wheel turns left. Get off it and it turns right. Very frustrating.
831E9AB3-5282-4606-A118-CE6ACDA739DF.jpeg

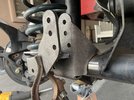
So I went back and purchased their front track bar kit that gets included with the 5” lift kit. It uses a new axle bracket, frame bracket and track bar.
364D7765-39E5-4367-92F1-78CF449CDE5E.jpeg

The kit came with these super nifty, but useless bolts. That or they didn’t send enough washers. 🙄
740AC879-6C1C-41FA-AE4C-292BCC4A9B8B.jpeg

With the new brackets in the track bar is now parallel to the drag link. And wouldn’t you know it, it drives perfect!!! Totally predictable at 70 on the freeway with one hand on the wheel. I’m finally happy to drive it again.
36DC3C1A-E967-4C5F-AA09-313E89988846.jpeg


One day later I get the dreaded phone call from Livy on her way to school. A very loud squeal when she presses on the clutch pedal. I told her to continue. Then on her way home from school it failed just as she got on our street. Lots of smoke. We pulled it home and now it’s sits. 😡
 

I Lean

Mbryson's hairdresser
Vendor
Location
Utah
This is how it looks all out back together and ready for a test drive. Notice the track bar. Why in the word does Tera not address this on the 4” lift.
If I remember right (and things could have certainly changed in the last 12 years...) the 4" kit does not come with the high steer knuckle, where the 5" does. That's why the 5" kit comes with the new (and very necessary, as you pointed out) brackets and track bar.
 

UNSTUCK

But stuck more often.
If I remember right (and things could have certainly changed in the last 12 years...) the 4" kit does not come with the high steer knuckle, where the 5" does. That's why the 5" kit comes with the new (and very necessary, as you pointed out) brackets and track bar.
I’ll have to look closer, but I don’t believe these new track bar brackets and track bar require the high steer knuckle. I think they’ll fit with the stock knuckle. The 4” kit comes with a track bar so they could at least give the option of spending a bit more for the brackets and then swap to the other track bar that runs on those brackets. Now I have a $280 track bar with 30 miles on it that is basically junk to me. 😕
 

I Lean

Mbryson's hairdresser
Vendor
Location
Utah
I’ll have to look closer, but I don’t believe these new track bar brackets and track bar require the high steer knuckle. I think they’ll fit with the stock knuckle. The 4” kit comes with a track bar so they could at least give the option of spending a bit more for the brackets and then swap to the other track bar that runs on those brackets. Now I have a $280 track bar with 30 miles on it that is basically junk to me. 😕
The new track bar brackets definitely require the high steer knuckle, for exactly the same reason your high steer knuckle require the new track bar brackets. Drag link angle and track bar angle need to be pretty close to matching, or you get bump steer. If you added the track bar brackets WITHOUT the high steer knuckle, you'll experience the same (but opposite direction) bump steer you got in your case.
 

UPNO4

Addicted
Location
Lindon, Ut
Hmmm... where have I been probably working on my LJ. Great read so far. What is it with wiring messes. Mine came with pretty much all the same issues your did.
 

UNSTUCK

But stuck more often.
The new track bar brackets definitely require the high steer knuckle, for exactly the same reason your high steer knuckle require the new track bar brackets. Drag link angle and track bar angle need to be pretty close to matching, or you get bump steer. If you added the track bar brackets WITHOUT the high steer knuckle, you'll experience the same (but opposite direction) bump steer you got in your case.
I had pretty nasty bump steer right after installing the lift kit, while still having the stock knuckle/steering. It just happened that I was offered the Tera knuckle at the same time. I did the knuckle swap and noticed the bump steer was just as nasty, but different. Steering effort was significantly improved though. Now with everything swapped out it night and day different, in a good way.

I ordered a clutch kit and flywheel. Should have it all here this weekend. I’ve decided to hold off on the tranny for now, but will also rebuild the t-case now, along with driveshafts.
I hate to spend $2k on a transmission that I don’t really want. A 4L60E sounds much better. 😎
 
Top