STAG
On my grind
- Location
- Pleasant Grove
Dedicating a thread to those of you who may be attempting a new skill or hobby for their first time. Obviously no one is a pro their first time doing something, so this is a shameless thread geared towards absolute noobs.
My first submission; leatherwork. I have always had an itch for learning automotive leatherwork. Like custom upholstery. I appreciate a nice leather interior (love me some King Ranch 🤤)
I have no interest whatsoever in leatherwork outside of the automotive interior realm, like wallets, bags, holsters etc. my interest is purely automotive.
That being said, I watched a few YouTube videos on leatherwork, and ordered a few tools off Amazon, and gave it a shot. Aside from a few memories of my dad doing leatherwork (bags and mountainman rendezvous stuff) when I was a kid, I have no leatherwork experience at all (it will show 😅)
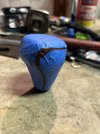
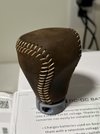
I decided to start with what I thought would be easy; a leather wrapped gearshift knob. One seam, and the ends would be hidden by metal caps.
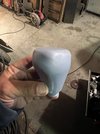
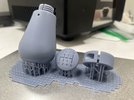
I created a design in Fusion360, and 3D printed out some bodies, with the intent that if the main body turned out well then I would machine the caps out of metal instead of just the plastic.
Top cap with the gear pattern would be held in by an M5 screw through the middle, while I modeled in an M10x1.5 thread through the bottom. Basically copying a Cummins 6spd shift knob.
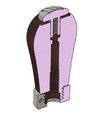
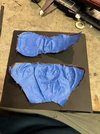
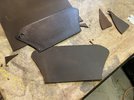
I also used Fusion360 to create a 2D pattern of the outer surface. Come to find out that my method of making the pattern wasn’t perfectly accurate, that will show up later.
But I ordered the cheapest piece of leather that Amazon had, and cut out a patterned piece.
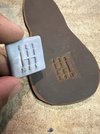
Then punched some stitching holes and attempted a baseball stitch. Wild how much thread it takes to do something like this. There’s over 6 feet of thread here to stitch up for this little shift knob.
Granted in the YouTube videos I watched, they recommend tightening as you go with each stitch, however in practice I determined it was easier for me to loosely stitch up at first and then go back and tighten up each stitch by pulling on the thread above it, like tightening up shoelaces.
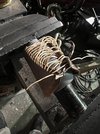
1st tighten
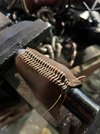
Final tighten
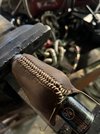
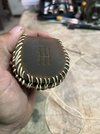
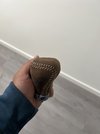
And then this is where it all went downhill. I realize that I had no idea how to make the top look good.
It doesn’t look too terrible if you look at only the sides 😁
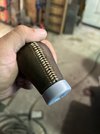
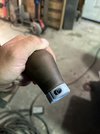
However the top is a complete abomination. About halfway through doing what I was doing I realized that it wasn’t going to turn out good so at this point the part was junk and I just figured slap it together anyways cuz it was no good.
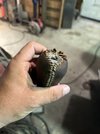
And for poops and chuckles I tossed the top piece in.
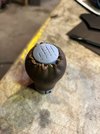
Learned a few things from this piece, and will redesign and make another attempt at another leatherwork project, maybe another shift knob, but differently shaped and designed.
Maybe with some shape tweaks of the original pattern, this could have turned out decent on the top, but I gotta learn more skills first.
In the famous words of @zmotorsports, “Thanks for looking”
And feel free to post up any of your newly acquired skills or hobbies.
My first submission; leatherwork. I have always had an itch for learning automotive leatherwork. Like custom upholstery. I appreciate a nice leather interior (love me some King Ranch 🤤)
I have no interest whatsoever in leatherwork outside of the automotive interior realm, like wallets, bags, holsters etc. my interest is purely automotive.
That being said, I watched a few YouTube videos on leatherwork, and ordered a few tools off Amazon, and gave it a shot. Aside from a few memories of my dad doing leatherwork (bags and mountainman rendezvous stuff) when I was a kid, I have no leatherwork experience at all (it will show 😅)
I decided to start with what I thought would be easy; a leather wrapped gearshift knob. One seam, and the ends would be hidden by metal caps.
I created a design in Fusion360, and 3D printed out some bodies, with the intent that if the main body turned out well then I would machine the caps out of metal instead of just the plastic.
Top cap with the gear pattern would be held in by an M5 screw through the middle, while I modeled in an M10x1.5 thread through the bottom. Basically copying a Cummins 6spd shift knob.


I also used Fusion360 to create a 2D pattern of the outer surface. Come to find out that my method of making the pattern wasn’t perfectly accurate, that will show up later.
But I ordered the cheapest piece of leather that Amazon had, and cut out a patterned piece.

Then punched some stitching holes and attempted a baseball stitch. Wild how much thread it takes to do something like this. There’s over 6 feet of thread here to stitch up for this little shift knob.
Granted in the YouTube videos I watched, they recommend tightening as you go with each stitch, however in practice I determined it was easier for me to loosely stitch up at first and then go back and tighten up each stitch by pulling on the thread above it, like tightening up shoelaces.

1st tighten

Final tighten

And then this is where it all went downhill. I realize that I had no idea how to make the top look good.
It doesn’t look too terrible if you look at only the sides 😁


However the top is a complete abomination. About halfway through doing what I was doing I realized that it wasn’t going to turn out good so at this point the part was junk and I just figured slap it together anyways cuz it was no good.

And for poops and chuckles I tossed the top piece in.

Learned a few things from this piece, and will redesign and make another attempt at another leatherwork project, maybe another shift knob, but differently shaped and designed.
Maybe with some shape tweaks of the original pattern, this could have turned out decent on the top, but I gotta learn more skills first.
In the famous words of @zmotorsports, “Thanks for looking”
And feel free to post up any of your newly acquired skills or hobbies.


