Learning to TIG: How to?

Gravy

Ant Anstead of Dirtbikes
Supporting Member
So I just bought that Eastwood TIG 200 from Chance and I'm going to get a bottle of argon and cut some coupons to practice. I'm alright with a MIG, and I can oxy-acetylene weld ok-ish but have ZERO experience with a TIG.

What are some resources I can use to teach myself to TIG?

I'd like to learn steel and AL.

Do I need to buy some TIG gloves or can I just use some thinner leather work gloves?
 

frieed

Jeepless in Draper
Supporting Member
Location
Draper, UT
start here: http://www.weldingtipsandtricks.com/
work gloves might work for you, but won't make it easier compared to a nice pair of deerskin Tillman gloves. A good fit on the gloves is important as well.
I also prefer to use a gas lens, they use less gas and the laminar flow just takes gas issues out of the picture. One less variable to deal with.
You're welcome to come by and get a few pointers from my limited experience.
 

spaggyroe

Man Flu Survivor
Location
Lehi
I'm no tig master, but can say that your experience with oxy welding will be helpful. I've found that cleanliness of material dramatically impacted my tig welds. Youtube may be a great resource for learning. There are some basic techniques like "walking the cup" that will help with the consistency of your welds. Prepping your electrode properly makes a bid difference as well. If you end up using it much, you will want to look into a liquid cooled tig torch. Also, the radiation from TIG is pretty intense, so cover up well as it can sunburn severely.
 

zmotorsports

Hardcore Gearhead
Vendor
Location
West Haven, UT
I would make sure you are proficient with oxy-acetylene welding before jumping to TIG. When I first started I struggled with learning TIG. I had a guy tell me to go back and get better with gas welding first, then go to TIG. That was the ticket. Once I became a bit more fluid and established on gas welding, the TIG came to me much easier.

Once you get to that point, a couple of pointers that I have tried to teach people I assist. Get some metal and concentrate of establishing and keeping a consistent puddle without the addition of any filler metal. Once you become well established with a nice bead without filler metal, go ahead and start introducing filler metal into the equation. I have found that by trying to eat the whole pie vs. taking small bites can be a bit intimidating.

What others above said about cleanliness is also very important. No mill scale and try to keep good argon coverage, don't weld with a breeze or outdoors when learning. That's hard enough even after you get some years under your belt.

Lastly, get yourself comfortable. If you are uncomfortable, it will be much more difficult to be consistent.

Mike.
 

Gravy

Ant Anstead of Dirtbikes
Supporting Member
Ok so being a perfectionist this is hard for me, but here are my first aluminum passes with the TIG. I burned up about 7 or 8 rods last night.
These are two different filler rod thicknesses on 3/16" I think. Experimenting with amperage & speed. Around 50 amps seemed to be the sweet spot for penetration.

Critique if you like: it helps me learn.
IMG_20180306_214600.jpg
 

Kevin B.

Big hippy
Moderator
Location
Vehicular limbo
I bought a much nicer helmet and that makes all the difference in the world. True color lense is amazing.

I put on Eric's helmet at his house the other day, and that was a mistake. Now I need a better hat. I need more things to spend money on like I need a new hole in my head, but I need a better hat. Made a big difference.
 

zmotorsports

Hardcore Gearhead
Vendor
Location
West Haven, UT
I'm sure you meant 3/32" rod and not 3/16" but for the most part for your first time, those look pretty decent. Nothing to be ashamed of there at all.

If I could just give two bits of advice that are easy mistakes yet can turn into bad habits if not corrected right away.

First off, a few of your starts look a bit cold upon starting to add filler. I suggest practicing on starting a molten puddle, then hold that molten puddle and taper off. Then go ahead and start up again and get to the same size. Then practice running a puddle and controlling it before adding filler material. This little practice step will really help in puddle control and starting the puddle. You want to focus on getting that puddle molten and liquid well before adding filler or you will end up with a slightly cold beginning of the weld.

Secondly, upon ending a weld, I notice a few craters. Aluminum is especially susceptible to craters but practice on tapering off gradually and less abruptly to avoid craters at the end of the welds.

Mike
 

Gravy

Ant Anstead of Dirtbikes
Supporting Member
I'm sure you meant 3/32" rod and not 3/16" but for the most part for your first time, those look pretty decent. Nothing to be ashamed of there at all.

If I could just give two bits of advice that are easy mistakes yet can turn into bad habits if not corrected right away.

First off, a few of your starts look a bit cold upon starting to add filler. I suggest practicing on starting a molten puddle, then hold that molten puddle and taper off. Then go ahead and start up again and get to the same size. Then practice running a puddle and controlling it before adding filler material. This little practice step will really help in puddle control and starting the puddle. You want to focus on getting that puddle molten and liquid well before adding filler or you will end up with a slightly cold beginning of the weld.

Secondly, upon ending a weld, I notice a few craters. Aluminum is especially susceptible to craters but practice on tapering off gradually and less abruptly to avoid craters at the end of the welds.

Mike

3/16" aluminum plate (parent material).
I used 2 different thicknesses of filler rod (1/8" & 1/16").

Thanks for the advice Mike, I'll definitely try all that. It's definitely different to start a puddle on aluminum because it doesn't change shape and color quite like mild steel. And it seems like a fine line between a puddle and overheating

I've been trying both starting my puddle at at the same angle as I push the puddle and totally verticle.
Is one a better practice than the other?

This was all with an on/off finger switch. I'll practice with the foot pedal next. I suppose I could increase the post flow to keep the puddle shielded better at the end or draw the tungsten back a bit too.

sorry to high jack this but you brought it up


i need a new helmet

what do you have?

Funny you should ask Rick.
I actually test drove the new Esab sentinel helmet and the Miller digital elite and believe it or not for the money (sub $300 range that I was shopping) the Arcsafe helmet by Vulcan was the best one for me (not to mention half the price).

The straps are excellent, the viewing area is very large and (in my opinion better positioned than the Miller) and a big deal for me: it sits very close to my face. I find myself sticking my head in tight spots a lot when I'm welding cages. I like the 4 independent arc sensors [(so if one is covered- say from a cage bar- it still darkens. (All of these have that feature)] Additionally: this may not be a big deal... but I like how the glass is flush with the rest of the helmet so junk like grinding dust and sparks doesn't seem to pile up on that "shelf." (The ESAB is similarly designed).

I'm not always the biggest fan of stuff at HF but it appears that they've got their act together with some of the premium brands they've recent brought in. It would seen they're private labeled for them but manufactured by someone else.

Time will tell if it lasts. I'm kinda hard on stuff. But my last helmet worked well for 7 years before it started flashing me and it was just a bargain auto darkening rig.
 
Last edited:

YROC FAB.

BUGGY TIME
Location
Richfield, UT.
50 amps on 3/16? I think you mean 150 right?

When practicing on a single plate like you are be aware that the plate will get heat soaked rather quickly and make it harder to keep consistent beads. Take a break or cool the plate off in a bucket of water a between beads, also avoid welding close to the edge as the heat will have nothing to dissipate into and it will do the same thing.

Also what ZM said with warming up the start of the puddle before your take off and trickling the heat down when you come to the end of the bead. I Set my big welders to 250 Amps any time i do aluminum so i can warm the puddle quickly when i start. You can see 1/8 tungsten starts to boil right around the 250 mark lol.

Get yourself a 12" piece of tig rod and while your sitting around watching tv practice feeding it with your hand.
 

zmotorsports

Hardcore Gearhead
Vendor
Location
West Haven, UT
Sorry, I misunderstood and thought you meant 3/16" filler material. I see now that you meant 3/16" material not tungsten, my bad.

You are correct about aluminum being a bit different to learn due to the material not changing color and yes there is a fine line between the perfect amount of current (heat) and oops, I just blew a hole through it.

As for TIG torch position, I don't feel angled or vertical make all that much difference when initiating the arc and establishing a puddle as long as the torch angle is not excessive. One of the biggest issues I do see is too drastic of torch angles being used and causing the arc force to be well in front of the path when you want it directly beneath the torch. If you can concentrate on controlling that angle from the beginning you will avoid developing a bad habit of too much torch angle and your welds will instantly be more consistent, torch angle is that critical.

I also recommend what YROC mentioned about getting a half length of TIG rod and while sitting and watching TV or whenever possible practice on feeding that rod to get to a point where you can do it without thinking about it. Remember when TIG welding there are a lot of things going on at once and the more you can develop into good habits and impulses will the more consistent your welds with become.

Also, if you can get used to the foot pedal where you can control amperage vs. an on/off switch the easier it will be to control the puddle as you heat soak your material, especially as you approach the edge of the material.

Mike
 

zmotorsports

Hardcore Gearhead
Vendor
Location
West Haven, UT
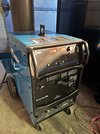
Great machine, you'll love the Synchrowave.

If you are going to spend some money on a TIG torch, I would recommend the CK Worldwide Flex-Loc 230 with the Superflex cables. I love mine and had a couple others including the Miller as well as a Weldcraft WP20 flex head but the Flex-Loc gives so much more versatility as well as more rigidity compared to a standard flex-head torch.
 

NYCEGUY01

Well-Known Member
Location
Willard, UT
Great machine, you'll love the Synchrowave.

If you are going to spend some money on a TIG torch, I would recommend the CK Worldwide Flex-Loc 230 with the Superflex cables. I love mine and had a couple others including the Miller as well as a Weldcraft WP20 flex head but the Flex-Loc gives so much more versatility as well as more rigidity compared to a standard flex-head torch.

I have the CK flex head and super flex cables on my Miller Diversion 180. Great stuff…
 
Top