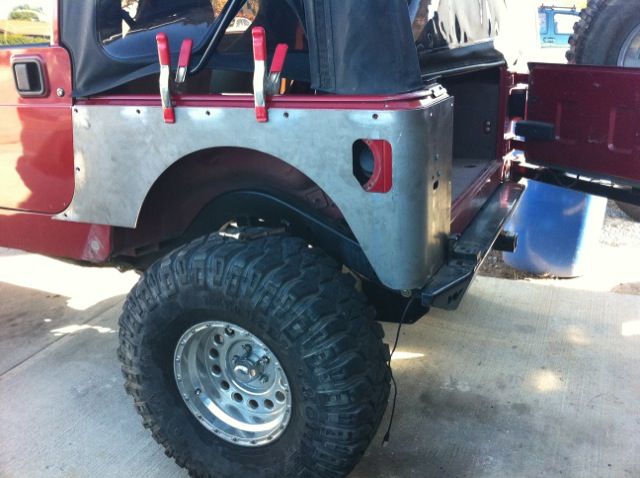
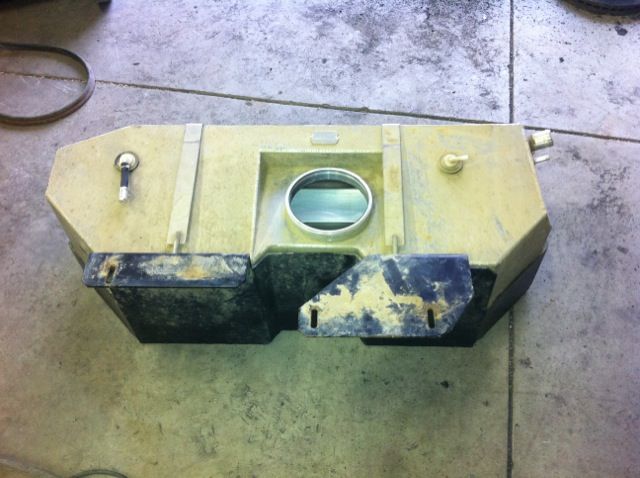
I bought this 99 TJ about 9 months ago and loved everything but the old short arm suspension with worn bushings. I decided since I was going to long arm it any way, why not stretch the wheelbase while I was at it. I managed to find a used GenRight EXT tank and then found a GenRight TJ stretch kit from an individual that had bought it and lost funding for the rest of his build. The timing and prices were too good to pass up. The last piece to fall into place was I had a set of GenRight shorty corners for an LJ I’d purchased that were sitting in my garage. I managed to trade those back to GenRight, plus some cash for a set of the full GenRight stretch corners, with the modified fuel filler opening.
I got the kits and corners all just before and during Easter Safari 2010, and since there was no rush after that, the parts had been sitting in my garage since then. I needed to make room to get the cars and bike in the garage before winter so it was finally time to do the install. Luckily I have my good buddy Matt with his enclosed shop with a lift and all kinds of great tools so we set last Saturday for the date.
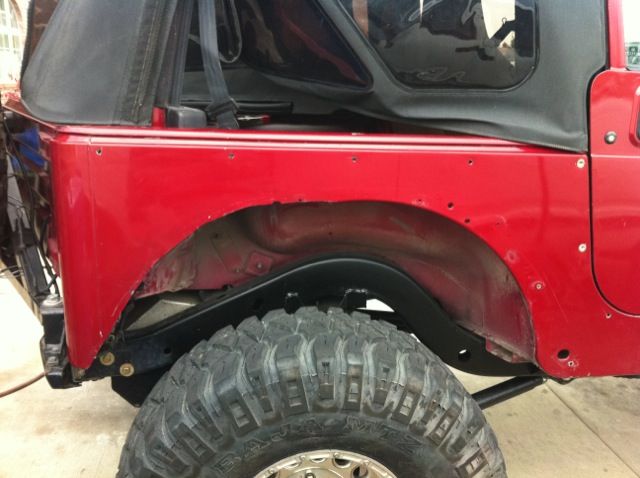
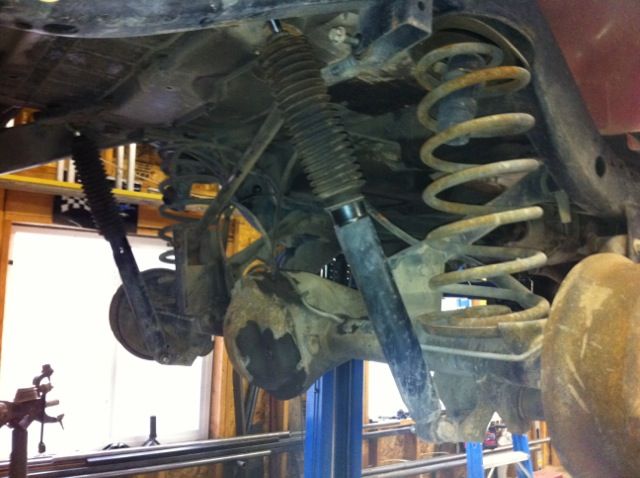
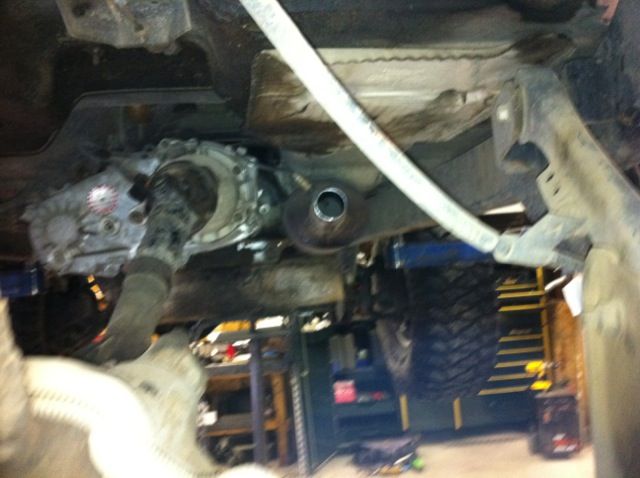
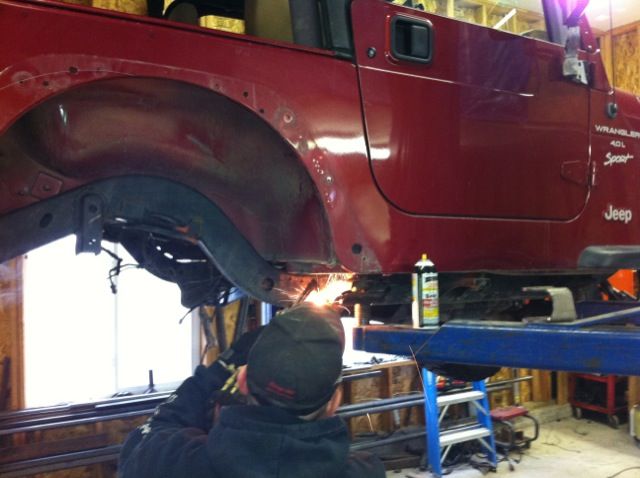
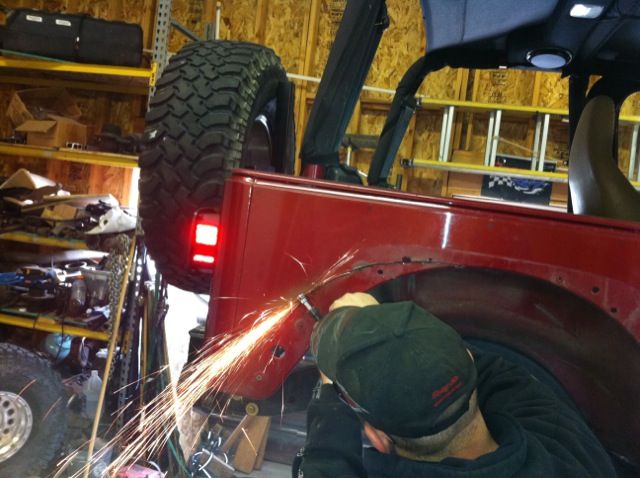
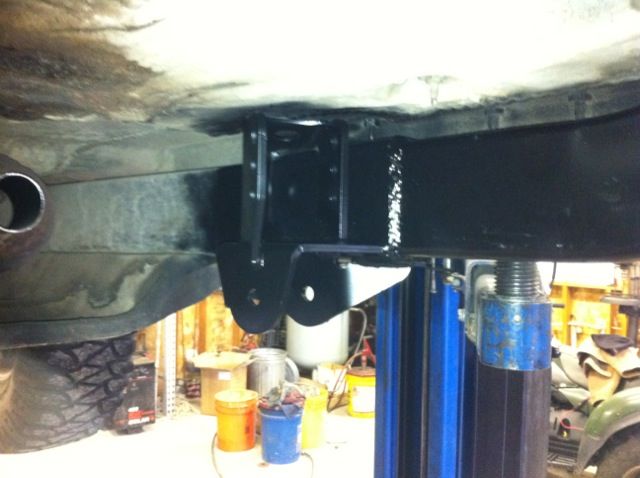
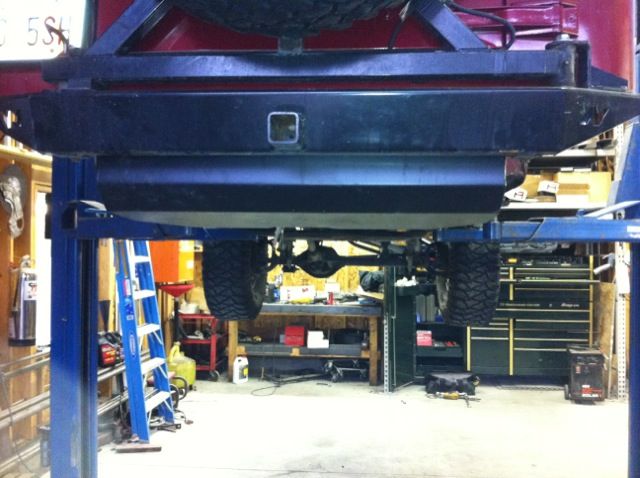
We started by dropping the fuel tank, rear axle and suspension. Matt is a master with the torch so he cut the control arm and track bar mounts from the frame and axle. I took a cut off wheel and removed the upper spring bucket mounts from the frame. It was lots of grinding and manicuring after that. We measured and mounted the frame side control arm brackets then moved the upper coil buckets back about 5”. After that it was all cleaning up and painting, the bare metal. I also had to cut the rear body wheel openings where I’d marked it for the new stretch corners to fit.

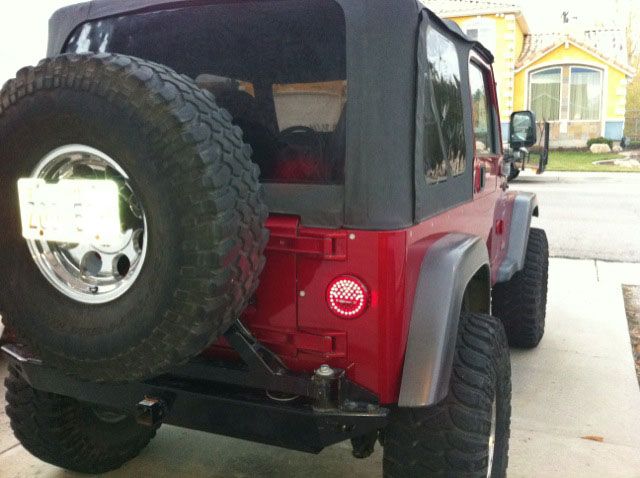
We mounted the truss on the rear axle and then installed the new (used) GenRight fuel tank. From there it was just measuring arm lengths and building them with the provided tube and inserts. It was so cool to see it almost complete and sitting on its own at the end of the day. Great day for a project and most everything seemed to go well.
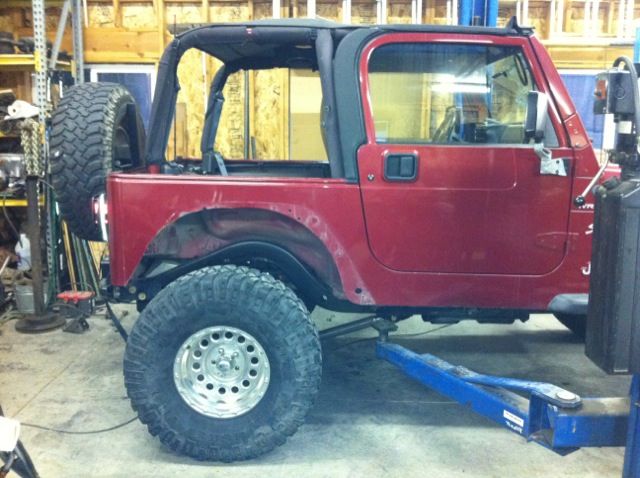
Things left to do. Extend and complete rear brake line, axle vent, rear ARB line, lengthen rear driveline, exhaust, paint rear control arms, paint corners, mount new Light Dot LED tail lights, mount license plate in new location…
I got the kits and corners all just before and during Easter Safari 2010, and since there was no rush after that, the parts had been sitting in my garage since then. I needed to make room to get the cars and bike in the garage before winter so it was finally time to do the install. Luckily I have my good buddy Matt with his enclosed shop with a lift and all kinds of great tools so we set last Saturday for the date.
We started by dropping the fuel tank, rear axle and suspension. Matt is a master with the torch so he cut the control arm and track bar mounts from the frame and axle. I took a cut off wheel and removed the upper spring bucket mounts from the frame. It was lots of grinding and manicuring after that. We measured and mounted the frame side control arm brackets then moved the upper coil buckets back about 5”. After that it was all cleaning up and painting, the bare metal. I also had to cut the rear body wheel openings where I’d marked it for the new stretch corners to fit.
We mounted the truss on the rear axle and then installed the new (used) GenRight fuel tank. From there it was just measuring arm lengths and building them with the provided tube and inserts. It was so cool to see it almost complete and sitting on its own at the end of the day. Great day for a project and most everything seemed to go well.
Things left to do. Extend and complete rear brake line, axle vent, rear ARB line, lengthen rear driveline, exhaust, paint rear control arms, paint corners, mount new Light Dot LED tail lights, mount license plate in new location…