General Tech The Mango Bastard - A Rockwell Buggy story

_Auzzy_

Current Rig: 12W Boots
Location
Richfield Utah
Also picked up a driveline from BOYCE equipment sales and got added to their list for their soon to be offered chromolly rockwell shaft kits. great bunch of guys.
 

_Auzzy_

Current Rig: 12W Boots
Location
Richfield Utah
Tell more about these shafts...

Supposedly going to start getting then in Stock at the end of February but their people doing it are dragging their feet on it. $500 a side is what Jeff at Boyce told me they would be. That's stub, joint, and inner shaft.

- - - Updated - - -

DUDE an ARP stud?!?!?!?! Sick

I know right?!? Now I need to put a giant ARP sticker on it cause racecar.
 

AaronPaige

Well-Known Member
Location
Price ut
I'll be watching, have had Boyce bail me out on hard to find parts several times and local ish cromos would be awesome, while the 16 spline cromos I have are awesome they still break and with no warranty and a month lead time ( usually) I'd buy from them hopefully with good quality
 

_Auzzy_

Current Rig: 12W Boots
Location
Richfield Utah
I'll be watching, have had Boyce bail me out on hard to find parts several times and local ish cromos would be awesome, while the 16 spline cromos I have are awesome they still break and with no warranty and a month lead time ( usually) I'd buy from them hopefully with good quality


Yeah these will come with a lifetime warranty and they'll hopefully have a few in Stock for warranty is what Daniel said (think that's what his name was)
 

_Auzzy_

Current Rig: 12W Boots
Location
Richfield Utah
Small updates matter.

So here my pile of random oil crap. high flow pump, pick up tube, arp stud, upgrade intermediate shaft, fel-pro rubber/metal gasket, and lower profile chrome oil pan which we found out today is actually about 3/4" depth difference which is actually useful! the link bolts hit the factory pan but now they should clear with ease! and thankfully the pickup tube that came with the pump is meant for this lower profile pan!double lucky score. didn't get the pump all the way in, it was kicking my butt like a school yard bully trying to get the pick up tube in. but in true fashion that is my luck, as soon as cory smacks it once it pops right in. just need him to break out his tig skills on it so the pickup doesn't fall off. but for now i have to get t the new job and wont be able to play with it again for a few days.

16106017_10212319724490934_7855960198925223666_n.jpg15965814_10212319729331055_121357416179265582_n.jpg15976969_10212319729611062_5169173261678657974_n.jpg16114257_10212319728891044_7882839106870247171_n.jpg16142400_10212319729131050_1136248653294614390_n.jpg
 

_Auzzy_

Current Rig: 12W Boots
Location
Richfield Utah
another smaller update that i am gonna over complicate the crap outta for joy.

Its the replacement of the factory coil with an MSD upgrade.

Decided to use the factory bracket for convenience of mounting the coil and mount for the future throttle cable. reason for replacement of the coil is cause A. i wanted to, and B. the point is corroded to crap. also for cool guy points sense the factory produces 35,000V and the new plug wires i am using are 11.5mm i was afraid the coil wouldn't give it enough V's to compliment them. new msd is said to make 45,000.
16114561_10212308802137882_4660655894046622043_n.jpg

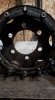
Firt thing first, remove the old coil. for this i used a makita angle grinder, hammer, and a punch that necked down to 1/8"
15965069_10212308802657895_3085853846891733466_n.jpg

Snipped the head off the one side, secured in a vice, popped the rivet right out, turns out they are aluminum.
16105639_10212308802857900_8406664393656430765_n.jpg

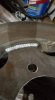
Next was cleaning up the old brackets off. the paint and rust didn't match the engines new flashy theme. used a 1/2 hp, 8" bench grinder with a wire wheel and stone wheel. cleaned off the brackets then used the stone wheel side to smooth the corners off cause once again, cool guy points. after that i painted the using DUPICOLOR high heat engine spray paint line, used grey primer for the base then coated with the "aluminum" flavor to finish it.

15965626_10212308803337912_4369278741345343748_n.jpg15977594_10212308803657920_9037599363597661655_n.jpg

I made use of the supplied hardware from MSD. the brackets that came with where bent into two 90*s which i straightened out into a 45* for a little added length to hook up the plug in wires. the tiny bolt that came with used a 9/32nd socket.

15977281_10212308804137932_8140597222035688494_n.jpg15977460_10212308803857925_3433888884476533433_n.jpg16105701_10212308804497941_7771421805765358107_n.jpg

After drying and torqued to a "ugh" we have the finished product. yes i doubled nutted just for fun.

15977889_10212308804737947_5411804303342578134_n.jpg15941200_10212308807618019_8871402100053757869_n.jpg
 

_Auzzy_

Current Rig: 12W Boots
Location
Richfield Utah
Stuff.

Haven't really done too much. been helping Cory out on one o our buddies project, exo/roll caged a bronco 2 in prep for KOH.

16388409_10158247903540473_3704580312036148770_n.jpg16299225_10158247903465473_3608592710043278670_n.jpg

and cause said friend was being lame, leaving at random, not really helping and playing on his phone etc, we decided to have some fun.

20170128_162502.jpg

So far he has not noticed it and its been 24 hrs.


Anyways, on to my crap. started building my H1 Wheels.

after contemplating back space and design we came out with this. ended with 3"s of back space which would move my whole tire out 1/2" to help combat the issues im having with them being so close to my coil overs. current rim setup is a 10" wheel with a 4" back spacing.

We started with a simple style. 16.5 rim makes it difficult to design anything crazy. started with a quarter inch plate for mock up. ended up adding a 3/16 total to the outter diameter and it fit perfect to the point it needed just a tiny bit of persuasion to sink the plates into my desired depth of 3".

Seriously don't know how we lived without this table, its straight up cheating. god bless cory for building it.
16265326_10212453946286395_1263261479678475587_n.jpg16195976_10212453946446399_7642532803266654833_n.jpg16298714_10212453946766407_5690037828693002120_n.jpg

Test fitting

16265218_10212453947766432_4573948208554317030_n.jpg16266055_10212453947446424_2482094587281059691_n.jpg
 

Attachments

  • 16265981_10212453949126466_3147205795219478041_n.jpg
    16265981_10212453949126466_3147205795219478041_n.jpg
    54.3 KB · Views: 31
  • 16298786_10212453948726456_8752758179850960453_n.jpg
    16298786_10212453948726456_8752758179850960453_n.jpg
    36.6 KB · Views: 30

_Auzzy_

Current Rig: 12W Boots
Location
Richfield Utah
Continued from above.

Cory luckily has a big old cast flat table plus these flat blocks i used to set the back spacing. then tacked them after cleaning it out with a flap wheel and wire wheels.

16387881_10212453947206418_306477290912981342_n.jpg16298941_10212453948126441_4771603511626560205_n.jpg

then over to cory for final fusion.

16388352_10212453948366447_7535287766613393752_n.jpg

Final product. now to cut the front section out and try to bead them up today!
16265839_10212453949006463_5923409791611761737_n.jpg16298786_10212453948726456_8752758179850960453_n.jpg16265981_10212453949126466_3147205795219478041_n.jpg

and our random walls of past diffs.
16265740_10212453949326471_8824923618446452591_n.jpg
 

_Auzzy_

Current Rig: 12W Boots
Location
Richfield Utah
so little update, got my oil pup into my motor finally and got the distributor some what timed for now. once we get my radiator mounted and headers done we will get my fuel cell built and hopefully be able to fire it up.

now for the bigger update, we got my wheels damn near completed. jut need to order my center plastics, o rings, and some new valve stems.
So here's the process on how we cut the wheel centers on cory's plazer.

First he made two circles on his inkscape program, imported it into his job program where he made the two circles into two different jobs. he also cut a butt load of tabs out of the first big circle he cut out.
16708545_10212591241678694_4315905325716079185_n.jpg16711524_10212591242078704_1814077067448404644_n.jpg

then once the big one was cut out we slowly dropped the wheel face into place to not bump it out of its axis Zero.
16712020_10212591241718695_8155983447751285726_n.jpg

Then cory cntinued the program with the second circle.
16640812_10212591241958701_72405477093089964_n.jpg16711680_10212591241558691_410364186377848952_n.jpg

and there ya have it. wheel faces done! now to get them all sandblasted and painted.

16508801_10212591241478689_2882061510540917046_n.jpg
 

_Auzzy_

Current Rig: 12W Boots
Location
Richfield Utah
So finally beaded up my two good tires i bought oh so long ago. 16.5 wide tires on a 8.5 wide rim lol makes them look more squared off and narrower thankfully.


16830905_10212672866119254_4143613893407364119_n.jpg16831011_10212672866399261_318399181034673727_n.jpg

Also changed up the door lines for easier entrance and better looks. got the other side done last night but it was dark etc so no pics.

16864388_10212672865399236_7754758726175037029_n.jpg16681600_10212672865719244_1501803955713445130_n.jpg
 

Ashcat

Active Member
Location
Wisco
When you first posted your wheel update, I didn't quite understand the 2 circle thing. It hit me a day or so later. You cnc 'd the original centers out. Genius.
 

Ashcat

Active Member
Location
Wisco
So you ba-geniuses can't finger out bumps? Placement, air, poly, bracketry? (because I know that shop cannot for the life of them produce brackets)
 

Ashcat

Active Member
Location
Wisco
Flipped through the pictures again, seems like your rails are all up high without any tubes near the axles at bump?

Tim Cameron style probably won't fly around YROC Fab. Maybe ask the cat?
 
Top