denhabr
Member
- Location
- Sandy, Utah USA
February 2010 - Update 3
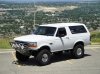
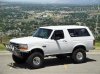
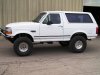
Almost there!!!
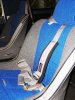
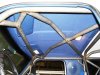
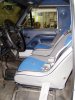
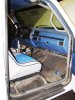
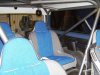
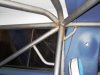
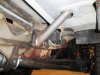
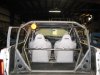
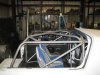
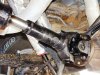
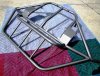
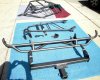
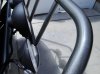
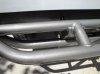
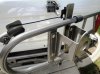
Seats are in, roll cage is done, rubber flooring and headliner is back in, dash reinstalled, and the Hella 4000s and 500s are wired up and working like a charm!
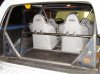
My fabricators provided for a LOT of leg room in back for the rear seat passengers...which translates to a little less room for storage behind the rear seats. However, I will still be able to get a large cooler back there, along with some smaller tool kits to either side of the diagonal side bars. The spare is going on the OEM swing-away tire carrier.
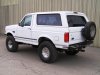
The rear-facing amber LED light was mounted a little too high for my tastes, so the guys are going to remount it lower on the c-pillar and closer to the rear glass.
I'm ordering some Mastercraft restraints to replace the OEM Ford seat belts. With the new configuration on the off-road seats and cage, the stock belts were just not going to cut it. So, I opted for the 4-point version in grey...with sewn in shoulder straps that loop around the lower lap belt outside of the buckle (vice having a shoulder strap that connects into the latch itself.)
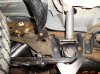
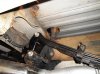
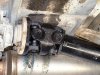
The rear axle truss is still pending fabrication...and that should be about it. Then comes the final payment!!!

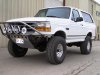
Plans are to take it to my first race in May. I'll be spectating/gambling/drinking at the BOR Racing Wendover 300 event in Wendover, NV, May 1!

Almost there!!!
Seats are in, roll cage is done, rubber flooring and headliner is back in, dash reinstalled, and the Hella 4000s and 500s are wired up and working like a charm!
My fabricators provided for a LOT of leg room in back for the rear seat passengers...which translates to a little less room for storage behind the rear seats. However, I will still be able to get a large cooler back there, along with some smaller tool kits to either side of the diagonal side bars. The spare is going on the OEM swing-away tire carrier.
The rear-facing amber LED light was mounted a little too high for my tastes, so the guys are going to remount it lower on the c-pillar and closer to the rear glass.
I'm ordering some Mastercraft restraints to replace the OEM Ford seat belts. With the new configuration on the off-road seats and cage, the stock belts were just not going to cut it. So, I opted for the 4-point version in grey...with sewn in shoulder straps that loop around the lower lap belt outside of the buckle (vice having a shoulder strap that connects into the latch itself.)
The rear axle truss is still pending fabrication...and that should be about it. Then comes the final payment!!!
Plans are to take it to my first race in May. I'll be spectating/gambling/drinking at the BOR Racing Wendover 300 event in Wendover, NV, May 1!
Attachments
-
 Bronco Fab Set 13 - 2-20-2010 (4).JPG88.9 KB · Views: 7
 -
 Bronco Fab Set 13 - 2-20-2010 (5).JPG65.4 KB · Views: 11
 -
 Bronco Fab Set 13 - 2-20-2010 (3).JPG79.9 KB · Views: 6
 -
 Bronco Fab Set 13 - 2-20-2010 (8).JPG47.4 KB · Views: 10
 -
 Bronco Fab Set 13 - 2-20-2010 (10).JPG53.7 KB · Views: 7
 -
 Bronco Fab Set 13 - 2-20-2010 (11).JPG68.5 KB · Views: 11
 -
 Bronco Fab Set 13 - 2-20-2010 (13).JPG77.6 KB · Views: 7
 -
 Bronco Fab Set 13 - 2-20-2010 (14).JPG96.1 KB · Views: 7
 -
 Bronco Fab Set 13 - 2-20-2010 (16).JPG41.5 KB · Views: 9

 looks great! I'm not much of a ford guy but that turned out damn nice
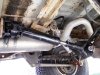


 800x600.JPG")
.JPG")
 Grote G4003 in 6493 Housing.jpg")
.JPG")
.JPG")
.JPG")
.JPG")