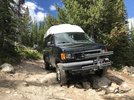
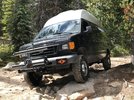
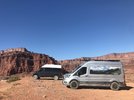
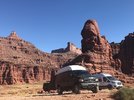
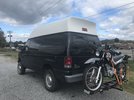
BlackSheep's Bar-B van

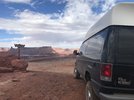
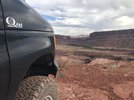
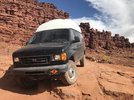
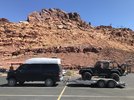
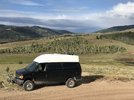
In June of 2023 while driving down Montezuma Canyon road in my Ford Transit 'Galahad', I encountered a creek crossing. That creek crossing resulted in the purchase of my new Bar-B van. I've named her "Bar-B the Barbarivan".

Owners Name & City - BlackSheep. My residence is in South Carolina, but I'm a hippie now mostly traveling full time in my van

Make, Model & Year of Vehicle- 2004 Ford E-350 XL Super Duty with a Quigley 4x4 conversion which was completed when the van was new.

Engine- Ford V-10

Transmission- 4R100

T-Case- Borg-Warner manual shift 1356, 2.69:1 Low range

Axles- Dana 60 Semi Float rear, Dana 60 front. 3.73 gearing

Suspension- Coil spring front, leaf spring rear. Bilstein shocks

Wheels and Tires- 265/75R16 BFG All-Terrain KO2 on stock 7x16" steel wheels and full moon hubcaps :rofl:

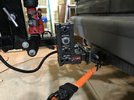
Winch- I have a 10,000# winch on a receiver carrier that I need to wire up. Not really the right capacity for this rig but it came with my F250 when I bought it.

Favorite Trails- to be determined. This van is much more capable then the Transit so I will (and have) take(n) it on trails that I wouldn't have driven the Transit. It's a campervan so there will be limits.

Other-
I purchased this van on June 21, 2023 from the 2nd owner. The van had 47,xxx miles on it. The 1st owner had the Quigley 4x4 system installed as well as a Fiberine 20" Aerodynamic high top. Then that 1st owner did a camper conversion to suit his needs. That 1st owner was from Patagonia and stored the van in Southern California in between making photography trips to the USA for which he used the van.

The 2nd owner purchased the van in 2020 in the height of the world madness. She and her husband, living in Tuscon, Az, installed a roof-top AC system and the shore power connections to run it. They also did a few minor upgrades to the camper electrical system to allow for charging the LiFePo4 100AH battery off of AC power. They made no changes to the interior designed by the original owner.

Here are some photos of the van after I purchased it and brought it to a friend's house before bringing it back to SC:


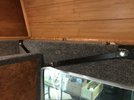
Note the extremely out of place look of the RV AC unit on top of this otherwise awesome looking van!
IMG_4068.JPG


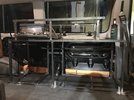
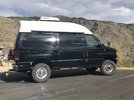
That's a 5 gallon gas tank hanging off the back. You can also see the Maxxair Deluxe fan on the roof. You'll also see the 30A electric so they could run the AC system.
IMG_4118.JPG


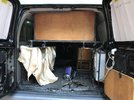
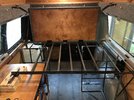
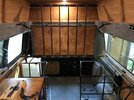
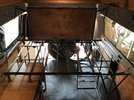
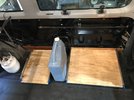
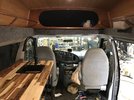
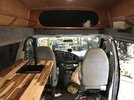
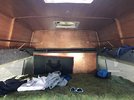
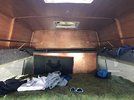
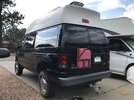
Looking towards the back of the van. The AC control unit hung down a few inches. At 5'5" I could still stand under it but it was a little tight. The platforms covered in carpet can be used as a suspended bed platform. They were a major pain to put in place and I knew they would be removed. I also knew the AC would be removed.
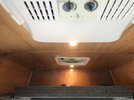
IMG_4102.JPG


Looking towards the front - that cavity is above the cab of the van. It is a great storage place with lots of room.
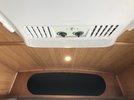
IMG_4103.JPG

Not sure which previous owner installed the swivel on the passenger seat - a very nice feature. on the left you can see the opened bench which has a lot of space for storage.
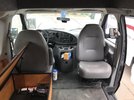
IMG_4107.JPG


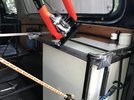
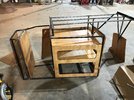
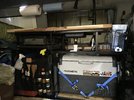
The cabinets on the passenger side. Note that this van has a slider door rather than the barn doors. I wanted the barn doors but with all the other cool stuff about this van, I decided I could live with the slider door. A reasonable sized Dometic chest style electric cooler sits on drawer sliders with the camper electronics housed in the space below the fridge. The cabinets are a unique design using 1/2" square tubing framework with nice wood (type I don't know but not Pine) inserts. I liked this style as it is pretty unique for all the van builds I've seen.
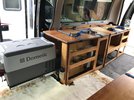
IMG_4111.JPG


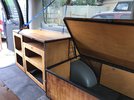
The driver side cabinets are of similar style. The bench / storage was about 74" long from behind the driver seat abutting the rear cabinet.
IMG_4112.JPG


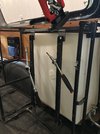
The 17 gallon water tank is on a platform with the pump and some plumbing under the platform. The pump switch is at the slider door, with the electronics. The only outlet for the pump is the hose you see in the photo.
IMG_4113.JPG


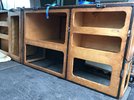
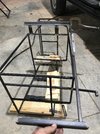
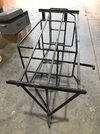
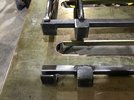
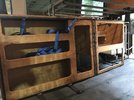
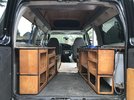
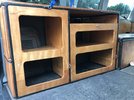
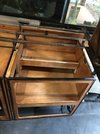
Some close-ups of the rear cabinets. I knew I would be modifying the frames for these cabinets. These pictures are for reference.
IMG_4114.JPG

IMG_4115.JPG


Plans: Modify the interior to suit my needs. Those needs are:
--> fit my bicycle inside the van
--> plumb a sink and an outlet for a shower. This will require also a method to capture grey water and a countertop to mount the sink.
--> build space to have my larger Dometic fridge so I can use the existing as a freezer
--> Build in a real bed platform. I must be able to sit up on the bed. Consider orientation of the bed (N-S or E-W??)
--> Build in a space for my 2 burner propane stove. Plumb the propane so I can attach to my Joolca propane fired shower system. Have a space to store the propane tank
--> Consider options for carrying the Joolca, max-trax traction boards, vehicle fluids, oil change kit, etc. outside the van.
--> Figure out how to cover the hole once I remove the roof-top AC unit.

I may add more bullet items as I add more posts documenting the actual build since I've already done that work. These are the big ones though.
 
Last edited:

BlackSheep

baaaaaaaaaad to the bone
Supporting Member
The first stop after picking up the van was at a Buddy's house near Los Alamos, NM. At that time I had both the Transit and the E-350 at his house. I made appropriate arrangements to get both vans back to SC. In the meantime, I was ordering parts and tools so I could modify the interior to meet my needs. The big tool I ordered was a Hobart 210 MVP MIG welder. I have welded before but I do not consider myself anything more than a beginner. However, since I was spending money to buy a welder I decided I should get one that would also handle larger pieces as I will be building swing-aways for a storage box and possibly a spare tire in the future.

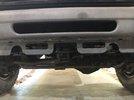
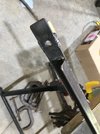
I got the E-350 back to SC around July 27th and I had a committment to a friend to be in SLC to support him for the Wasatch 100 ultra-marathon the weekend after Labor Day. So, I had to get to work. The first job I did was to install the front receiver:

IMG_4185.JPG

I didn't think it necessary to remove the air dam completely so I just trimmed it up. It seems to be a bit off-center :rofl:


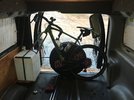
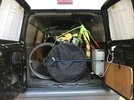
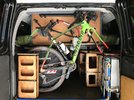
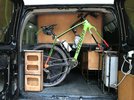
The next thing was to pull the cabinets from the van and determine whether I was going to be able to fit my bicycle inside or not.
IMG_4187.JPG

IMG_4188.JPG

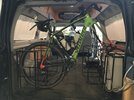
She fit, so then I stripped the frame for the passenger side rear cabinet:
IMG_4171.JPG

IMG_4172.JPG


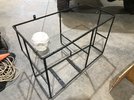
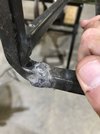
Once I had it stripped, I cut off the rear portion and started modifying / welding up the modifications. See my inexperience in full color!!
:rofl:
IMG_4189.JPG

That square tube is pretty thin so I'll give myself a little break on that. Not pretty but it looks like it will hold.
IMG_4200.JPG


The fork mount needed to be at the proper angle so here I'm trying to get a sense of what that angle needs to be.
IMG_4196.JPG

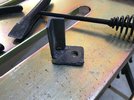
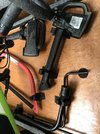
I welded in another piece of angle iron so I could bolt the mount down but I didn't get the angle quite right. You can see on the further bolt a couple of washers I needed to add to improve on the angle.
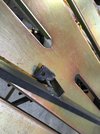
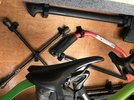
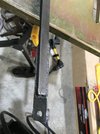
On my other van I had these magnetic tool bars attached to the aluminum extrusion. I found a great place to add them for this van. They are out of the way and keeps my most used tools handy.
IMG_4202.JPG

I also had to modify the cabinet on the driver side so I would have a slot for the rear wheel. I made some cuts and more welds so that I'll also have a spot near the rear wheel to store my pedals, chain lube, etc.
The bike looks pretty good in there.
IMG_4206.JPG
 

BlackSheep

baaaaaaaaaad to the bone
Supporting Member
The next thing I began to work on was how to fit the bed in there. I had measured from the base of the window to the base of the window and found it to be 74". That just happens to be the exact length of a twin sized mattress. Further, when considering the size of the countertop, a twin sized mattress was about 38" wide - that left me the right amount of space for a 48" countertop behind the driver seat. The countertop would have to wait so I started to think about the bed platform. I needed to put the base of the mattress at the base of the window. It was easiest to begin at the rear-most portion of the bed space.

I also wanted to have some type of separation between the 'garage' and the bed space so I re-purposed one of the sections of the original builder's suspended bed platform as a wall between the spaces. I modified the original metal suspension straps to position the upper portion of the 'wall' and tacked in the supports on one side at a time.
IMG_4224.JPG

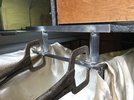
The original builder's suspension straps were cut and repurposed to hang the 'wall' from the original suspension bolts. This is triangulated so the wall does not move. I used the original builder's bolt holes in the "wall".

IMG_4225.JPG
I liked this wall as it would allow the bed to be used like a couch. Later, I found another use for it.

Tacking in the supports on the driver side
IMG_4215.JPG

Both lower supports tacked in. Bolts will attach the "wall" to these supports.
IMG_4217.JPG

Note that I built these supports as part of the cabinet and kept a pass-through in the center. When / if I need to dis-assemble the bed, I can keep the cabinets in place and still have a walk-through. In keeping with this idea of a walk-through, I needed to build bed platforms on top of each of the two rear cabinets:
IMG_4236.JPG


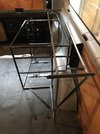
Initially I added only two rails to the cabinet portion of the bed frame. In this photo you can also see the hinge at the base of the wall and a piece of angle iron attached. That is the start of the center section of the bed frame. It attaches to the wall and can be removed with the wall.
IMG_4246.JPG


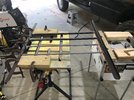
With the driver side cabinet portion of the bed frame in place, I started working on the center section. The passenger side had some complications for which I didn't yet have a solution. Laying out the angle iron and getting it tacked in place:
IMG_4249.JPG


Center section built and mocked up in the van.
IMG_4250.JPG

The hinges made it nice to be able to fold it up and out of the way while I was in there working.
IMG_4251.JPG

With the center section in place, I could see that adding a third support to the driver side cabinet was a good idea. Once finished, that third rail will also add support to the edge of the center section angle iron which is also the part that is hinged to the wall.
IMG_4258.JPG

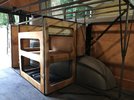
There are a lot of little details that went into this as all y'all know. I spent a lot of time just trying to determine the best way to do what I wanted and keep a level of flexibility in the build in case I wanted / needed to modify later.
 
Last edited:
BlackSheep

baaaaaaaaaad to the bone
Supporting Member
Next I spent a lot of time trying to solve the problem with the bed platform on the passenger side of the van. The challenge here was the forward cabinet which covered the cooler and the electrical box. I needed to be able to remove that cabinet in case I needed to get in depth with the electrical system. That means the portion of the p-side bed platform that extended over that cabinet could not be fixed to the rear cabinet. I considered modifying the electrical cabinet to attach the bed platform but rejected that idea.

I considered extending the center section over the electrical cabinet but in order to fold it up out of the way I could not do that because of the way the roof / high top was built. So, that made me stand in front of the cabinet mulling things over in my mind until I came up with a sliding section of bed frame. I mocked up a piece held together by vise-grips, confirmed it worked then used it to build and weld a second piece. ONce I confirmed the welded pieced worked the way I wanted, I welded up my 'prototype' and assembled the pieces:

IMG_4276.JPG


Now the bed platform was complete.
IMG_4279.JPG


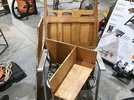
I removed the frames and started mocking up how I would re-assemble the wood within the frames. I repurposed most of the wood that was originally in the frames although I did make some pretty big modifications.
IMG_4263.JPG

IMG_4289.JPG

IMG_4290.JPG


I added this shelf to the passenger side using some of the wood that wasn't being repurposed.
IMG_4291.JPG

The cabinet at the rear of the van to hold my pedals, chain lube, and various items worked out great.
IMG_4292.JPG


Next was to begin the process of building the kitchen.
 
Last edited:
BlackSheep

baaaaaaaaaad to the bone
Supporting Member
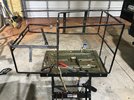
The kitchen is going along the wall behind the driver seat. It needed to have a countertop, sink, faucet, stove and fridge. Plus I needed space for the grey water tank and I needed to consider where I would be storing the propane tank.

Regardless of any other design consideration, I needed to be able to attach it. On the floor, as with the original builder, I was going to use 2 of the factory seat bracket bolts. These are something like 12mm bolts with Torx 55 heads. They will hold very well, but the height of the kitchen made me think it is necessary to also tie it into the wall. First I needed to examine the wall of the van to decide on how I would attach the kitchen.

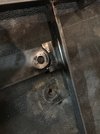
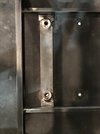
I found two holes that were at the same height as well as depth on the van's interior wall. There was a third hole slightly above the height of the other two and slightly deeper into the wall. The two holes at the same height were the perfect diameter for a 5/16x18 rivnut and I just needed to open up the third hole to fit one there. With those rivnuts in place, I started welding up the bracket.
IMG_4300.JPG

IMG_4302.JPG

IMG_4296.JPG

IMG_4301.JPG

IMG_4299.JPG

I bolted that in place and started laying out the base of the cabinet. The grey water tank fits between the gas fill and the outer base of the frame.
The fridge will be on 24" sliders and the drawer on 22" sliders (at least that's what I thought!). They're not actually bolted to the sliders at this point, just layed out so I can get my head around how big the base needs to be. I'll build a rectangular frame that is focused on fitting that fridge - both width and height. It will also encompass the drawer but the fridge is the main component for the lower portion of the cabinet. The upper portion will need to deal with the stove on a set of sliders and the sink drain.
IMG_4304.JPG

As I was working through the design of the kitchen, I changed out the sliders on the original cooler location. The original builder did not use locking sliders so I changed them. I had to narrow the angle iron frame and the plywood by about 3/8". This is the finished product:

IMG_4308.JPG


IMG_4307.JPG
 
Last edited:
BlackSheep

baaaaaaaaaad to the bone
Supporting Member
Time was starting to get short for me on my build so it seems I took a lot less photos once I got into design and build of the kitchen. I managed to get the base of the kitchen sized properly for the fridge and it accommodated the bulge from the gas tank fill. In building the base I focused on making sure the sliders for the fridge would work properly. I had seen with the original build that the drawer was a bit loose when fully inserted and even worse with the drawer / sliders at full extension. I measured my fridge about 50 times to insure I had the drawer width correct. The Gas tank fill was a limiting factor on the Fridge location.

With the outer sliders bolted in place I built the drawer for the fridge. The drawer is 3/4" plywood surrounded by 3/4" angle iron. I built the drawer making sure it was about as wide as I could squeeze between the sliders. It fits great.

As I had mentioned, I needed to attach the cabinet to the floor as well as the wall. The seat bracket mounting locations are slightly depressed compared to the general plane of the floor. I used angle iron so I could put the frame in place, bolt the brackets in place then tack the bracket at the appropriate level. I actually caught the vinyl floor on fire despite using a welding blanket.

IMG_4327.JPG

IMG_4326.JPG


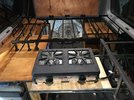
I actually had very few photos of the kitchen cabinet build. Another of my main considerations was the height of the uprights for the upper part of the frame. almost by chance, I selected 10". I toyed around with 8". In looking closely at the stove in the frame, had I gone any shorter for those uprights, the stove would not have fit properly and I would have had to re-do them.

for the location of the fridge (lower right of the frame), note that I made the spacing different from front to back. This was necessary to accommodate the handles on each side of the fridge. At the back it only needed to clear the main dimensions of the box.

for the bracket that attaches the cabinet frame to the wall I added angle iron between the wall bracket and the frame. The angle iron is welded on the van side but bolted on the frame side.
IMG_4329.JPG


I ended up using 24" sliders for the stove. This allows for the stove to clear the edge of the countertop. It did require making the height of the stove drawer such that it cleared the cabinet on the other side of the van.
IMG_4333.JPG

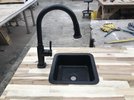
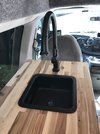
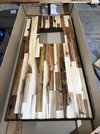
I had considered what material I wanted for the countertop and finally decided on an Acacia wood butcher block I found at Lowes. My buddy helped me narrow the block, cut the hole for the sink and fix the block to the frame. It was necessary to narrow the piece because the van is not really that wide. Additionally, the window behind the driver seat does open up and I needed to reach the latches.

IMG_4318.JPG

IMG_4319.JPG


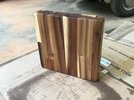
After getting the countertop back to the shop, I sanded and oiled both the countertop and the cutting board we made from the sink cutout.

IMG_4336.JPG


IMG_4339.JPG

With several coats of oil on both pieces, I decided to install.

IMG_4344.JPG
 

BlackSheep

baaaaaaaaaad to the bone
Supporting Member
I still needed to finish plumbing the grey water tank but none of the local hardware stores had a drain to fit my sink. I finally found and ordered one online. Then I was thankful to find a guy at ACE hardware who knew something and was able to help me with the parts I needed to make the 90deg turn towards the grey tank and then into the grey tank.

IMG_4381.JPG


Difficult to see in the above photo, but the elbow at the base of the sink just clears the fridge. That was really pure luck. I couldn't cut the sink drain any shorter because of the threads that extend down so far.
IMG_4382.JPG


I wanted to take advantage of a shelf that was created when the hi-top was installed. I already had a set of baskets I used previously in my Transit, I just needed to figure out how to keep them in place.

In this photo you can see one of the baskets on the right side of the image. I decided on copper pipe as a way to hold the baskets in place.
IMG_4344.JPG

IMG_4366.JPG

The copper works pretty well. I did not sweat any of the joints, instead i just tied them down with some bungee cord. This facilitates removal if I ever find that necessary.

I mentioned that i had found another use for the garage wall. As I looked at it from the back I realized I could mount tools to it. So, my Axe, hatchet, bow saw and tire tools are now mounted to that wall.
IMG_4355.JPG

IMG_4356.JPG

IMG_4357.JPG
 

BlackSheep

baaaaaaaaaad to the bone
Supporting Member
I departed SC on sunday of Labor day weekend, spent the month of September and early October in Utah to test the systems.

My first overnight camp (not counting two sleeps at rest areas along the interstate) was in the Snowy Range, west of Laramie, Wyoming. I had camped here in 2022 in my Transit. It felt great to get the van into the terrain for which it was built.
IMG_4385.JPG

IMG_4392.JPG

I spent from wednesday Sept 6 - Monday Sept 11 downtown SLC with my ultra-running friend. He completed the Wasatch 100 in 33h33m. It was a lot of fun crewing for him along the way. Little did I know that the charging I was getting to the house battery from driving the van was not sufficient to cover the draw from the combination of fridge + freezer. By Saturday night I realized that discrepancy but had no real way to monitor.

I have to give a big thanks to @Hickey for allowing me to crash at his place while I figured out my battery situation. I was able to plug in at his house for most of the day Monday, then overnight. Great hanging out with him and Lory. I was able to determine the house battery is a SMART batter with it's own built in monitoring system. Now at least I would be able to quickly monitor the state of the battery and run the engine as necessary.

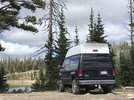
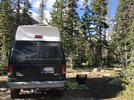
After departing Grantsville, I headed into the Mirror Lake Wilderness. I drove Bar-B up FR 041 to a spot where I had previously camped with the Transit. When I had camped in the Transit it was still early season with a lot of snow so I camped at a lake which was about as far as I was going to take that van. Since it was late summer in Bar-B, I didn't have be concerned about snow and I started following a trail that took me to Blue Lake. I'd posted these photos and some of you know right where this lake is.
IMG_4435.JPG

IMG_4439.JPG

IMG_4450.JPG


I would have never taken the Transit up to Blue Lake. While this photo is not particularly extreme from what y'all are used to, This is a fun trail to be able to take a camper van down. The Bar-B van has MUCH more ground clearance and larger tires compared to the Transit. The solid axle gives much more confidence as well compared to the Transit's F150 component IFS.
IMG_4464.JPG

IMG_4465.JPG

I did a lot of exploration as I headed from the MIrror Lake area down towards Moab. Utah is such an amazing state. Since this is about the van, I'll stick to van stories.

I had previously driven the Transit down the Schaffer Switchbacks. When one of my Transit buddies wanted to drive it I was fully in support. His Transit is 2wd with no lift and slightly oversized tires. He said he scraped only once on the entire drive from Canyonlands NP to the pavement near Potash.
IMG_4634.JPG

IMG_4637.JPG

more to come.
 
Last edited:
BlackSheep

baaaaaaaaaad to the bone
Supporting Member
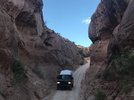
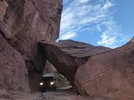
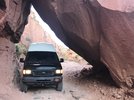
A couple of years ago when I first started traveling in Galahad (the Transit), I had driven to the bottom of Long Canyon Road. I was considering whether I should take the van up that road. I decided to scout it by riding my bicycle from the Colorado River to Hwy 313 and back. I rejected driving the Transit up that road. I also rejected going around and driving down with the Transit. Since I was camped at Lone Mesa Group Campground I didn't hesitate to drive Bar-B down Long Canyon Road. There is a lot more room under that rock than I thought.
IMG_4651.JPG

IMG_4652.JPG

IMG_4653.JPG

After driving down Long Canyon, I headed for Hurrah Pass. When I had the Transit out there in 2021 I had started up Hurrah Pass road but turned around before I really got anywhere interesting. I set up camp at one of the campgrounds and scouted by bicycle. With Bar-B I didn't hesitate to drive up there. While it's not a particularly challenging road by y'alls standards, again, taking an 8200# campervan up there is pretty fun.
IMG_4661.JPG

IMG_4666.JPG

IMG_4669.JPG

IMG_4672.JPG

I'm looking forward to getting out on some more difficult trails with Bar-B. So far it's been a blast.
 

BlackSheep

baaaaaaaaaad to the bone
Supporting Member
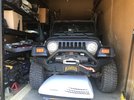
I had been storing my Jeep and trailer in Moab but I had received a letter stating that they were raising my rate from $85/month to $125/month. Well, as I guy with no income I decided that just wasn't going to work. So, while I was out there I closed out the storage unit and hauled the Jeep back to SC.
IMG_4600.JPG

I have a storage here in SC already and I originally set it up because I could fit my Jeep inside. Well, since then I've accumlated stuff and now BlackSheep barely fits in there!
IMG_4722.JPG

Bar-B did great hauling BlackSheep (about 5200# Jeep + Trailer) back to SC. I got about 8.5mpg with that setup. That was an expensive trip back to SC!

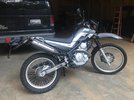
One of the things I liked about the Econoline platform is the price of accessories. The front receiver was around $200 whereas for the Transit I was looking at something like $1600 to get a front receiver. A main point of the Econoline platform is body on full frame. This give me a lot more confidence to do something silly like sell that nice aluminum trailer and buy a cool dirtbike and carrier.

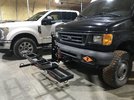
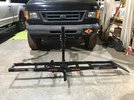
When I bought the carrier i tried to fit it on the front of the van. Unfortunately, without some type of adapter it was not going to fit. I have an adapter, not suitable for carrying the motorcycle, that worked to check out how much of an adapter I would need. These two photos are using that light weight adapter. One issue I noted was the drastic reduction in approach angle with this carrier. It really sticks out a long way.
IMG_4758.JPG

IMG_4759.JPG


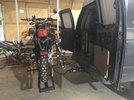
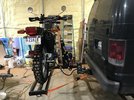
When I picked up the bike I had no adapter so I just carried it on the rear. It works ok but I cannot open the doors much at all with the bike in the carry position. Once lowered to the ground I could get into the doors. I need to get in the doors because that's where I store the tools to raise and lower the bike.
IMG_4763.JPG

IMG_4766.JPG


My friend where I stay when in SC had an adapter so I installed it to see how it would do. It actually worked great and allowed me to open the rear doors. However, the tongue weight capacity of that adapter (when I looked it up online) was only 500# and I wanted to have more than that. I kept looking.
IMG_4768.JPG


Finally, I found this adapter from Gen-Y Hitches. One of the spec sheets I read indicated that this 16,000# adapter has a tongue weight rating of 2000# (my receiver is rated at 1000#). I felt that this adapter would do the job. The biggest advantage is that I can adjust the height of the carrier to multiple positions. With it in the 2nd slot from the bottom (oriented as in the photo below), I can open both doors enough to do what I need to do while the bike is in the carry position. once lowered, I can fully open both doors. In the 3rd slot as shown I can open the passenger side rear door which is enough to access the tools to raise and lower the bike. I do need to find a way to lock the adapter in place. It does bounce quite a bit when I hit a good bump.
IMG_4794.JPG

IMG_4795.JPG

I have not yet set up the adapter for front carry of the bike but I hope to do that while I'm here visiting family in Massachussetts.
 

BlackSheep

baaaaaaaaaad to the bone
Supporting Member
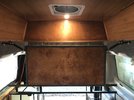
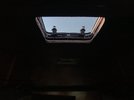
Something I didn't mention - what did I use to fill the hole where the AC was mounted? I found a boat hatch that I was able to adapt and use. It is actually really great because it allows a lot of natural light into the van.
IMG_4365.JPG


This photo is lighted completely by the natural light coming in through the hatch.
IMG_4366.JPG


You can see with this photo how streamlined the boat hatch is on the roof. The hole (I had to enlarge from 14.75" to 16") is large enough that I can open the hatch fully and stick my head and shoulders up out of the van. I could crawl in and out through the hatch but it would be a little challenging (I'm not 20 anymore! lol).
IMG_4498.JPG


As you can see in that above photo, the windows behind the driver door have been tinted with a 5% tint (all the way around to the slider door). The driver and passenger windows have an 18% tint and the windshield has a 70% tint. This is great for privacy and temperature reduction.

I also had a new stereo head unit and speakers installed. The stereo is a Jensen 710 with apple carplay. Also installed all new speakers which are also Jensen. For you audiophiles out there it's probably sub-standard but it works great for me. I was surprised how much quieter this van is compared to the Transit.
 

BlackSheep

baaaaaaaaaad to the bone
Supporting Member
After a month traveling in the van, what did I find?

1. I need passive solar. This means panels on the roof. I've actually ordered 2 100W panels. That's about all I"m going to be able to fit up there. They are Renogy flexible panels. I'll attach them with 3M double sided sticky tape. I've also purchased a Renogy portable 120W panel to increase the capacity of the panels and allow me to be able to take advantage of shade for the van while still gaining some energy from the sun. This will also require a replacement of the solar controller so I've gone with a Victron 100V/30A controller. With 200W solar I'm pretty sure I can overcome the draw from the fridge + freezer.

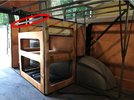
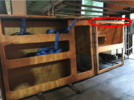
2. Under the bed, for the cabinets I modified, I realized that I'm limiting myself for what I can fit in the upper shelves. What I found was these upper frame pieces (circled in the photos) are really just getting in the way. I'll cut them out and open up that space. That particular frame member isn't really necessary as the bed frame works to stabilize the rest of the framework.
modify cabinets1.jpg

modify cabinets2.jpg.png

That's really the most of it. I want to find a place to fit my inflatable stand up paddleboard so I'll think through that a bit.
Thanks for looking!
 

Herzog

somewhat damaged
Admin
Location
Wyoming
Awesome John! That van seems much more versatile and capable than the last one. If you're ever up in our area (we moved way north from the last place you stopped at) you have a place to stay anytime!
 

BlackSheep

baaaaaaaaaad to the bone
Supporting Member
Awesome John! That van seems much more versatile and capable than the last one. If you're ever up in our area (we moved way north from the last place you stopped at) you have a place to stay anytime!
Thanks Shane, I’ve seen that you’ve moved. I’ll be back out that way next spring and summer. I’ll make sure to ping you.
 
Top