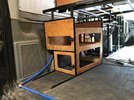
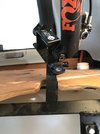
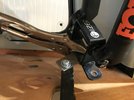
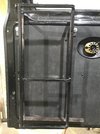
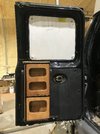
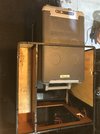
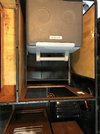
BlackSheep's Bar-B van

In June of 2023 while driving down Montezuma Canyon road in my Ford Transit 'Galahad', I encountered a creek crossing. That creek crossing resulted in the purchase of my new Bar-B van. I've named her "Bar-B the Barbarivan".

Owners Name & City - BlackSheep. My residence is in South Carolina, but I'm a hippie now mostly traveling full time in my van

Make, Model & Year of Vehicle- 2004 Ford E-350 XL Super Duty with a Quigley 4x4 conversion which was completed when the van was new.

Engine- Ford V-10

Transmission- 4R100

T-Case- Borg-Warner manual shift 1356, 2.69:1 Low range

Axles- Dana 60 Semi Float rear, Dana 60 front. 3.73 gearing

Suspension- Coil spring front, leaf spring rear. Bilstein shocks

Wheels and Tires- 265/75R16 BFG All-Terrain KO2 on stock 7x16" steel wheels and full moon hubcaps :rofl:

Winch- I have a 10,000# winch on a receiver carrier that I need to wire up. Not really the right capacity for this rig but it came with my F250 when I bought it.

Favorite Trails- to be determined. This van is much more capable then the Transit so I will (and have) take(n) it on trails that I wouldn't have driven the Transit. It's a campervan so there will be limits.

Other-
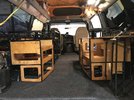
I purchased this van on June 21, 2023 from the 2nd owner. The van had 47,xxx miles on it. The 1st owner had the Quigley 4x4 system installed as well as a Fiberine 20" Aerodynamic high top. Then that 1st owner did a camper conversion to suit his needs. That 1st owner was from Patagonia and stored the van in Southern California in between making photography trips to the USA for which he used the van.

The 2nd owner purchased the van in 2020 in the height of the world madness. She and her husband, living in Tuscon, Az, installed a roof-top AC system and the shore power connections to run it. They also did a few minor upgrades to the camper electrical system to allow for charging the LiFePo4 100AH battery off of AC power. They made no changes to the interior designed by the original owner.

Here are some photos of the van after I purchased it and brought it to a friend's house before bringing it back to SC:


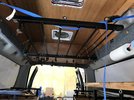
Note the extremely out of place look of the RV AC unit on top of this otherwise awesome looking van!
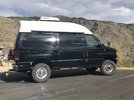
IMG_4068.JPG


That's a 5 gallon gas tank hanging off the back. You can also see the Maxxair Deluxe fan on the roof. You'll also see the 30A electric so they could run the AC system.
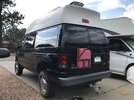
IMG_4118.JPG


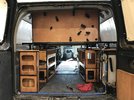
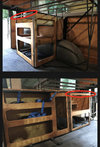
Looking towards the back of the van. The AC control unit hung down a few inches. At 5'5" I could still stand under it but it was a little tight. The platforms covered in carpet can be used as a suspended bed platform. They were a major pain to put in place and I knew they would be removed. I also knew the AC would be removed.
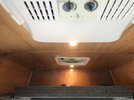
IMG_4102.JPG


Looking towards the front - that cavity is above the cab of the van. It is a great storage place with lots of room.
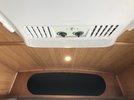
IMG_4103.JPG

Not sure which previous owner installed the swivel on the passenger seat - a very nice feature. on the left you can see the opened bench which has a lot of space for storage.
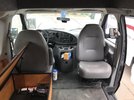
IMG_4107.JPG


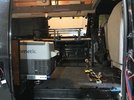
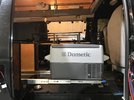
The cabinets on the passenger side. Note that this van has a slider door rather than the barn doors. I wanted the barn doors but with all the other cool stuff about this van, I decided I could live with the slider door. A reasonable sized Dometic chest style electric cooler sits on drawer sliders with the camper electronics housed in the space below the fridge. The cabinets are a unique design using 1/2" square tubing framework with nice wood (type I don't know but not Pine) inserts. I liked this style as it is pretty unique for all the van builds I've seen.
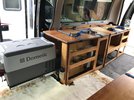
IMG_4111.JPG


The driver side cabinets are of similar style. The bench / storage was about 74" long from behind the driver seat abutting the rear cabinet.
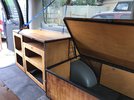
IMG_4112.JPG


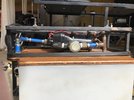
The 17 gallon water tank is on a platform with the pump and some plumbing under the platform. The pump switch is at the slider door, with the electronics. The only outlet for the pump is the hose you see in the photo.
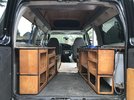
IMG_4113.JPG


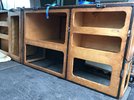
Some close-ups of the rear cabinets. I knew I would be modifying the frames for these cabinets. These pictures are for reference.
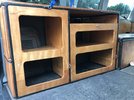
IMG_4114.JPG

IMG_4115.JPG


Plans: Modify the interior to suit my needs. Those needs are:
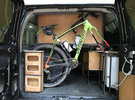
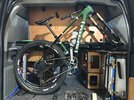
--> fit my bicycle inside the van
--> plumb a sink and an outlet for a shower. This will require also a method to capture grey water and a countertop to mount the sink.
--> build space to have my larger Dometic fridge so I can use the existing as a freezer
--> Build in a real bed platform. I must be able to sit up on the bed. Consider orientation of the bed (N-S or E-W??)
--> Build in a space for my 2 burner propane stove. Plumb the propane so I can attach to my Joolca propane fired shower system. Have a space to store the propane tank
--> Consider options for carrying the Joolca, max-trax traction boards, vehicle fluids, oil change kit, etc. outside the van.
--> Figure out how to cover the hole once I remove the roof-top AC unit.

I may add more bullet items as I add more posts documenting the actual build since I've already done that work. These are the big ones though.
 
Last edited:

ID Bronco

Registered User
Location
Idaho Falls, ID
Was this at the transmission shop on Broadway in Idaho Falls last week? I swear it was yours but I was traveling at a high rate of speed as I noticed it. The hub caps were the same though. If so, do you need anything? I live near there.
 

BlackSheep

baaaaaaaaaad to the bone
Supporting Member
For the last couple months I’ve been compiling a list of projects / upgrades for the van. Here’s the list:

DONE - move fridge forward on tray - I can't open the fridge lid completely and I have about an inch of drawer available. If I move the fridge forward this inch I should be able to completely open the lid.

DONE remount / switch orientation of freezer - the compressor and vents are currently hidden in the cavity. If I switch the orientation then the compressor and vents will be open to the living space of the van - hopefully this will improve the ventilation and improve the efficiency of the freezer.

@ shelf under copper - some of the baskets are slipping through depending on how I have them loaded. Adding a shelf the width of the baskets will prevent this.

DONE - sliding table behind D seat - When sitting in the rotated passenger seat, I don't have a side table to put my drink or snacks or book (or whatever). I have a shelf that I can mount up a drawer slider to give myself a little side table.

@ swing away box mount - on the back of the van. I have a 18" x 36" aluminum box that I want to mount on the back. I'm going to run into issues with the clearance of the motorcycle. This will be a fun project.

@ install Joolca propane fired shower system - intended to be mounted to the box mentioned above.

@ install maxtrax - intended to be mounted to the box mentioned above.

@ move trailer plug - mount directly into bumper?

@ reseal roof - the high top is leaking because the sealant is cracked.

@ USB plugs above sink - lots of electrical modifications on the plan

@ scoche magnet for phone - placement? - I have a spare magnet mount for my iphone, I just need to decide where to mount it.

@ wire cig plug for fridge - this requires running wire from the passenger side electrical box to the driver side where the fridge is mounted

@ wire secondary water pump switch at rear of van - if I"m taking a shower it would be nice to have a switch at the rear of the van instead of inside the slider door.

@ install solar and controller with exterior plug - Two 100W panels to be mounted to the roof with a new solar controller and an exterior plug for my portable panel.

@ modify plugs above slider to be always hot. Remove lighted switch - just more electrical details I need to work out.

@ wire radio with switch to stay on when wanted - nice to be able to play the radio while hanging at camp.

@ wire at least one double USB plug on dash hot at all times - I am powering my rear view camera monitor, ipad and iphone from the dash now. I need to also power my Garmin device.

@ Consider what to do about camera plug - change to power pole? - details for the dash setup. The rear view camera monitor is currently a round (cigarette) style plug

@ order and install Espar - heater to draw directly from the gas tank. This is what my other van has and it is really great.

@ install insulation in slider and behind slider. Also in rear doors - the van really needs as much insulation as I can fit. I have a box of wool insulation so I'm going to try to use all of it.

@ insulate h2o pump and battery - I had two incidents where my pump lightly froze in the last couple weeks when we had our coldest days here in SC. I need to try to better protect the pump. Also the battery is lithium so I need to try to protect it from freezing.

DONE plug holes in rear dside door - previous owner had a 5 gal gas can mounted through the door skin. Those holes are still there and need to be sealed.

@ finish hatch opening - the boat hatch I put in place of the AC is not finished on the inside in part because I wanted to make sure it didn't leak. I'll see what I can do to make that look pretty.

@ magnets in rear window covers - the insulated covers on the rear doors hold ok with the suction cups but magnets are much better.


I'm sure there are other things but this is the list so far.
 
Last edited:
Tonkaman

Well-Known Member
Location
West Jordan
Since you’re looking to install an Espar heater and a Joolca water heater, why not combine them? Have you looked into a hydronic heater? You would have the added benefit of engine coolant heating the water as well.
 

BlackSheep

baaaaaaaaaad to the bone
Supporting Member
Since you’re looking to install an Espar heater and a Joolca water heater, why not combine them? Have you looked into a hydronic heater? You would have the added benefit of engine coolant heating the water as well.
I’ll have to look into that. I already have the Joolca but haven’t yet ordered the Espar. Thanks for the tip.
 

BlackSheep

baaaaaaaaaad to the bone
Supporting Member
One item not on my list - mostly because I wouldn’t forget about it - I bought a “new” bicycle and need to modify the rear cabinets to make it fit.

This was the bike I carried originally:
CE337D39-1B7D-47CA-B5AC-62B0FAA86165.jpeg

And this is where I started today:
9FFB48A8-8B33-410C-B70F-C991FA483C7F.jpeg

I’m pleased with my design as it allowed me to remove the rear cabinet without disassembling the entire van:
F607F2C5-9331-4F91-93F6-67EC45DEEF31.jpeg

All I had to do was remove two bolts and raise the center bed frame which is attached to the garage wall. I have supports for the wall and had some eye bolts to hook a ratchet strap to hold the bed frame.

This allowed me to remove the rear cabinet on the driver side and make some cuts which removed the rearmost part of the cabinet - necessary for me to be able to put the new bike in the rear of the van. After the cuts I reinstalled the main cabinet:
5D696FE3-698E-4292-8946-6510B3058891.jpeg

Then it was down to working out the details to fit the new bike in. I’ll post those up in the next post.
 

BlackSheep

baaaaaaaaaad to the bone
Supporting Member
In order to fit the new bike in, I needed a different angle for the fork mount than I had for the other bike.
B01E2653-C8FF-4D9A-9C66-DBC52D85746A.jpeg

I had some cutoff metal from the previous work so I grabbed a piece of strap steel and started prototyping
702C5F36-B721-4BD4-9E1C-900647DADFB9.jpeg
55C7885A-975D-461C-9D15-3B3D834E5B0C.jpeg

This was a piece of 1/8” which is definitely too thin. However, in the original build I didn’t get the angle of the fork mount quite right and I could easily bend the 1/8”. That allowed me to move the bike in and out several times to check how it fit. A key element was to make sure the through axle would clear the cabinet top. So the angles of the mount were important.

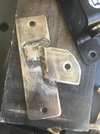
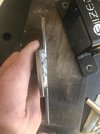
Once I was satisfied that I could easily move the bike in and out of the van I took a piece of 3/16” strap steel and started making the fork mount adapter. It is two pieces that I will weld together. I’ll bolt it to the existing piece to give me flexibility in case I want to carry a different bike.

You could say that I’m still prototyping as I haven’t fully addressed my original build angle mistake. Where it sits now is with this spacer piece.
153E033C-52DD-453D-9322-BE3B7D05D59B.jpeg
3D5B0753-85B9-4B72-9D5F-6CDC1579D3E4.jpeg

Tomorrow I’ll see if I can bend the 3/16” strap so I can just weld it up without the little spacer.

So far I'm pleased - the bike looks great in there.
798E0BDA-E076-47A9-B6E2-DD05DB7111AC.jpeg
 

BlackSheep

baaaaaaaaaad to the bone
Supporting Member
This morning I started by trying to bend the 3/16” plate to the adjusted angle I needed. As I was working the metal the entire structure started to bend. Initially I thought that wouldn’t be an issue. However, when I went to put the bike in the axle was no longer sliding through easily. I messed with it for a while before I realized the extent to which the structure had changed. I bent it back, put my spacer back in place and the axle slid through like butter. So, I just welded it up with the spacer in place. I need to buy some paint and it will be done.
1680412D-7310-4369-BAFA-82916CC943B6.jpeg

296DD6D2-4665-4B9B-9B69-E18F98DD31BA.jpeg

674B6D3E-203C-4160-B822-34402F2C0739.jpeg

CC80DE5A-CD61-423A-A3CE-EF982547ECA5.jpeg

9A8E7C49-5257-4632-965B-D9A703DB1ADA.jpeg

Don’t look too closely at the welds. 🤣🤣
 

BlackSheep

baaaaaaaaaad to the bone
Supporting Member
Moving the fridge forward was an easy one. I moved it as far forward as I could which is about 1.5” or so.
717AC1BC-1914-47CA-A2C1-AA52B8DE4CA7.jpeg

EA18A93D-F6F4-4D28-992E-3448645A8CD3.jpeg

The ratchet straps stick out a little but I doubt it will be an issue
F905307A-76FE-449D-B306-4D5B9EAD6F8E.jpeg

At least now I can open the top all the way. That will be nice when loading it up.
9F4C4953-442C-43E6-9B35-8611EE2EE469.jpeg
 

BlackSheep

baaaaaaaaaad to the bone
Supporting Member
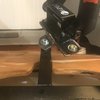
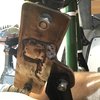
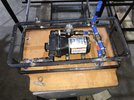
I’m trying to tackle the easy stuff as quickly as possible so I just found a solution for a side table. I couldn't easily reach my drink or snack or whatever when it was on the existing shelf below the countertop so finding a way to make that a side table was important. I won’t weld it up until I pull the kitchen out of the van but here’s the solution

 
Last edited:
BlackSheep

baaaaaaaaaad to the bone
Supporting Member
The last several days I’ve been working on more little stuff. I’ve completed the modifications to the two rearmost cabinets - removing a frame member on each one so they each become more useful. It’s these frame members I noted previously:
61C95619-C81D-4F9B-B565-C6A48948C128.jpeg

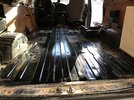
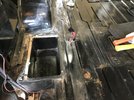
Of course to cut those out the cabinets were out of the van. Once all of the cabinets were out I noticed that the floor insulation was wet at the back of the van. So, I pulled the flooring out:
24629587-4188-4426-9451-647360880DA2.jpeg

I hope the insulation dries out over the next few days
3C8ACDCE-1CAE-4239-ACF9-F808DD51D5CA.jpeg

Among the items on my list is insulation of the van and the water pump. To access the body panel behind the slider door I needed to pull out the water tank and pump. Thankfully I already had a cut-down adjustable wrench - otherwise I would have had to make one. There is maybe 4-5” between the tank support and the floor of the van:
364BDCA0-BC42-478D-BB1B-5E1179C90356.jpeg

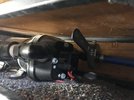
The tank is strapped to the metal framework and the metal frame work is bolted to the floor of the van. The water pump is also screwed to the floor of the van so I had to remove the tank and frame before I could unscrew the pump. Here it is, upside-down out of the van:
D28B44B6-2B8E-4681-A620-A02873B8F38E.jpeg
FCCB11F9-1758-48FE-B9AD-F90C111C1401.jpeg

I didn’t like that I had to break the water-tight connections to remove the water system so I ran to the hardware store, bought the appropriate PEX parts and pieces and re-did the system so the pump mounts to the bottom of the board on which the tank sits. There’s some risk that the vibration of the pump may pull out the screws but I’ll deal with that if it happens. Here’s the modified system:
58E0FA9F-7166-4090-8D1F-AF2CDD3CC1C4.jpeg
291F7971-B214-4EEF-AFCE-CC8BB28A859E.jpeg

I wanted to use the newest style shark bite connectors but the spacing under the tank wouldn’t accommodate the size of those type connections. So, I had to buy a crimping tool and the crimp clamps to get it assembled. It is all tightened up, I just need to test for leaks.

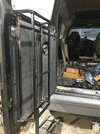
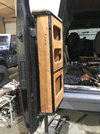
I have also welded in the support for my side table. Here I’m setting the height to insure a level table when it is deployed:
61BD1886-C303-41B1-864C-76449B7203A8.jpeg
827FB8AE-9F45-4A35-B6CE-955626171A32.jpeg

Plenty of work to be done yet. Thanks for following along.
 

BlackSheep

baaaaaaaaaad to the bone
Supporting Member
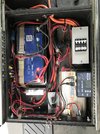
When I bought the van I pulled everything out so I could clean out the packrat's nesting. That offered me an opportunity to take a look at the electrical system for the van. Here's a photo I took back in June 2023:
IMG_4098.JPG

Here's what it looks like this evening:
IMG_5136.jpg

I needed to clean up a bit of that wiring and in fact, today's photo actually has some of the clean-up that I'd done already. However, I've decided to install a fuse block to clean things up a bit more as I add a couple more circuits for the fridge and some USB ports on the dash. I need to also keep in mind the addition of more wiring for the Espar heater.

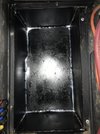
I found that the battery was wet on the bottom when I removed it and that there was some rust on the bottom of the battery tray - the photo above is after I cleaned it up and painted it. I need to seal that compartment a bit so water doesn't get into it. Especially since I will be adding some insulation under the battery. I need to keep that area dry as possible.
 

BlackSheep

baaaaaaaaaad to the bone
Supporting Member
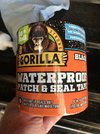
In an attempt to seal the battery compartment I used silicone sealant on the inside and bought some Gorilla patch and seal tape for the bottom. I did my best to clean the surfaces on the bottom so I hope it works.
7354CDFF-F36C-4425-90E1-612067234403.jpeg
CBB04656-6C5F-4347-B239-F1D1E1B344B8.jpeg
F85B0CC5-0EA4-4E44-9218-AE1EA37BE61F.jpeg

Sealing that box actually took a couple days as I painted the inside and had to give it curing time before I did the silicone.

The bottom didn’t take long but it sits directly in front of the rear tire and gets a lot of road spray and splashing. So it took about as long to clean it as it took to tape it up. I used a bunch of smaller pieces of the seal tape because it was a tight spot to work.

This afternoon’s project was fab up the door mount for the little cabinet that I removed to fit the new bike.
2C0C0904-6003-46B7-B33D-F04CEA11A168.jpeg
B44DA047-5750-4E71-B46A-BCDF0C1B8892.jpeg
1BB15316-27A8-4E04-99B6-B1FD3CEE6903.jpeg
DA581794-7604-4BDA-94A0-1B093D736A6C.jpeg

It’s just mocked up in there until tomorrow when I’ll remove and disassemble for paint.

It’s held in with four 5/16 X 18 bolts threaded into rivnits I installed on the inner body panel. The complete assembly with all the stuff is probably less than 20 lbs so I hope that holds and doesn’t just deform the inner body sheet metal.
 

BlackSheep

baaaaaaaaaad to the bone
Supporting Member
My previous post showed how I was trying to seal the battery compartment because I found moisture inside when I pulled the battery. Well, this is what my electrical box looks like now:
IMG_5171.jpeg

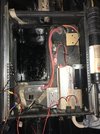
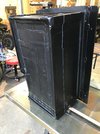
Yep, I pulled the complete box from the van. As I was working on trying to make an insulator for the battery, I realized how poorly it was sealed even after my previously noted attempts.

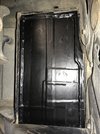
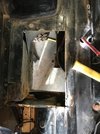
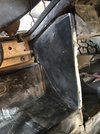
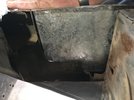
Turns out, there was a massive hole direct to the outside where the battery is. The original builder used a chunk of sheet metal to cover it up.
IMG_5172.jpeg
IMG_5173.jpeg
IMG_5167.jpeg

It's no wonder that I felt so much cold air coming in near the battery. He attempted to put some insulation in there but it was useless. So, I'll work on trying my best to seal up that cavity as much as possible. Having completely removed the electrical box now allows me to really refresh it.

You can see that he used rivits to attach the battery box. The electrical box was screwed into the sheet metal. A couple of the screws broke when I tried to remove them. I got one out, there is still one more that I have soaked in PB Blaster.

I'll try to reinforce the mounting for the battery box and the electrical box - some of the mounting holes he used are barely into the sheet metal. I would like to use rivnuts if possible so I'll have to ponder on that for a while and see what I can do. I may have to weld an extension to the edge of the boxes so I can actually get the rivnuts into solid sheet metal.
 

BlackSheep

baaaaaaaaaad to the bone
Supporting Member
After nearly a week of working on the battery box and electrical box I have finally re-installed the battery box. During the week I added mounting tabs to both the battery box and the electrical box and riv-nuts to bolt them down. My intention is that I'll be able to remove the cabinets and pull the entire electrical box out of the van by simply disconnecting the wires coming/going to/from the box and disconnecting the battery.

For the battery box, I had previously shown an attempt at using the patch and seal tape on the box while it was in place. Since I had it out of the van to weld the tabs, I decided to completely wrap the box in the patch and seal tape.

IMG_5199.jpeg

It was already a pretty tight fit into the floor cavity but with it wrapped in tape - WOW! I had to hammer it into place once I decided to seal it up and bolt it in. Before I installed the box I ran a bead of caulking around the edge. Hopefully that will help seal water out of the compartment.
IMG_5200.jpeg

You can see the 4 x 6mm allen head bolts holding the battery tray in place now.

I previously noted the huge air gap that the original builder had left in the footwell of the slider door. I failed to take a photo before I put the battery back in but I used reflectix and ZIPP flashing tape to do my best to seal the air out. I figured that the reflectix won't really hold any water and the flashing tape is basically water and wind proof. There is a bit of gorilla tape (duct tape) visible but that was just to hold the ends down. I may mess with that a bit more as it is accessible with the battery box in place.
IMG_5201.jpeg

I also ran some caulking around there between the battery box and the flashing tape. It should at least slow down the air and I'm pretty sure it is going to be waterproof.

I have painted the electrical box frame but as I sit here I'm reconsidering the configuration of that box and the cabinet above it. Recall that directly on top of the electrical box is a drawer slider with my freezer on it. I may push the drawer / freezer forward in the van so I can open up cabinet space behind the freezer to mount up the DC to DC charger, AC to DC charger and the solar controller. If I can make the electrical cabinet a single unit that contains all of the components then I'll be quite pleased. It would require a modification to the cabinet but I had some thoughts on re-designing it anyway.
 

BlackSheep

baaaaaaaaaad to the bone
Supporting Member
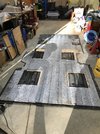
Today I was working on fitting the electrical box and considering modifications to the freezer drawer slider and the cabinet that sits over the top of the electrical box / freezer. In order to make sure the electrical box fit properly, I decided to start fitting the new flooring I got the other day. Once I fit the Vanrug - I had to do some trimming around the rear mounted AC/heater unit as well as trim out the battery box - I decided to go ahead and start finding the bolt holes that hold all of the cabinets in. Many of them I could locate from under the van so I just poked a pointed dental tool up through the flooring and went from there.

All of the cabinets to include the kitchen unit I fabricated are held down very well and in fact the vanrug helps to stabilize them. The kitchen is also attached to the wall so it's solid. The two rear-most cabinets are stabilized by the garage wall that I will reinstall. The only one I need to work on is the cabinet that goes over the top of the electrical box / freezer. It was also connected to the wall but I don't really like the way it is connected so I'm working on that a bit. Here's how it looks:

IMG_5203.jpg
IMG_5204.jpg

Once I had everything in there I needed to start looking at what I can do to open up the electrical cabinet a bit. One of the things on my list was to reorient the freezer so the vents are open to the van rather than hiding inside the cabinet. After much contemplation, I decided to just move the drawer sliders towards the front of the van (and do the reorientation) just to see how that works out. Well, turns out it's perfect!

Here it is with the drawer in the closed position - still plenty of room to get in and out of the van:
IMG_5205.jpg

And here in the open position:
IMG_5206.jpg

Just that alone solved a big issue for me. It was VERY difficult to remove (or reinstall) the drawer slider because of the way the freezer was bolted to the drawer. It had to be done with the freezer attached. In this configuration I can access the bolts at both the front and rear facing sides of the drawer so if I have to remove the drawer slider I can pull the freezer off first. MUCH EASIER!!

The extra bonus of moving the drawer further forward is the ease of access to the electrical box:
IMG_5207.jpg
IMG_5208.jpg

Of course I haven't reinstalled all of the electronics yet but I'll have to modify that electrical box so I can move that control panel face out to the forward edge of the closed position drawer. That's going to give me almost a foot of extra space for my electronics! That's going to make it much easier to get that box organized especially with the addition of a fuse block. In fact, I'm going to take back the small fuse blocks I picked up at my local auto parts store and order something a bit more substantial.

Now for the extra extra bonus - there is now a space above the electrical box (behind the freezer) in which I can install my solar controller, DC to DC charge controller and my AC to DC charge controller. Here's the space with the drawer in the closed position:
IMG_5209.jpg
IMG_5210.jpg

I'll hinge the top surface of the cabinet for ease of access.

I'll put a top over the closed position freezer but I may or may not put sides on that section. I'll have to work out how I'm going to build the extended electrical box then I can decide on how I want to enclose the cabinet.

I'll have to remove all of that stuff including the vanrug so I can seal up the floor but it served it's purpose today.

thanks for following along.
 
Top