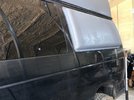
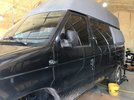
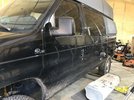
BlackSheep's Bar-B van

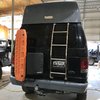
In June of 2023 while driving down Montezuma Canyon road in my Ford Transit 'Galahad', I encountered a creek crossing. That creek crossing resulted in the purchase of my new Bar-B van. I've named her "Bar-B the Barbarivan".

Owners Name & City - BlackSheep. My residence is in South Carolina, but I'm a hippie now mostly traveling full time in my van

Make, Model & Year of Vehicle- 2004 Ford E-350 XL Super Duty with a Quigley 4x4 conversion which was completed when the van was new.

Engine- Ford V-10

Transmission- 4R100

T-Case- Borg-Warner manual shift 1356, 2.69:1 Low range

Axles- Dana 60 Semi Float rear, Dana 60 front. 3.73 gearing

Suspension- Coil spring front, leaf spring rear. Bilstein shocks

Wheels and Tires- 265/75R16 BFG All-Terrain KO2 on stock 7x16" steel wheels and full moon hubcaps :rofl:

Winch- I have a 10,000# winch on a receiver carrier that I need to wire up. Not really the right capacity for this rig but it came with my F250 when I bought it.

Favorite Trails- to be determined. This van is much more capable then the Transit so I will (and have) take(n) it on trails that I wouldn't have driven the Transit. It's a campervan so there will be limits.

Other-
I purchased this van on June 21, 2023 from the 2nd owner. The van had 47,xxx miles on it. The 1st owner had the Quigley 4x4 system installed as well as a Fiberine 20" Aerodynamic high top. Then that 1st owner did a camper conversion to suit his needs. That 1st owner was from Patagonia and stored the van in Southern California in between making photography trips to the USA for which he used the van.

The 2nd owner purchased the van in 2020 in the height of the world madness. She and her husband, living in Tuscon, Az, installed a roof-top AC system and the shore power connections to run it. They also did a few minor upgrades to the camper electrical system to allow for charging the LiFePo4 100AH battery off of AC power. They made no changes to the interior designed by the original owner.

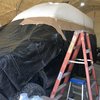
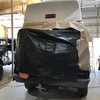
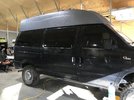
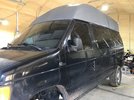
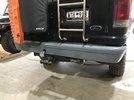
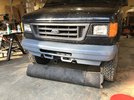
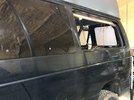
Here are some photos of the van after I purchased it and brought it to a friend's house before bringing it back to SC:


Note the extremely out of place look of the RV AC unit on top of this otherwise awesome looking van!
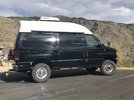
IMG_4068.JPG


That's a 5 gallon gas tank hanging off the back. You can also see the Maxxair Deluxe fan on the roof. You'll also see the 30A electric so they could run the AC system.
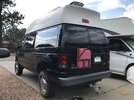
IMG_4118.JPG


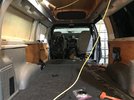
Looking towards the back of the van. The AC control unit hung down a few inches. At 5'5" I could still stand under it but it was a little tight. The platforms covered in carpet can be used as a suspended bed platform. They were a major pain to put in place and I knew they would be removed. I also knew the AC would be removed.
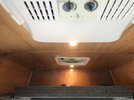
IMG_4102.JPG


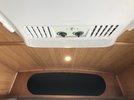
Looking towards the front - that cavity is above the cab of the van. It is a great storage place with lots of room.
IMG_4103.JPG

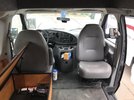
Not sure which previous owner installed the swivel on the passenger seat - a very nice feature. on the left you can see the opened bench which has a lot of space for storage.
IMG_4107.JPG


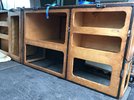
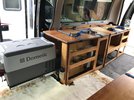
The cabinets on the passenger side. Note that this van has a slider door rather than the barn doors. I wanted the barn doors but with all the other cool stuff about this van, I decided I could live with the slider door. A reasonable sized Dometic chest style electric cooler sits on drawer sliders with the camper electronics housed in the space below the fridge. The cabinets are a unique design using 1/2" square tubing framework with nice wood (type I don't know but not Pine) inserts. I liked this style as it is pretty unique for all the van builds I've seen.
IMG_4111.JPG


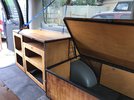
The driver side cabinets are of similar style. The bench / storage was about 74" long from behind the driver seat abutting the rear cabinet.
IMG_4112.JPG


The 17 gallon water tank is on a platform with the pump and some plumbing under the platform. The pump switch is at the slider door, with the electronics. The only outlet for the pump is the hose you see in the photo.
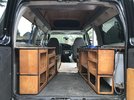
IMG_4113.JPG


Some close-ups of the rear cabinets. I knew I would be modifying the frames for these cabinets. These pictures are for reference.
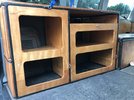
IMG_4114.JPG

IMG_4115.JPG


Plans: Modify the interior to suit my needs. Those needs are:
--> fit my bicycle inside the van
--> plumb a sink and an outlet for a shower. This will require also a method to capture grey water and a countertop to mount the sink.
--> build space to have my larger Dometic fridge so I can use the existing as a freezer
--> Build in a real bed platform. I must be able to sit up on the bed. Consider orientation of the bed (N-S or E-W??)
--> Build in a space for my 2 burner propane stove. Plumb the propane so I can attach to my Joolca propane fired shower system. Have a space to store the propane tank
--> Consider options for carrying the Joolca, max-trax traction boards, vehicle fluids, oil change kit, etc. outside the van.
--> Figure out how to cover the hole once I remove the roof-top AC unit.

I may add more bullet items as I add more posts documenting the actual build since I've already done that work. These are the big ones though.
 
Last edited:

BlackSheep

baaaaaaaaaad to the bone
Supporting Member
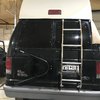
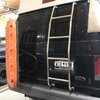
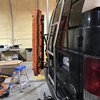
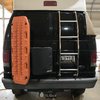
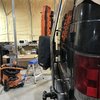
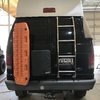
With the roof resealed I’m able to move on to another project. Today I installed a ladder and an equipment carrier. Instead of the nuts and bolts suppled with the items, I installed rivnuts for all bolt locations. Makes it much easier to install or remove.

A49AE339-082E-4A35-8CD2-3C43A7F6B00B.jpeg

Technically, this “equipment carrier” is actually a tire carrier. I’m calling it an equipment carrier because I’m working towards mounting my maxtrax and my propane shower system on it.

I had a queen size bed frame that I picked up at the Habitat for Humanity Restore for $25. You can’t get that much metal at a metal shop for that kind of money.

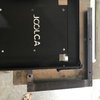
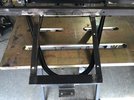
The bed rails, after grinding the rivets and removing the legs and attachment hardware, are 82”. Cutting one rail in half gave me just what I needed to make the Maxtrax mount.

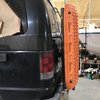
I drilled and mounted the maxtrax mounting pins and attached the boards. I took a couple pieces of scrap strap steel and tack welded the angle iron in place. This allowed me to carry around just the mounting frame as I fit it to the equipment carrier.
17BB1996-633A-42A7-B54D-4C7D2FE02409.jpeg

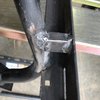
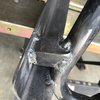
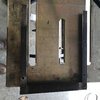
I needed to make sure the boards were spaced far enough out so the door would at least open to the 90degree point so I decided to carve out a little section on the hinge side to give me a little more meat to weld.
F8373F9B-BD93-4737-B352-B18934A3C8BB.jpeg

I’ve got these little notches at both the upper and lower locations on that hinge side. Once the frame is tacked into place I’ll add a bit of reinforcement material to make sure I have a solid connection. On the non-hinge side I think I’ll have plenty of weld as I’ll be welding to the part where the tire would have originally bolted on.

Hopefully I’ll finish up the traction board mounting tomorrow.

Thanks for following along.
 

BlackSheep

baaaaaaaaaad to the bone
Supporting Member
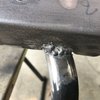
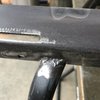
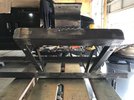
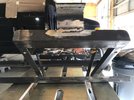
Working on the traction board mounting frame today. Those little cutouts were tough to weld - partially because the tube burned through really easy. I had to go to the lowest setting on the welder. The welds look horrible, but I think they'll hold.
IMG_5434.JPG
IMG_5435.JPG

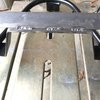
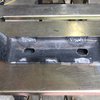
The other side of the mounting frame lined up against the tire carrier - a 1/4" (maybe only 3/16" - I didn't measure it) plate. That made it fun to weld, although these welds didn't turn out too bad
IMG_5436.JPG
IMG_5438.JPG

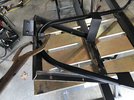
Because the weight of 4 Maxtrax boards is pretty significant, I decided to add some reinforcement material to hold the other side. I shaped a couple pieces of angle iron and welded it in place. Burned through the tube at least once during this task.
IMG_5437.JPG
IMG_5439.JPG

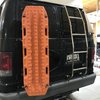
With it all welded up I reinstalled it on the van with the mounting pins in place and loaded up the maxtrax boards
IMG_5441.JPG
IMG_5442.JPG
IMG_5443.JPG

It looks pretty good and seems pretty sturdy. Next up is the propane fired shower system.

Thanks for following along.
 

BlackSheep

baaaaaaaaaad to the bone
Supporting Member
With the traction boards in place I started to look at how to mount up the Joolca propane system. I purchased a mounting plate and a cover so I was able to use the mounting plate to start looking at how I was going to attach. Because the cover has a zipper, I needed to make sure I had access all the way around the unit. This made me look at angling the unit kind of opposite from the traction boards.

I built a frame to bolt the mounting bracket to. With the frame and the bracket I could lay it up against the carrier to see how it would fit. It's a bit tighter than I thought it would be.
IMG_5447.JPG
IMG_5448.JPG

I had just enough 1" angle iron to make the two cross-pieces and used a section of bed frame for the other piece. Angling it so it attaches to the carrier at the door opening and the maxtrax frame at the other end.
IMG_5450.JPG

The welds on the maxtrax frame side didn't turn out too bad
IMG_5451.JPG

However, I totally blew the weld on the door side. IT IS UGLY!!! I was having trouble tracking the seam and went onto the bedframe when I ran my first bead. What an amateur!! :rofl:

IMG_5453.JPG
I had to grind that one. It still doesn't look great. It will look better after paint.
IMG_5454.JPG

That was it - time to mount up. It seems the carrier frame tweaked slightly with all of the welding, my bolts don't go in quite as cleanly after adding all the mounting framework.

IMG_5455.JPG
IMG_5456.JPG
IMG_5457.JPG

I have a bunch of painting to do so I'll get started on that tomorrow. May bust out the bed liner and start painting the (sides and back of the) high roof. Also to be painted with bedliner are the bumpers. However, I realized this afternoon that I need to get a hole saw so I can mount the trailer brake connector into the bumper.

And yes, the door does clear the Joolca. It's the cover that actually sticks out a bit so it flexes out of the way. The door doesn't hit it anyway. I need to install the Motorcycle carrier to see how that's going to work out...

thanks for following along!
 

BlackSheep

baaaaaaaaaad to the bone
Supporting Member
Today was an easy day. Didn’t get to work on the van until after lunch as I had to run some errands.

Started with painting the equipment carrier. Two coats of primer then two coats of satin black. It looks pretty good. I’ll install it tomorrow.

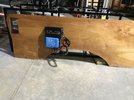
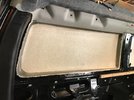
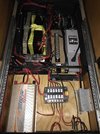
In between coats of paint I added some backing board to the passenger side interior panel. Two of the charge controllers are bolted to this 1/4” plywood. I added a piece of 1/2” plywood on the back so the charge controllers actually have some meat to attach to.
CD0855CD-339A-4E10-9724-3ADC2E2355C6.jpeg

Back side:
B7E324A3-B6CB-47F6-BEB6-B86EFED36D40.jpeg

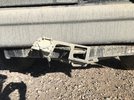
When I was traveling in Utah in September I drug the receiver and nearly lost the bracket that attaches the trailer plug:
37F43D47-6CC0-4BD5-BA80-231F88F62B14.jpeg

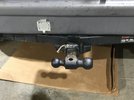
This was unacceptable so another of my tasks was to relocate the plug into the bumper. I was surprised how well the jigsaw with a metal blade cut a reasonably round hole. 🤣. Anyway, no photo of the hole, just the finished relocation.
B7884F42-6471-4CCF-A35C-22327A7DAA6F.jpeg

Thanks for following along.
 

BlackSheep

baaaaaaaaaad to the bone
Supporting Member
The only photo from today is the painted and mounted equipment carrier. You can’t even see the paint. 🤣
2005B441-6718-400A-A280-B849A31E1768.jpeg

Other things I worked on:
Sanding the sharp corners of the new wood on the electrical box. Coated with stain once I was satisfied with the sanding. Shot a little paint in there as well, trying to cover the “new” metal. Taking the electrical box apart to paint just seemed like a major pain. Who’s the engineer that designed that electrical system?!?! 🤣

I also painted the bike mount adapter I made so long ago! Finally!

Tha last thing I started on today was the installation of the Espar heater. I was torn as to whether I was going to move forward with that as I have much to do. However, I decided that now’s the time. I’ll have to strip the interior to do it later if I don’t do it now. Since the interior is already stripped, I decided to go ahead.

I think tomorrow I am going to get prepped for bed liner on the many parts that need / will get it.
 

bryson

RME Resident Ninja
Supporting Member
Location
West Jordan
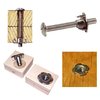
Looks good! For mounting things to thin-ish plywood, I'm a big fan of 1/4" T nuts like pictured below. That way you don't have issues with screws pulling out after bumpy roads, and no issues if you have to take things apart several times (wood screws in plywood don't like to be R&R'd much...)
t nuts1.jpg
 

BlackSheep

baaaaaaaaaad to the bone
Supporting Member
Looks good! For mounting things to thin-ish plywood, I'm a big fan of 1/4" T nuts like pictured below. That way you don't have issues with screws pulling out after bumpy roads, and no issues if you have to take things apart several times (wood screws in plywood don't like to be R&R'd much...)
View attachment 171236
Thanks. Great suggestion! I’ll keep that in mind for future work or if I have to redo these things.
 

BlackSheep

baaaaaaaaaad to the bone
Supporting Member
Wow! Another big day today. I started out the day sanding the bumpers, the flare and the roof. I’m not a paint pro so I used my orbital sander with 80 grit and a spare piece of 80 grit for touch up where the sander didn’t quite do the job.

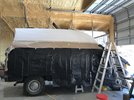
Then I had to mask the van. What a job! Up and down the ladder, over and over. I had previously purchased a roll of masking paper and 6mil drop cloth (plastic).
37BBDB87-6CA0-4639-8EAB-D9ACDAD6D12D.jpeg
C52E0766-85F7-4DAD-A86D-179FF7D9A6C2.jpeg
F23CA9A1-30C3-454D-A6D1-091870FA2BD8.jpeg

I had purchased a gallon of Durabak 18 roll on bed liner and one of those stir attachments for my drill. Man am I glad I bought that stirring bit! It took a while to smooth this stuff out.

Once I had it stirred up I hit the flare with Xylene as a final cleanup before rolling on the first coat.

Once that was laid I cleaned up the front, sides and back of my high top then went to town with the roller.

I started at the front driver side. By the time I worked my way around to finish at the front passenger side the flare was ready for its second coat.

The driver side front was ready after the flare’s second coat so I worked my way around the roof for its second coat. This time I carried a paint brush to touch up spots on the drip rail that weren’t really compatible with use of the roller.

That stuff thickens up relatively quickly so I was working as fast as I could but the paint brush was gumming up just a little. It worked out ok but you have got to be on your toes! Having to move the ladder every few feet slowed me down a bit. I wish I had some scaffolding, especially for the front. It was difficult to reach.

I needed to remove the masking before I could do the bumpers so I put the roller and the brush in a tin of xylene so I could reuse them after I dealt with the masking.

As I removed the masking I saw a few spots that needed touch up with the brush especially on the front of the roof. I cleaned up the bumpers, opened the can of bed liner, stirred it again and went to work. The touch up and both bumpers got painted with the brush.

F25E13C6-9FA1-4180-932C-CA7065CA943D.jpeg

A6DE0DDF-03B5-4FEA-B740-0E69E9293C20.jpeg

4A943DBF-8597-4B0B-9037-125B4E5FA257.jpeg

0263AF92-F994-4AB3-B5EF-F80E1460F342.jpeg

E780DC64-FA56-4201-A8A4-5AFD03B27306.jpeg

I’ll put another coat on the bumpers tomorrow as I was beat and hungry.

I’m glad that is done (or will be soon). I thought it was going to be a multi day thing waiting for the liner to set up between coats.

By the time I finished everything and did a little cleanup the flare was just about ready to be handled. I won’t handle it until I’m ready to install it later this week. I figure to give as much cure time as possible.

Strangely I didn’t get a photo of the flare.

Thanks for following along.
 

BlackSheep

baaaaaaaaaad to the bone
Supporting Member
Another slightly stressful task (half) completed.

I ordered a set of Flarespace Flares for my van, knowing that with the slider door the passenger side may not fit. Expensive but I’m not tossing the passenger side away, just delaying trying to install until next winter. More on that later.

I needed a hand with this job, definitely a two person job. So I arranged for a friend to come over to help this morning.

I wanted to get as much done as possible to maximize use of the help so yesterday afternoon I pulled the driver side rearmost window.


961D1ACF-B040-42ED-9CD2-810587ED6AE6.jpeg
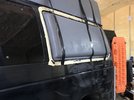
It is surprisingly easy to remove. They’re actually bolted in with butyl tape as the sealant. I removed all but two bolts on the top and two bolts on the bottom. Loosened those four as mush as possible so I could work to release the butyl tape. Once I got the bottom clear, I pulled those two nuts and started working my way to the top. Once I had released the bond, I pulled to remaining nuts, went to the outside of the van, grabbed two suction cups and lifted the window right out.

Scraping the butyl from the body went fast. When I got back to work this morning I sanded the bonding surface in prep for the flare.

My buddy arrived and we test fitted the flare. Turns out I had to grind some high spots off the flare to get a good fit. He went back home and picked up his belt sander and the job went pretty quick.

I spent a lot of time trying to make a perfect fit. It would have required sanding almost 10mm from the bonding surface. So, instead of spending all that time sanding, we looked more closely at the vehicle side bonding surface and realized we could bend that a little for a better fit. He must have set the flare up against the van a couple dozen times as I stressed out about the gaps I’d have to fill.

Eventually I just decided that there was going to be some level of gap which would get filled with the adhesive anyway, so we cleaned everything up, laid a big bead of adhesive and set it in place. Flarespace recommends taping it to the van:
1637E01A-8BD8-481C-87BA-4B50571EB91F.jpeg

I had the masking tape on there in hope that any squished out adhesive could easily be removed. We pulled it pretty much right away. I climbed up and laid more adhesive all around the flare until I felt that any gaps were completely filled. I ended up using two full tubes plus the beginning of a third (for the entire job).

A couple hours later I pulled the gorilla tape
F70715FA-F18E-49E8-9722-B24AD44A715C.jpeg
A38B61FA-1853-4FA7-BC50-54493CA6B7D4.jpeg

1A195BB0-68FE-4B86-8CB4-88F6F013D887.jpeg

BD85A3C0-5D4A-42E3-B419-15B4792B3CB3.jpeg446F823B-F746-4F51-9B82-1139883C84ED.jpeg


The front edge of my bed goes up to the C-pillar so adding this flare gives me anywhere between 2” (at the front) and 3.5” (at the rear). That will be pretty nice as my mattress won’t be smashed as tight between the two windows.

My thoughts on the slider door side flare:
1. It may fit if I install it from the inside, rather than from the outside. I made a bunch of measurements but they are so close that I couldn’t make a solid determination of the fit. I’ll have to pull the window and test fit it to actually know whether it would work or not.
2. It is fiberglass so I could just cut a section out of it and re-glass it. This wouldn’t look as nice perhaps and it would reduce the added space but it would still be able to add some space and get the symmetry of the van squared away.

I’d still have to pull the window and I don’t have time to do option 2. Option 2 would be necessary if option 1 didn’t work.

In the meantime, I may go get some dark grey wrap material and cover that window. If I find a company that can print a graphic I may have them see if they can match the color and make it look like it has some texture.

Thanks for following along!
 
Last edited:
BlackSheep

baaaaaaaaaad to the bone
Supporting Member
Mostly working on installation of the Espar today. Wiring is complete except for the actual connections to the fuse block and negative bus.

Started working under the van to route the intake, exhaust and fuel pump / lines. Hopefully finish that up tomorrow.

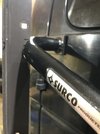
The van is so high I needed a grab handle near the slider door so I ordered a pair off of Amazon. They arrived today so I immediately installed one!
708FAEFF-5F11-4A6C-91A8-00A30EF2B42C.jpeg
9EDD743D-E696-48F6-B2E8-323C51B683C6.jpeg

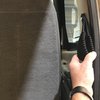
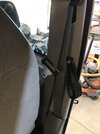
I used a rivnut in the B-pillar and a 5/16-18 hex head cap screw. After I put the grab handle on the cap screw, I used two nuts run up to the end of the threads and tightened them together. This allows the grab handle to pivot freely on the cap screw and allows me to run the screw in tight to the rivnut. I drilled a hole in the plastic trim so I can install or remove the grab handle without having to remove the trim piece.

Thanks for following along.
 

BlackSheep

baaaaaaaaaad to the bone
Supporting Member
I've spent a lot of time working on the installation of the Espar heater. Nothing exciting about the wiring so no photos. It's just about done, once I re-install the electrical box I'll finish the connections to the negative bus and the fuse block. Hopefully in the next couple days.

I removed the gas tank so I could order a new sending unit with an auxiliary port for the Espar to draw from. I figured since I'm removing the tank I'll replace as much of the hoses and vents that I can. The new sending unit comes complete with all the things (pump, filter, strainer, etc).

Here it is after I got it from under the van.
IMG_5490.jpg

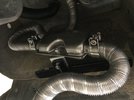
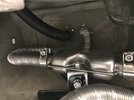
I actually ended up breaking off the hose bib on one of the vents (rear of the tank) so it's good that I had decided to replace everything. I forgot one item that I had to order - a fuel line quick connect that steps down from 1/4" (auxiliary port) to 1/8" (Espar fuel line). It is supposed to arrived tuesday so in the meantime I started working on mounting up the intake and exhaust for the Espar. It's pretty tight in there but I think I have plenty of clearance for all the things. I need to drill a couple of small holes to allow drainage of condensation as necessary.
IMG_5492.jpg

The black bracket I made using some scrap 3/4" angle iron. There were two factory Ford bolts that I've bolted it up there with.


IMG_5493.jpg

Although I don't have a photo of it, the intake actually goes up and into a frame crossmember where I've zip-tied it. That should keep it pretty well protected from any road spray.

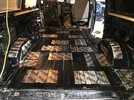
Since I am waiting on parts, I had some time today to work on sealing up the floor and laying down some Kilmat. There were some bolt holes that I can't put bolts in (these are seat mounting bolts). With the new flooring I think they will get in the way of the fitment of the cabinets. So, I used flashing tape to seal them up. I'll get some patch and seal tape tomorrow and see if I can access them from underneath as well.

I laid a fair amount of kilmat - I've heard that you don't actually need to line the entire cabin, so I didn't. Plus, this stuff is actually pretty heavy and I'm going to be adding about 20 lbs of it.
IMG_5495.jpg

I'll be adding some on the walls and inside the slider door in the next few days. For now I've got the floor done and the flooring re-installed.

Thanks for following along.
 

BlackSheep

baaaaaaaaaad to the bone
Supporting Member
It's been a bit since my last update. I got the interior back together and went to install the house battery and the battery failed. I can't determine if it was something I did or not but the battery started showing a high voltage error on one of its cells on one day, then the next day it just went flat. 5.09 volts. I put it on charge with my battery tender but to no avail. I actually ordered a replacement battery before I even knew for sure the battery was gone. I wanted to minimize any delay.

I called a guy I know who is really a guru on all things automotive to ask some questions about the 12V system and to make sure I was looking at things correctly. He suggested I get a battery, connect with Jumper cables and test all of the systems again. So, I pulled the battery from BlackSheep and connected it up. Zach suggested that I connect a test light inline with the negative terminal of the battery to see whether I had any draws. I knew I would have some draws, so I eliminated the known draws from the testing - my fridge and freezer and a propane detector that I installed on a 12v circuit.

With the test light in place, I started placing fuses in one at a time. Sure enough, three components that I suspected of having a draw lit up the light. The Maxxair fan, the Espar heater and a USB outlet that I had installed on the dash. I really wanted to know how much these were drawing - clearly they were enough to light and keep the light lit in the test light. I actually considered pulling my Victron Smart Shunt from my Transit before I remembered I had already purchased one for the Barbarivan.

I went out and got some 1ga cable to install the shunt and I got some 4 ga to improve (from 6 ga) a couple of connections. I found a place to install the shunt and got the cable crimped up and re-connected BlackSheep's battery. As I knew would happen, the espar and the fan both showed an initial start-up draw but it went to zero pretty quickly. I am able to turn off the dash USB outlet so that didn't draw anymore. I plugged in the propane detector and it draws about 0.15a pretty consistently. This is nothing compared to what the fridge and freezer will draw.

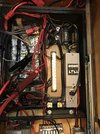
IMG_5518.jpg

The shunt is in the bottom right, to the left of the outlet. You can see the 1ga cables attached.

With the basic DC system checking out, I decided to connect shore power and confirm the AC to DC charge controller was functioning. I tested the output from the Victron unit, flipped the breaker, connected to the house system and flpped the breaker back on. All good.

Then I decided to check the function of the DC to DC charge controller. Connected the big fuse in place and started the engine and got what I would expect for a 12v charging system.

I had previously checked the solar controller using the portable panel and it had shown correct function. I still hadn't checked the panels on the roof but that would have to wait until I got the van out in the sun.

Somewhere along the way I had tested the output voltage from the other AC-DC charger controller (it was wired to keep the vehicle battery charged while on shore power). The output voltage from this component (an older unit probably from the original build) was only about 11.2 volts. I've completely removed it from the system. I would have removed it from the van but that will come some other time.

With everything checking out, the battery finally arrived last friday (4/19/24). I did a slow start - essentially connecting one thing at a time (including fuses) while monitoring the draw through the Victron app.

All went fine and it's been running the systems to include the fridge and freezer since I installed it friday night.
IMG_5523.jpg


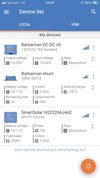
I really like the Victron components. Using the VictronConnect app is really great and you get a lot of information from the components.

IMG_5531.jpg

That's just the device list. Click on one of the devices and you get a lot more information.

I'm packing the van to get back on the road starting Thursday morning. I'm quite stoked!

Thanks for following along.
 

BlackSheep

baaaaaaaaaad to the bone
Supporting Member
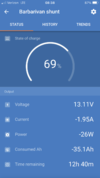
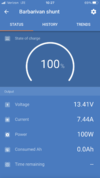
I let the systems run through the night to see what my draw was like and more importantly whether 200W of solar on the roof would recharge the battery. Good news, it took less than 2 hours in full sun. Here’s the state of charge at 8:38am:AAB8E953-05D1-42D5-BC19-485C518CB171.png

That is the detail screen from the Victron Smart Shunt. The freezer was running when I made that screenshot - that’s the negative amp draw.

At 10:27 I walked up to check the systems and this is what I found:
AFAFA7FF-DEA3-4A21-B61F-9375A0BACB68.png

I’m very pleased with those results. We’ll see how the solar panels age and how their efficiency changes.

Thanks for following along!
 
Top