Jeep Nathan and Tanja's 99 XJ Build up

thenag

Registered User
Location
Kearns
are you going down to moab with the teraflex run this weekend? if you do, that will be a good time to meet up so i can look your 60 over...school doesn't keep me busy or anything. haha

My wife and I will be in Moab 14-16th. I didn't realize that Teraflex had an organized trip. Looks like we will be meeting up with a group from Colorado and maybe Blackzj on Friday for Kane Creek. Saturday is up in the air we might hit poisen spider on our own. The guys from CO are going to area BFE which I don't want to go near quite yet.

Trip threads

http://rme4x4.com/showthread.php?t=85733

http://rme4x4.com/showthread.php?t=85428

Nathan
-99 xj build thread here...
 

thenag

Registered User
Location
Kearns
The jeep is as ready is it is going to get for Moab.

I got the rest of the bumper made and built a bracket to hold my stove on the swing out.

a picture of my shift leavers, I am trying to make it easier for my wife.
DSCN5805.JPG


A couple shots of the competed rear bumper.
DSCN5806.JPG


2011-10-11_14-33-26_971.jpg


RigidCo is the way to go, that bumper ties into the uni-body in like 7 places. It uses the factory bumper mounts, the factory tow hitch mounts, adds a plate in the middle and ties into the bulkhead on the edges. It is incredible how well it mounts.

Nathan
--99 xj
 

RockChucker

Well-Known Member
Location
Highland
i would assume meeting between 8 and 9 on saturday morning at portal rv campground (right south of slickrock campground) i'll pm you my cell and you can call me if you wanna tag along.
 

jeep-N-montero

Formerly black_ZJ
Location
Bountiful
Nathan's XJ is pretty dang sweet, saw it in action Friday and Saturday, just needs a rear sway bar to add some stability and longer throw on the front steering.
 

thenag

Registered User
Location
Kearns
I guess I didn't do a Moab update...

Ran Kane Creek and Poison spider in Moab 10/14 and 10/15.

I said I would be excited just making it there and back, it did great. The lack of bushings in the front end wasn't nearly as bad on the highway as I expected.

The jeep felt really stable until I got the spare tire carrier, that and a full load of gear really made the rear ride low and the tire moving up from in the cab, really made the top heavy. As mentioned it needs an anti-rock in the rear. I think I am going to have to mount the bar to axle truss and the links to "frame". It is either that or get really long arms and put the torsion bar between the gas tank and rear bumper.

I hit a rock in Kane Creek with the passenger side front tire... hard and it knocked my steering wheel off center by about 1/4 turn. Once home I tore everything apart, it pretty much could only be a few things; spindle was not quite where it should have been and it got knocked where it is supposed to be, bent knuckle, some other bent thing. The tires were toe-ed out so something did happen. I have a spare spindle and replaced that but it did not fix the toe. I also measuered and checked with a level and the spindle that was in there was not at all different than the new one. (and it was brand new) One bad thing is that the spindle came off really easy. This could be because I just had the axle apart not too long ago or it could be because something is tweaked. We shall see. At this point I am putting it all back together and not worrying about it until something happens again.

couple pics;
DSCN5808.JPG


DSCN5813.JPG


DSCN5820.JPG


DSCN5838.JPG


nathan
-99 xj
 

thenag

Registered User
Location
Kearns
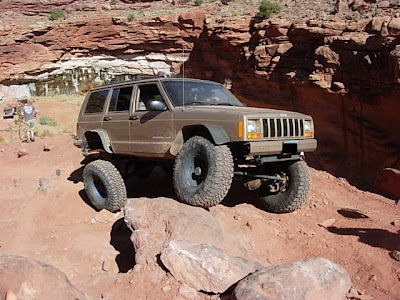
Time for some (more) steering upgrades. When I hit the rock in Kane creek I was sure I tore the steering box from the frame. I had not re-enforced this at all. So I figure I better get on it.

As usual I scoured the "internets" for info. This is the best durango box write up I could find;
http://www.colorado4x4.org/vbb/showthread.php?t=93520
(somewhere there is one with working pics) *note post #15*

And then there is a Saginaw rebuild write up on pirate, and I have the jeep service manual.

So as I learned after putting everything together I will not get full lock to lock steering with the xj style pitman arm and the ford d-60 knuckles. so if I can get a little more turning out of the box I will take it.

I got a box for a 99 Durango with the big v-8. This box will allow the steering wheel to turn 2 15/16 times. The stock xj was 3 1/16 times. (I guess the xj was a "quick ratio" this is "fixed ratio")

Same steering shaft input, same pitman arm, same bolt patern. Bigger power piston so that will help move the tires a little more.

Alright so I took some time to see what the modifications to get more range would do.

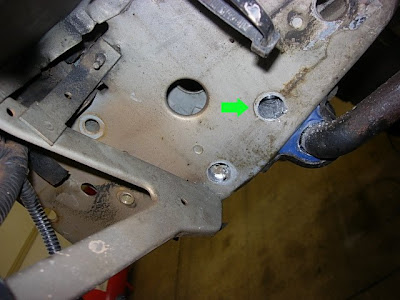
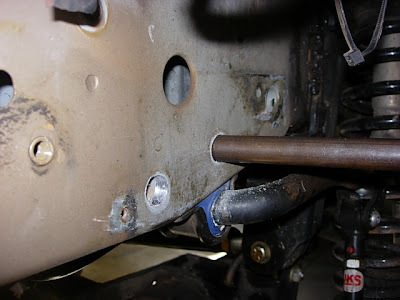
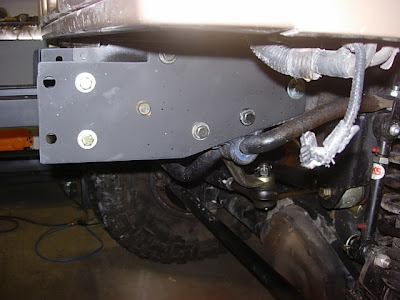
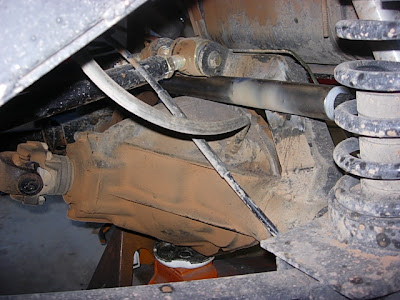
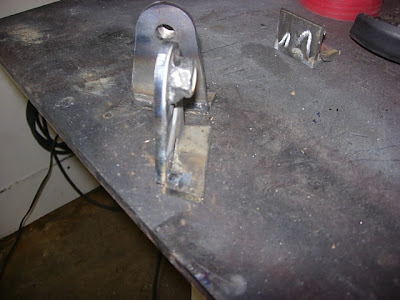
Here is stock durango box, this is how far my knuckle is from the stop, this is pretty much the same both sides with the new box. (btw I never measured the xj box so I don't know how close it was, it seems pretty close but I don't know for sure)

5/8ths from stop (both sides)
DSCN5856.JPG


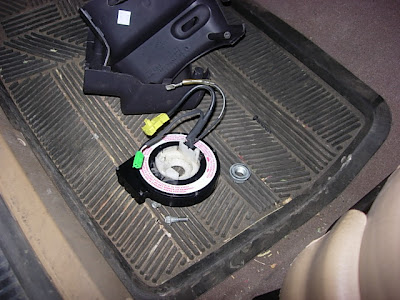
I had the steering wheel off and figured I would leave the clock spring out of harms way for this...
DSCN5855.JPG


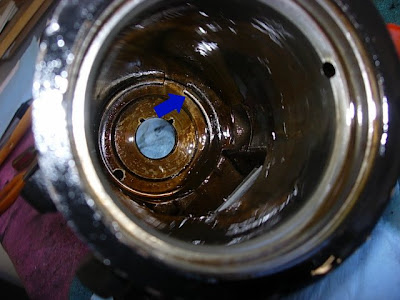
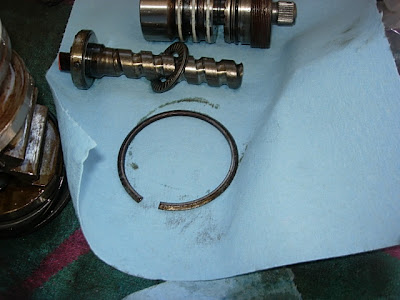
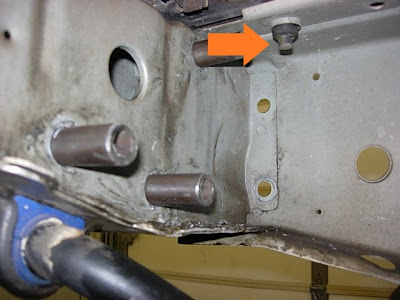
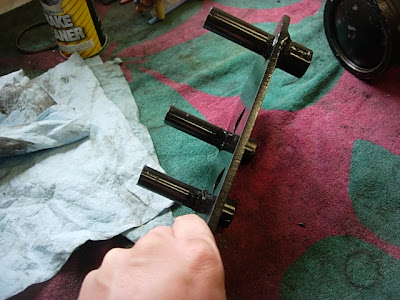
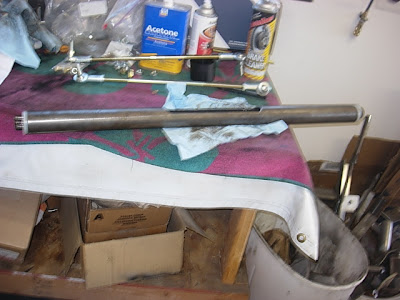
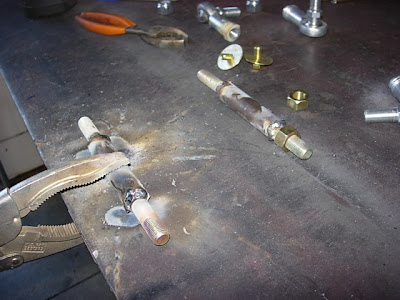
The first mod is to remove this snap ring (in the thread I linked to he calls it a "spacer") This will allow the power piston to move the width of the snap ring more toward the rear of the vehicle.
DSCN5859.JPG


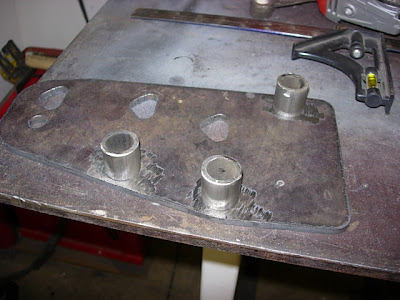
picture of removed snap ring
DSCN5860.JPG


So then I put the box back together and mounted it up on the jeep (still with axle on jack stands) and measured the steering. Pulling this snap ring got about 1/4 more movement at the knuckle while turning to the Right. The movement turning to the left was un-changed. (which I expected) I also got about 1/8 more turn at the steering wheel.

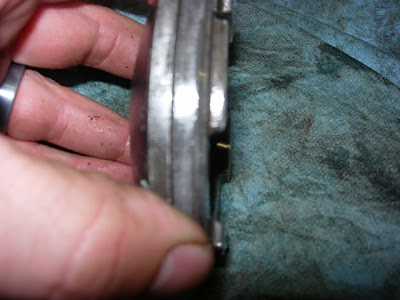
So then I did as in "post #15" which that guy is the only guy I found that said anything about grinding those ridges off.

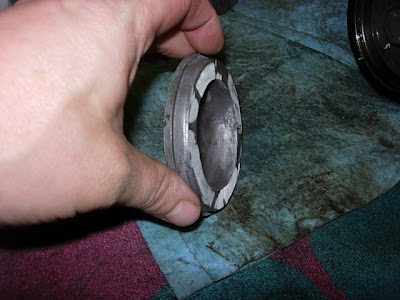
A couple thoughts here; this is brand new manufactured box that I am butchering on one guys post from the internet... Second this cap is aluminum so if you grind this be carefull, oh and btw an o-ring seals right there too so I hope you are good at the game "Operation"...
DSCN5865.JPG


several tense minutes later...
DSCN5866.JPG


I think I wouldn't recommend grinding those ridges flat like I did, I think I would leave a bit of a ridge so the power piston can't sit flush on the end. It seems like it is right at the end of the play with the frustrating ball bearings in the worm gear so I suspect if you turn hard to the left you might be able to knock a ball out of the worm gear, not sure just seems that way.

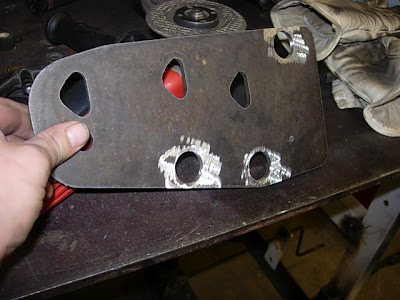
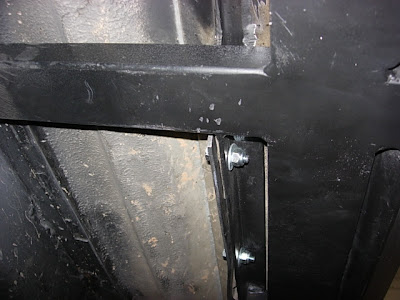
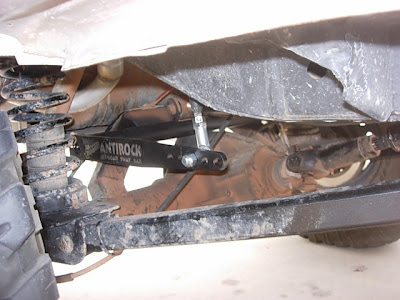
So again put it back together and mounted it up. (actually finished off my ILean frame bracket then put it up) again turned the wheels. The steering wheel will travel almost 3.5 times around. and this time the stop on the knuckle to the left was improved by 5/16th maybe even 3/8th.

So the improvement was significant, but not anywhere near what I need to get to full lock on my knuckles. So I still need a pitman arm I guess.

Another note is that each of these mods only makes an improvement in one way, if you could re-center something to make it work in the middle then you could just do one mod (grind the ridges, you don't have to pull much apart to do it) So you could figure out a way to grind out the key spline in the steering wheel so you would re-center your steering wheel, that would probably be the easiest.

Also my clock spring (as counted by me and what the jeep service manual says) is good for about 5 turns so these mods shouldn't hurt your clock spring.

The steering box isn't that hard. If I have a leaky one in the future I will rebuild it myself instead of buying a rebuilt. It is one of those projects that you will spend a lot of time re-doing things and trying to figure stuff out. I accidentally rotated the power piston after having that sector shaft back in and couldn't figure out which way to turn it to get the gears to engage and had to pull the sector shaft out.

I haven't really driven it, it does turn the tires more easily and I can make tighter left turns... for what ever that is worth.

(stay tuned for the steering box brace...)

nathan
--99 xj
 

thenag

Registered User
Location
Kearns
My front bumper is from Terry at RidgidCo and has an outer steering box plate built into it. (still waiting on my front bumper btw...)

but I need an inner plate. also the Durango box needs an extra 3/16 spacer from the frame so the box will mount properly.

"I Lean", who currently is "Mbryson's hairdresser" makes steering box plates for xj's, so pm him if you want one, he makes inner and outer but I didn't need outer.

I had him drill mine with 1 inch holes but here it is
DSCN5845.JPG


So I drilled my holes in frame to 3/4 inch
DSCN5840.JPG


some people drill them all the way out to 1 inch, I did 3/4. I will have 3/4 DOM going all the way through, and 1 inch DOM just on the box side.

DSCN5841.JPG


So I carefully measured and figured I needed 1 inch DOM this long and put them in the plate.
DSCN5846.JPG


Then after a few trial tack welds I realized I needed to mod the plate so it would slide in and out of the frame without removing the radiator. I also cut off the very bottom nub of the radiator

DSCN5844.JPG


Here is the plate you can see above the top DOM I had to cut a bit.
DSCN5867.JPG


DSCN5868.JPG


So this plate slides in from the inside, the 3/4 DOM goes all the way through from the box to where the bumper/outside plate will be and is welded to the inner plate and the 1 in DOM that is just on the outside of the plate. Also there is quite a bit of the OEM spacer left in the frame rail that the 3/4 slides in nicely.

clear?

if not let me know I will try to re-post it...

nathan
-99 xj
 
Last edited:

jeep-N-montero

Formerly black_ZJ
Location
Bountiful
Was it in the stream bed that you hit the rock? Ashley thought you and Tanja were really nice and that we should do it again in the future.
 
Last edited:

thenag

Registered User
Location
Kearns
Was it in the stream bed that you hit the rock? Ashley thought you and Tanja were really nice and that we should do it again in the future.

Yes, did you see us hit it?

It went like this;

bam

Tanja glared at me, I said "whoops"

Then as my steering wheel was 1/4 turn out while driving striaght I replied "I think I just ripped the steering box off the frame"

She says "well pull over and look at it"

That is why we pulled over.

I am sure we will wheel together again at some point.

-nathan
 

thenag

Registered User
Location
Kearns
Does anybody else have opinions of Currie sales/tech people?

Due to the fact that I am working on an xj, that was never intended to have a rear triangulated suspension, and hell it is a really small uni-body car, mounting an anti-rock in the rear is going to be problematic.

so i have 3 mounting options;
1 cut hole through the unibody, run the torsion bar through the frame rail, hope it doesn't hit upper links and have to completely re-do tail pipe. (this would be optimal but it wasn't going to happen.)

2 mount the torsion bar between the gas tank and rear bumper, putting the torsion bar and ends of the arms basically in my departure angle. Of course I would need 20 inch arms and the longer the arm the less stiff they are. (I want more stiff)

3 mount the torsion bar to the axle truss and put links on the body.

So I emailed Currie a few times explaining my predicament and got some lack luster responses, I won't directly paste the response emails up but...

first response; I have not seen an antirock mounted with the torsion bar on the axle, I am not saying it wouldn't work, it just wouldn't work as well.

so I asked if "upside down" with 17 inch arms would be more stiff or less stiff than 20 inch arms "upside right" (I was far more detailed in all my emails)

second response; shorter arms are stiffer than longer arms no matter what

so I then re-stated my question pointing out that he said "upside down wouldn't work as well" in his first email, but he also said that shorter arms would be stiffer in his second email.

10 days have past with no response.

I actually decided to order one anyway and mount the torsion bar to the axle truss. I will post up pics. I think Ruff Stuff needs to make an off road sway bar...

maybe I will send some pics to Currie since they have never seen their product installed like that...

Also front bumpers and sliders are done and waiting to be installed...

nathan
--99 xj
 

I Lean

Mbryson's hairdresser
Vendor
Location
Utah
If you haven't already ordered the anti-rock, you might hold off and get a torsion bar from somewhere else. That will open up more options for you, for different lengths, different diameters (so stiffer bars for use with longer arms), etc.

If you want.
 

thenag

Registered User
Location
Kearns
If you haven't already ordered the anti-rock, you might hold off and get a torsion bar from somewhere else. That will open up more options for you, for different lengths, different diameters (so stiffer bars for use with longer arms), etc.

If you want.

Other than race car type stuff, or sway lock's what else is there? I didn't come across anything that was less expensive and more easily installed for what I needed.

The other option was a stock tj rear bar...

(might get a sway lock for the front those look like the bomb-diggity for a street driven rig...)

nathan
--99 xj
 

I Lean

Mbryson's hairdresser
Vendor
Location
Utah
Speedway Engineering http://www.1speedway.com/ is an excellent resource. I suppose it's "race car type stuff", but it's good quality and can be custom-made to what you want, or at least they have a ton of options to make it "custom". I've had them do non-standard lengths before, then just used off-the-shelf arms and other hardware.

It's just if you need something different from what Currie offers. Nothing at all wrong with an anti-rock, but if you need something other than the two lengths they offer, and the standard arm length, or the light spring rate, it's another source.
 

RockMonkey

Suddenly Enthusiastic
Hey nice build! I'm not sure how I missed it until now. I like that you get stuff done! It took me years to do what you did in the last six months. I envy your clean interior install.
 

thenag

Registered User
Location
Kearns
Hey nice build! I'm not sure how I missed it until now. I like that you get stuff done! It took me years to do what you did in the last six months. I envy your clean interior install.

My life is now complete... Rock Monkey has praised me... (I am not being sarcastic I am grateful for the compliment)

I think I said that your build is high skill, low dollar, and mine is high dollar and um low-ish skill.

I know that yours is probably more capable than mine, it is for sure lighter. Mine has a higher COG too.

We made a ton of compromises to keep the body and interior stock-ish and the interior is one of my favorite things too.

I followed your thread very closely. Mostly I saw your things and thought damn that's nice does someone make a kit that is almost as nice as that?

Thanks!

Nathan
 

RockMonkey

Suddenly Enthusiastic
My life is now complete... Rock Monkey has praised me... (I am not being sarcastic I am grateful for the compliment)

I think I said that your build is high skill, low dollar, and mine is high dollar and um low-ish skill.

I know that yours is probably more capable than mine, it is for sure lighter. Mine has a higher COG too.

We made a ton of compromises to keep the body and interior stock-ish and the interior is one of my favorite things too.

I followed your thread very closely. Mostly I saw your things and thought damn that's nice does someone make a kit that is almost as nice as that?

Thanks!

Nathan

I don't know about low skill... That build definitely took some skill to pull off. With all the tube in mine, I bet my sprung weight is higher. All your weight is in axles, and that's a good place to have weight.
 

thenag

Registered User
Location
Kearns
So I will add some pics of my Bumpers and Sliders from Terry at Ridgidco. Other than taking quite a while they are great, great price, quality that is as good as any big shop. Multiple mounting locations for everything, they really spread the load on the beer can... uh uni-body I mean.

Front bumper mounting
DSCN5873.JPG


DSCN5874.JPG


Rock sliders, they mount to the "frame" and the pinch seam. I will put a small stitch weld on the frame since I have 3/16 Frame Stiffiners on the "frame"

DSCN5878.JPG


I also added a little nubbin to assist with entering the vehicle. It helps, the driver side it is not as useful as passenger though.
DSCN5889.JPG


Now it looks like it ready for wheeling
DSCN5890.JPG


Shot of the rear. The mud flaps un-bolt very easily. The top of the hi-lift will hit the bumper if the tire carrier opens all the way. (instead of the tail light...)
DSCN5888.JPG
 

thenag

Registered User
Location
Kearns
So the anti-rock instal is done.

I only took a few pics...

As mentioned earlier it seemed to me the best way to mount it was to mount the torsion bar to the axle and then mount the links to the "frame"

I had to notch the torsion bar tube so it would fit between my upper links and my diff.
DSCN5881.JPG


like this; notch is on top, I drilled a couple of holes in the tube so water and stuff will not build up in there;
DSCN5883.JPG


So I welded a nut on the tab, the nut will go inside the frame and the tab welded on and welded to the frame stiffener.
DSCN5885.JPG


I figured about as long of link as I could get away with was about 9 inches. Since one of the link ends is left hand thread I had to cut and weld them into some 3/4DOM
DSCN5886.JPG


DSCN5887.JPG


I don't have anything to compare it to. I know it is back there and working. We hit Rattle Snake and it surely made the rig feel more stable. I tried to make it feel tippy and it felt as stable as leaf springs.

Now I just need to upgrade the front to a dual rate sway-loc...

Also today my steering did something weird and something is making a small popping noise. It seems like the track bar, That is the one thing I didn't look at when I had it all apart after Moab so maybe that was the problem, or part of the problem...

nathan
- build thread here...
 
Last edited:
Top