General Tech What did you work on Today?

Greg

Make RME Rockcrawling Again!
Admin
Gears in the F-150 set-up after only a couple of iterations to the shim selections.

Grabbed the box of set-up bearings out of the cupboard to use on the pinion. It's been a while since I've done a Ford 8.8 rear end but found my 8.8. setup bearings easily and quickly.
View attachment 142674


Case spreader installed and case spread about .015" to allow proper installation of the carrier assembly. As it was going in I paid particular attention to ensure it didn't pull in tight to the pinion and there was at least some backlash. Carrier bolts torqued to spec. @ 80 ft/lbs.
View attachment 142675


I started out with the original .035" shim under the inner pinion bearing as a starting point. The carrier assembly went in without contact but backlash felt a bit tight. I opted to paint the teeth to run a pattern and determine if I was close on the pinion depth. Pinion depth is what you want to start with and then address backlash after pinion depth is determined. The pinion depth was pretty close using the original .035" shim. I could have left it but if you look at the definitive line (red arrow pointing to in picture) on the drive side of the tooth near the root, this is a bit to defined for me and I thought I could do better. Backlash measure just over .002" so way too tight.
View attachment 142676

I removed the carrier and the pinion and replaced the .035" shim with a stack equaling .030". This seem to be the perfect depth of the pinion but still backlash was too tight @ .005". I then decided to swap sides of the original carrier shims. Originally the left side measured .273" and the right side measured .270". I swapped them side for side so the thicker was on the right and slightly offset the carrier to the left. This was perfect as you can see in the contact pattern below. It has a nice soft edged pattern between root and face and barely offset toe to heel with .007" backlash. Here is the coast side of the ring gear teeth with a nicely balanced contact pattern.

View attachment 142677

Very nicely balanced drive side of the ring gear teeth. Painted and checked in two different locations around the ring gear and both resulted in the same .007" backlash after case spreader pressure removed.
View attachment 142678


I can live with those contact patterns and now to set the pinon preload and put everything back together.

Thanks for looking.

Mike

Love the detail and tech in your posts Mike, you're a big asset to RME and I appreciate you sharing your work on here.
 

zmotorsports

Hardcore Gearhead
Vendor
Location
West Haven, UT
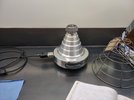
Finished up assembling the F-150 rear axle last night. I prefer to heat the pinion bearings and slide them into place vs. beating on with a hammer. Bearings and impacts don't make good bed fellows. After heating the bearing to approx. 250-degrees it slides right on the outer pinion shaft, then add some oil to not only cool the bearing down to shrink it back onto the pinion but it also prelubes the bearing so it doesn't start dry.

This is where you need to be quick and avoid interruptions as there are a lot of moving pieces that need to take place in a certain order and the pinion bearing preload is a critical step.

I install the inner pinion bearing along with the final shim stack that was used to achieve the desired gear contact pattern. I add gear oil to the inner bearing and make sure it is thoroughly coated around the rollers. I then install the crush sleeve (or crush sleeve eliminator) and insert the pinion into the housing. I then have the seal at the ready by packing the back side with the spring with grease to avoid that spring coming out during installation. I also apply a small amount of sealant to the circumference of the seal and set it aside so it is ready along with the seal driver.

I also have my grunt tool (used to hold the pinion yoke) and my long 3/4" ratchet with proper socket for the pinion nut. This is where you need to work fluidly to ensure the outer pinion bearing goes onto the pinion as far as possible right up against the crush sleeve installed in the previous step, then apply gear oil to cool (shrink) and pre-lube the outer bearing. At this point install the pinion seal then the yoke with some Sil-glyde or lube applied to the seal surface and I prefer to use the old pinion nut for the initial preload setup. Install the grunt tool and begin crushing the crush sleeve. On new bearings I shoot for approx. 20-30 in/lbs. of rotating torque, used bearings I setup for approx. 8-15 in/lbs. Make sure you are not reading break-away torque and actually measuring rotating torque after the needle settles a bit. You have to be quick in reading this as you generally can't get more than about 180-degrees of rotation on the dial torque wrench due to interference with undercarriage and/or chassis components.

Once the pinion preload is set you can move back around to the rear and install the carrier. On this particular application we landed right at 25 in/lbs. of pinion preload.
f1501.jpg

After the carrier is installed, carrier caps torqued to spec. (80 ft/lbs in this application), I then remove the case spreader and double check the backlash as well as confirm my total preload has increased slightly due to the carrier preload adding to the pinion preload. This ensure there is the proper preload from spreading the case and inserting the correct shim thickness.

In my opinion THIS is where a lot of gear setups go wrong. I don't want to offend anyone here but if you are not spreading the case to ensure you are getting the proper amount of carrier preload you are doing an injustice and the rear end will be living on borrowed time. Simply beating, hammering or prying the shims into place is not putting the correct carrier preload into the equation. What happens is now under heavy torque applications (racing, lifting a heavy vehicle up and over obstacles or just heavy throttle) is now pushing that carrier away from the pinion and therefore allowing the gears to climb up and away from the root of the gear towards toe face which is the thinner and weaker portion of the tooth. When you have the proper preload in the carrier this will not be allowed to happen and therefore keep the gears meshing in the same orientation as they were setup thus allowing for a long service life of the gears.

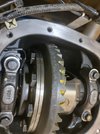
One last task that I do on all of my gears is just prior to buttoning up and putting the cover on is I engrave my specs on the outer diameter of the ring gear. I used to put my shop name but since I closed my business down, now I merely put my initials, date, pinion preload (PL), combined preload (CPL) and the backlash. I think I'm one of the few, if not the only one who does that because I've never opened up another rear axle and seen this before, even back when I was racing nor now when I see a lot of Jeeps that I know have been re-geared. I probably don't need to do this but I like to check things when I pull a cover and do something as simple as an oil change. If I pull someone's Jeep in for a differential service and it's one I've setup I like to throw the dial indicator on it and double check backlash if nothing more than to satisfy my own curiousity.
f1502.jpg

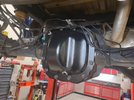
Freshly painted cover installed with a bead of RTV around the perimeter. I don't like putting gear oil in immediately and prefer to let them sit overnight for the RTV to cure before adding fluids and road testing. Probably overkill as the cover will need to come back off in 500-800 miles anyways for a service but I don't want it to leak in that time frame.
f1503.jpg


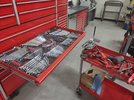
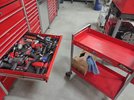
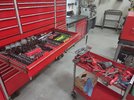
The last step in any job is to thoroughly clean and put tools away so they are ready for the next job. Plus I can't seem to sleep at night knowing I have tools that aren't in their proper home. :rolleyes: Tool cart gets rolled up right next to the toolbox and tools are wiped down and put away in their respective location.
f1504.jpg

Also, things like wrenches, screwdrivers and pliers need to be facing the correct direction or there is a disturbance in the force and I can feel it. :rofl:
f1505.jpg

f1506.jpg

Very last thing after tool cart and benches are cleared is opening drawer by drawer to do a quick visual inspection and make sure I didn't leave a tool anywhere on the vehicle or out somewhere. My wife thinks I'm crazy but at a quick glance a person can see if something is missing or not in the correct spot.

Oh who am I kidding, my wife just thinks I'm crazy, period.

Thanks for looking.

Mike
 

zmotorsports

Hardcore Gearhead
Vendor
Location
West Haven, UT
Rad, Mike!

We need a garage/toolbox tour thread here.

Actually, I need to get up to your shop one of these days


You are welcome any time Brent.

I have a video shop tour if anyone is interested. It is a few years old and I should probably do another video and post it to my channel as I have made a few changes and have a couple of small additions since I recorded the last shop tour linked here.


rholbrook

Well-Known Member
Location
Kaysville, Ut
I have a BIL that is also a mechanic and he too has the same illness that Mike has. I wish I had this illness but I was blessed with a full head of thick hair that stands straight up if too short. I have seen Mike's JK in person and you could eat off of it just like you can his shop floor. I have shop envy for Mike's shop. Thanks for Sharing @zmotorsports
 

UNSTUCK

But stuck more often.
Very last thing after tool cart and benches are cleared is opening drawer by drawer to do a quick visual inspection and make sure I didn't leave a tool anywhere on the vehicle or out somewhere. My wife thinks I'm crazy but at a quick glance a person can see if something is missing or not in the correct spot.
A guy showing off "vertical" drawer tool boxes at SEMA last week was trying hard to sell me on them. His main point was that with a vertical tool box all of the tool are on display for easy viewing. He told me his company did studies and found that the average mechanic wastes 90 minutes a day looking in his toolbox for the tool he was after. I busted up laughing at him. I said name a random tool. He said dead blow hammer. I said bottom draw, top box, left side, as quick as I could. Then said any mechanic that spends 90 minutes a day looking for his tools would not be very welcome in the places I've work at.
Any half decent mechanic knows the home for each of their tools. And yes, wrenches do need to face the correct way in their drawer.
 

Hickey

Burn-barrel enthusiast
Supporting Member
A guy showing off "vertical" drawer tool boxes at SEMA last week was trying hard to sell me on them. His main point was that with a vertical tool box all of the tool are on display for easy viewing. He told me his company did studies and found that the average mechanic wastes 90 minutes a day looking in his toolbox for the tool he was after. I busted up laughing at him. I said name a random tool. He said dead blow hammer. I said bottom draw, top box, left side, as quick as I could. Then said any mechanic that spends 90 minutes a day looking for his tools would not be very welcome in the places I've work at.
Any half decent mechanic knows the home for each of their tools. And yes, wrenches do need to face the correct way in their drawer.
I'm no mechanic, but even I don't spend 90 minutes a day looking for tools. If I spend half an hour looking for a tool, that tells me it's time to clean the shop.
 

glockman

I hate Jeep trucks
Location
Pleasant Grove
A guy showing off "vertical" drawer tool boxes at SEMA last week was trying hard to sell me on them. His main point was that with a vertical tool box all of the tool are on display for easy viewing. He told me his company did studies and found that the average mechanic wastes 90 minutes a day looking in his toolbox for the tool he was after. I busted up laughing at him. I said name a random tool. He said dead blow hammer. I said bottom draw, top box, left side, as quick as I could. Then said any mechanic that spends 90 minutes a day looking for his tools would not be very welcome in the places I've work at.
Any half decent mechanic knows the home for each of their tools. And yes, wrenches do need to face the correct way in their drawer.
I do this exercise with my son's calling me at work. Where is your 1/2" torque wrench, " top drawer, right side, against the back wall." I'm betting the people who don't know what drawer their tools are in are the same people who store expensive dirt bikes out in the back yard uncovered in the elements.

I am semi OCD and I really appreciate Mikes posts. Equal parts because they are awesome and they make me feel like a normal person in comparison:rofl: I love your shop Mike and have watched that shop tour at least once start to finish.
 

zmotorsports

Hardcore Gearhead
Vendor
Location
West Haven, UT
I have a BIL that is also a mechanic and he too has the same illness that Mike has. I wish I had this illness but I was blessed with a full head of thick hair that stands straight up if too short. I have seen Mike's JK in person and you could eat off of it just like you can his shop floor. I have shop envy for Mike's shop. Thanks for Sharing @zmotorsports

Thank you Russ. I appreciate the comments.

A guy showing off "vertical" drawer tool boxes at SEMA last week was trying hard to sell me on them. His main point was that with a vertical tool box all of the tool are on display for easy viewing. He told me his company did studies and found that the average mechanic wastes 90 minutes a day looking in his toolbox for the tool he was after. I busted up laughing at him. I said name a random tool. He said dead blow hammer. I said bottom draw, top box, left side, as quick as I could. Then said any mechanic that spends 90 minutes a day looking for his tools would not be very welcome in the places I've work at.
Any half decent mechanic knows the home for each of their tools. And yes, wrenches do need to face the correct way in their drawer.

I completely agree Josh. If I had to look that long for a tool I would hang it up and try my hand at a different career, maybe needlepoint. :rofl:

I do this exercise with my son's calling me at work. Where is your 1/2" torque wrench, " top drawer, right side, against the back wall." I'm betting the people who don't know what drawer their tools are in are the same people who store expensive dirt bikes out in the back yard uncovered in the elements.

I am semi OCD and I really appreciate Mikes posts. Equal parts because they are awesome and they make me feel like a normal person in comparison:rofl: I love your shop Mike and have watched that shop tour at least once start to finish.

That is funny you mention that. My wife and I were in Moab a couple of weeks ago out on the trail with some friends when our son called to ask me where my air fitting adapter and hose were to blow out his sprinkler system as he was standing in my shop and couldn't find it. I explained it was in the toolbox under the east workbench, second to the last drawer from the bottom in the back right corner. He quickly exclaimed "it's not there". I said "are you sure? That's where I put it a couple of weeks ago when I blew our sprinkler system out". Then I started questioning myself because it isn't a tool I use that often, only once a year to winterize the sprinkler system. He said "yes, I am standing by the vise on the bench and I can't find it in any drawer in this particular toolbox. I said "if you standing at the vise that is the south bench, try your other east". Next thing I heard was "oh, there it is."

I grinned to myself and my wife who was sitting beside me in the Jeep just rolled her eyes.

I really appreciate everyone's comments and am very flattered. To me this is just a normal part of my day and part of who I am as a mechanic but I sometimes take that for granted and just assume everyone is this way.
 

jeeper

Currently without Jeep
Location
So Jo, Ut
I know where all my tools are also.

Philips head? On top of the water bottle stack in the house garage next to the entry door.

Slip joint pliers? With the channel locks on the floor mat in the back seat of the Colorado under the riding gloves.

Brad nailer? On top of the trimmer string, set on top to the propane tank for the furnace in the detached garage, next to the small random shelf holding the wd40 and empty can of Mountain Dew.

See. Easy. 🤣
 

anderson750

I'm working on it Rose
Location
Price, Utah
Maybe @jeeper can explain why I am seeing this in a Yamaha but never have seen it in a KTM😂😂😂😂

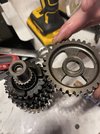
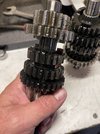
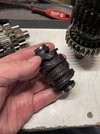
I am in the middle of putting crank and piston into a 2021 250FX and this is what the transmission is looking like. I would say whatever the root cause of motor failure was there was some heat in the motor. BTW the oil smells like burnt 90wt


017346FB-A470-4278-AC95-190CB9E1A4CC.jpegE150BA49-5C63-4559-9129-F7096E432E50.jpeg66DCE5F3-72E6-476F-9C49-F1FF84F31B77.jpeg
 
Top