
Started on our house remodel. Did this the day before thanksgiving. The wainscot will only be on 2 walls in the home, with new baseboards and paint going in on all the walls. I used a HF air sprayer to spray the white. I was actually very impressed.
![IMG_2634[1].JPG](https://www.rme4x4.com/data/attachments/70/70581-58462593f4dadfaf88b971829ae7cecd.jpg "IMG_2634[1].JPG")
![IMG_2639[1].JPG](https://www.rme4x4.com/data/attachments/70/70582-be311d2c1f4fdad59fa5ac166ac28e20.jpg "IMG_2639[1].JPG")
![IMG_2644[1].JPG](https://www.rme4x4.com/data/attachments/70/70583-9c7e0734b7fbd18afaf5e566c7fb12e7.jpg "IMG_2644[1].JPG")

Your axle stand is a WAY NICER version of what I use regularly. Mine's just cobbled together.
One question though, how will you deal with the huge range of axle tube sizes? I have a couple different clamp pieces in differing sizes, along with a spacer for my saddle part I have to use sometimes....since I've had to deal with anywhere from 2.25" to 4" diameter tubes.
The grade 8 bolts in the center of the clamps should hold the axle tight against the bottom side of the valley, if the tube is too small to reach with the bolts in there he could put longer bolts in.


The grade 8 bolts in the center of the clamps should hold the axle tight against the bottom side of the valley, if the tube is too small to reach with the bolts in there he could put longer bolts in.
") (unless those are 4" I.D.)
(unless those are 4" I.D.)

That looks awesome! I hope mine looks that good
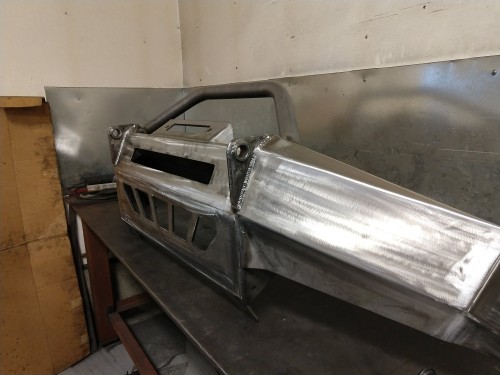
Holy crap Carl... Ok, how much for a Tacoma bumper cutouts. I was going to hand make one but then I remembered that you exist.
Makes me want to buy an 80 so i can get a carl fab diy bumper kit
Build a 100 series rear bumper already
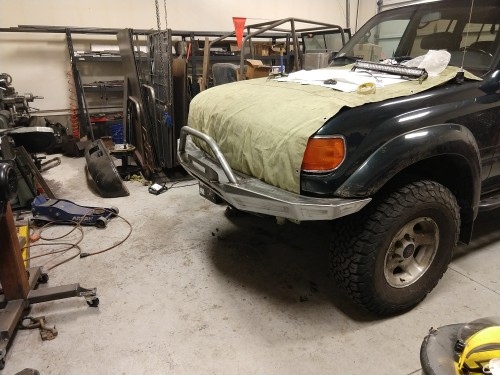
Looks like a good place to start! I like how you have the winch feet-forward and face-down so the fairlead ends up higher--I did that same thing with the hidden winch mount on my 80. Aside from it being harder to access the clutch handle, it can make for a nice clean install.
Coincidentally, I have also been working on a new winch bumper. (to replace the hidden version behind my factory bumper) Just finalized it and took it to be powder coated today.
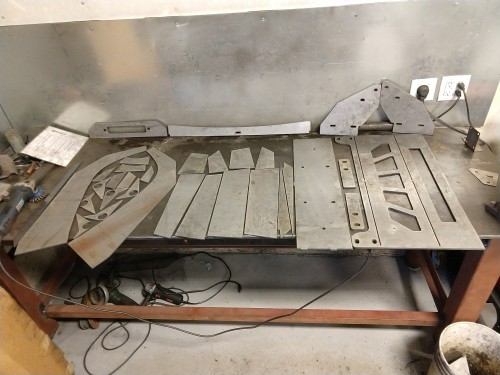
Heres the winch mounting plates rough design.
That would have saved me a lot of time doing it the trial-and-error way. What program are you using? (and how expensive was it, and how hard to learn?)Very nice looking.
Great job.
Mike