You are using an out of date browser. It may not display this or other websites correctly.
You should upgrade or use an alternative browser.
You should upgrade or use an alternative browser.
General Tech What did you work on Today?
- Thread starter Gravy
- Start date
Pile of parts
Well-Known Member
- Location
- South Jordan
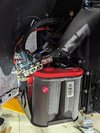
Clean!Still some wiring going on.
View attachment 169604
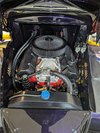
This is how it's going to look under the hood. Just need some heater hose clamps, PCV hose and a radiator cap.
View attachment 169605
View attachment 169606
- Location
- Bountiful, land of rocks
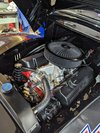
Almost like we put some thought into it?Clean!
It's kind of a lot of engine for a little truck I guess? 😁
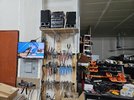
Those are interesting hammers.Kind of cluttered but it's coming along. Item by item, bit by bit. Getting organized is kind of messyView attachment 169613
- Location
- Sandy, Ut
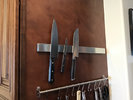
What magnet racks are those? Like em?Kind of cluttered but it's coming along. Item by item, bit by bit. Getting organized is kind of messyView attachment 169613
I tossed an IKEA one up in our kitchen for MrsCruiser and it really made me think about adding some in the home shop for tool organization. I don’t think the IKEA ones would hold heavier pliers or ratchets?
- Location
- Bountiful, land of rocks
What magnet racks are those? Like em?
I tossed an IKEA one up in our kitchen for MrsCruiser and it really made me think about adding some in the home shop for tool organization. I don’t think the IKEA ones would hold heavier pliers or ratchets?
View attachment 169630
I do like them. They look kind of cluttered but you can easily tell what you need and they are obviously at hand. I have the same magnetic strips holding up a set of Tekton pry bars. The biggest pry bar is fairly heavy. I don't think you could ask for more than what these are giving me?
- Location
- Sandy, Ut
I do like them. They look kind of cluttered but you can easily tell what you need and they are obviously at hand. I have the same magnetic strips holding up a set of Tekton pry bars. The biggest pry bar is fairly heavy. I don't think you could ask for more than what these are giving me?
Sweet. Now to do some layout and decide where I’d want them and what length.
DAA
Well-Known Member
- Location
- West Bountiful, UT
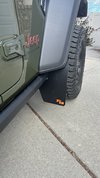
Well after battering my hinges and rear fenders on the first outing I ordered a pair of these. Also discovered while installing despite my best efforts, my nose tells me I definitely ran over some 🐮 💩
View attachment 169635
How long you give it? It looks like something that would go missing the first trip? For me?
- DAA
As Trate said pretty sturdy mounting, and quick release if I get on some technical stuffHow long you give it? It looks like something that would go missing the first trip? For me?
- DAA
Corban_White
Well-Known Member
- Location
- Payson, AZ
Worked on the rusted out tractor wheel.
First I went over the whole thing with the needle scaler:
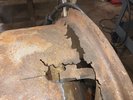
Then I started cutting to get back to good metal.
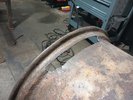
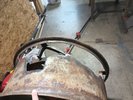
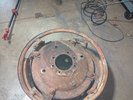
Then started welding in patches.
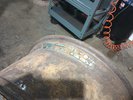
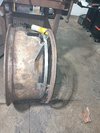
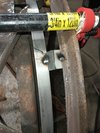
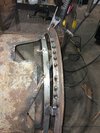
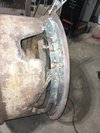
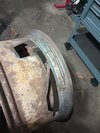
When I started this project it seemed straightforward in my head, but it turns out that that's the only place I have the skill and patience to do a @zmotorsports level job. In the real world I run out of talent and patience (and tools - or so I tell my wife) before I get to where it looks as good as new. But when I'm done it should work as good as new, even if it has obviously been repaired, and that's all that really matters to everything except my pride.
A few more patch pieces to put in and then a day of grinding. 😂
First I went over the whole thing with the needle scaler:

Then I started cutting to get back to good metal.


Then started welding in patches.


When I started this project it seemed straightforward in my head, but it turns out that that's the only place I have the skill and patience to do a @zmotorsports level job. In the real world I run out of talent and patience (and tools - or so I tell my wife) before I get to where it looks as good as new. But when I'm done it should work as good as new, even if it has obviously been repaired, and that's all that really matters to everything except my pride.
A few more patch pieces to put in and then a day of grinding. 😂
- Location
- Grantsville, Utah
In the realm of farm repair, this one is on the high end of quality. Looks good to me.Worked on the rusted out tractor wheel.
First I went over the whole thing with the needle scaler:
View attachment 169646
Then I started cutting to get back to good metal.
View attachment 169647
View attachment 169648
View attachment 169649
Then started welding in patches.
View attachment 169650
View attachment 169651
View attachment 169652
View attachment 169653
View attachment 169654
View attachment 169656
When I started this project it seemed straightforward in my head, but it turns out that that's the only place I have the skill and patience to do a @zmotorsports level job. In the real world I run out of talent and patience (and tools - or so I tell my wife) before I get to where it looks as good as new. But when I'm done it should work as good as new, even if it has obviously been repaired, and that's all that really matters to everything except my pride.
A few more patch pieces to put in and then a day of grinding. 😂
- Location
- The Land Northward (Bountiful), Utah
After the first picture I'd be on eBay getting a new one so any effort beyond that is top tier farmer fab. 💪
- Location
- Eagle Mountain, Utah
For the delight of all of us spectators... Though I know its a tractor wheel, I'd really like to see you try and balance this wheel...Worked on the rusted out tractor wheel.
First I went over the whole thing with the needle scaler:
View attachment 169646
Then I started cutting to get back to good metal.
View attachment 169647
View attachment 169648
View attachment 169649
Then started welding in patches.
View attachment 169650
View attachment 169651
View attachment 169652
View attachment 169653
View attachment 169654
View attachment 169656
When I started this project it seemed straightforward in my head, but it turns out that that's the only place I have the skill and patience to do a @zmotorsports level job. In the real world I run out of talent and patience (and tools - or so I tell my wife) before I get to where it looks as good as new. But when I'm done it should work as good as new, even if it has obviously been repaired, and that's all that really matters to everything except my pride.
A few more patch pieces to put in and then a day of grinding. 😂
- Location
- Grantsville, Utah
That’s easy. Beet juice for ballast.For the delight of all of us spectators... Though I know its a tractor wheel, I'd really like to see you try and balance this wheel...
Beet juice is the current preference for ballast in tractor tires. Calcium Chloride used to be popular, but you might end up with a welding project after using it for several years. 😬

glockman
I hate Jeep trucks
- Location
- Pleasant Grove
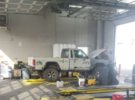
After replacing a bunch of vacuum tubes, PCV valves, whatever I still failed emissions testing yesterday on the Comanche. Mechanic told me there was a really bad leak at the exhaust manifold so I'm in the process of pulling that apart.
I've also starting on body work and getting ready to paint in the spring/summer (shop isn't heated). I need dry air, here is my plan, please shoot holes in it as any advice is welcome. The plan is just a simple single circuit in the shop with a 'T' to preserve the cleaner/dryer/regulator when not required. Don't pay attention to the filters/compressor/parts shown it's just a visual, any recommendations on a cleaner/dryer/regulator would be appreciated.
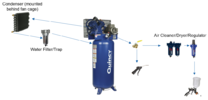

I've also starting on body work and getting ready to paint in the spring/summer (shop isn't heated). I need dry air, here is my plan, please shoot holes in it as any advice is welcome. The plan is just a simple single circuit in the shop with a 'T' to preserve the cleaner/dryer/regulator when not required. Don't pay attention to the filters/compressor/parts shown it's just a visual, any recommendations on a cleaner/dryer/regulator would be appreciated.

With all the wiring in the cab done, hopefully finish the rear of the truck this weekend and test it all.
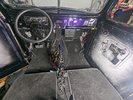
I was going to put my glass in the doors the other day until I realized one of my regulators is going to be a problem. Headed out of town to go get another one.
Put a Killswitch up under the dash
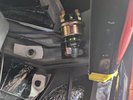
Fronts all wired up
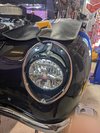
Can't wait to get it out of the shop and be able to really step back and look at this thing.
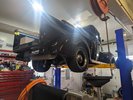

I was going to put my glass in the doors the other day until I realized one of my regulators is going to be a problem. Headed out of town to go get another one.


Put a Killswitch up under the dash

Fronts all wired up

Can't wait to get it out of the shop and be able to really step back and look at this thing.


