Jeep Willys ground-up build

Bart

Registered User
Location
Arm Utah
I have a usable (not streat legal) one out of a scout if you need. The glass is flat and it could probably be trimmed to fit.

Thanks Corban, but I'll try to find a Willys if I can. Anything I find will need mods, but the CJ3a will have much less work to do to fit the way I need it.
 

BCGPER

Starting Another Thread
Location
Sunny Arizona
That mint '48 is still sitting there under the carport. What are your thoughts on working after dark, and razor wire?? :-\

I should have just dragged the thing off when I had the chance.

Thanks Corban, but I'll try to find a Willys if I can. Anything I find will need mods, but the CJ3a will have much less work to do to fit the way I need it.
 

I Lean

Mbryson's hairdresser
Vendor
Location
Utah
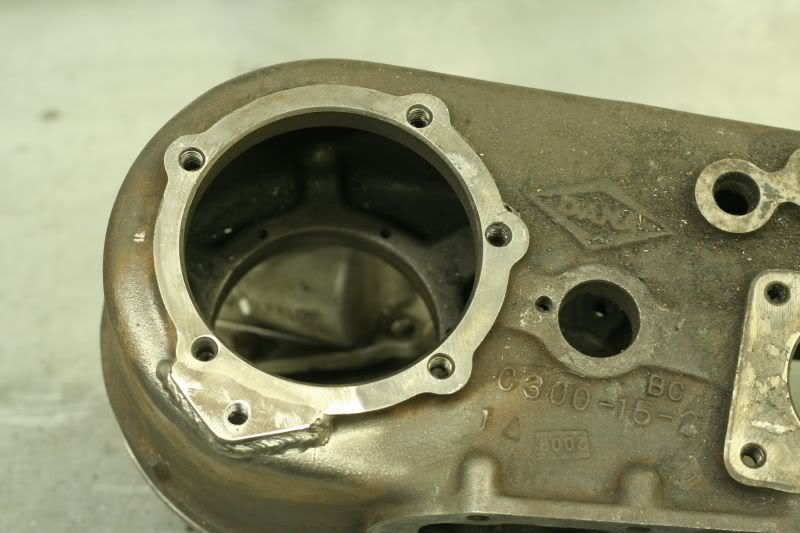
A few pics finally. Here's the D300 case with the clocking ring on it:

IMG_1706.jpg


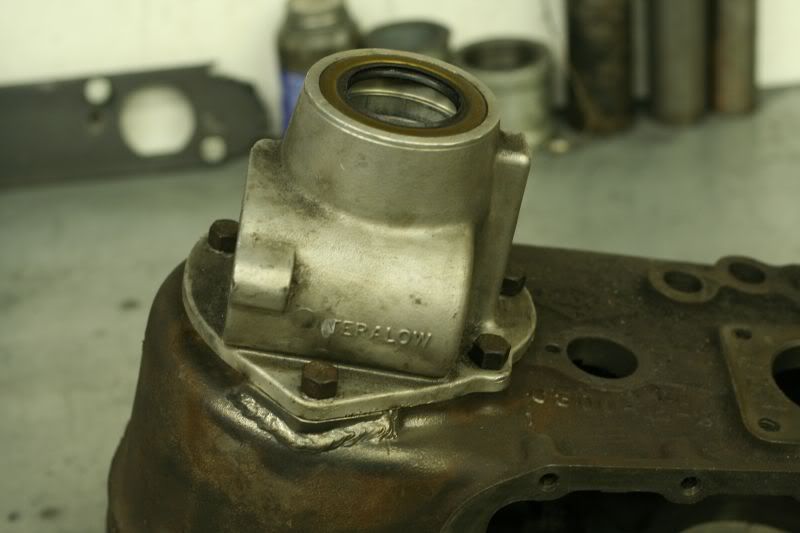
These show the modification to the 1980 version D300 to bolt on a "normal" HD output housing designed for a 1981+ 'case:

IMG_1707.jpg


IMG_1708.jpg


IMG_1709.jpg


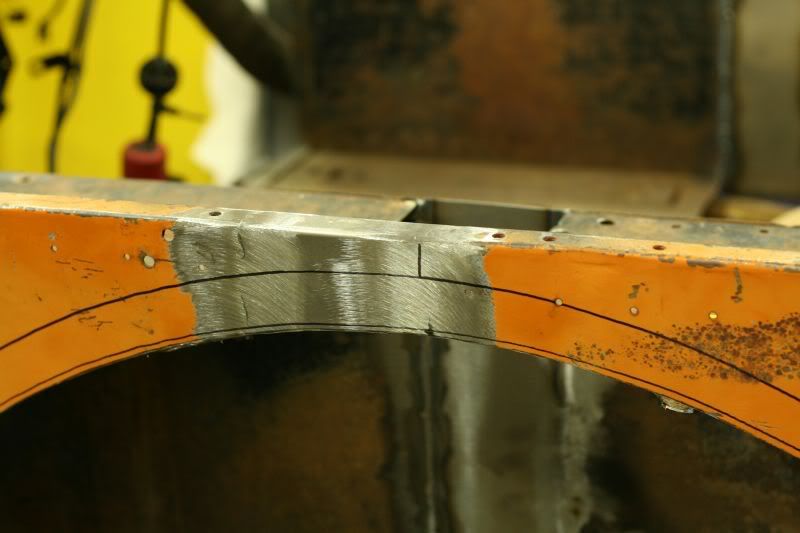
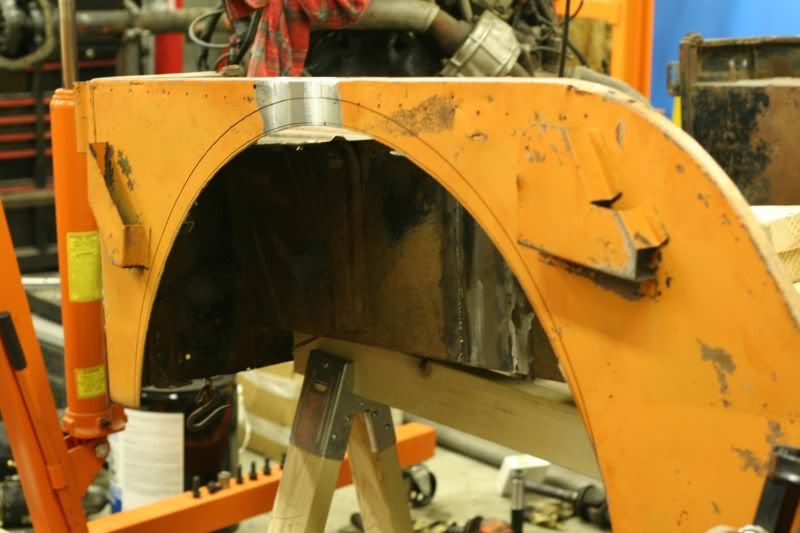
The 4" stretch, and cutting a 37" diameter wheelwell. I cut nothing from the front of the wheelwell, and about 1.5" or 2" off the rear. The scribed line just over the cut is the actual fender line, I have a piece of 1/4" rod rolled to the same diameter I'll weld to the inside of the fender, then hammer the sheet around it so it has a finished, reinforced edge.

IMG_1710.jpg


IMG_1711.jpg


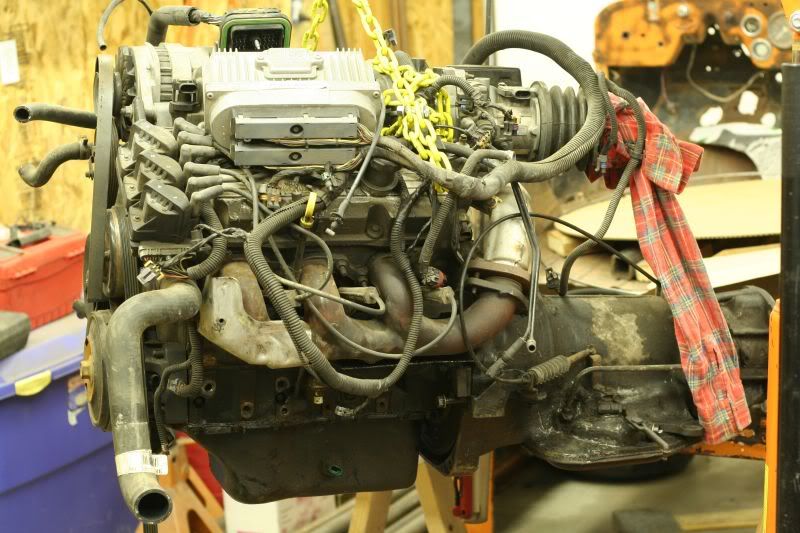
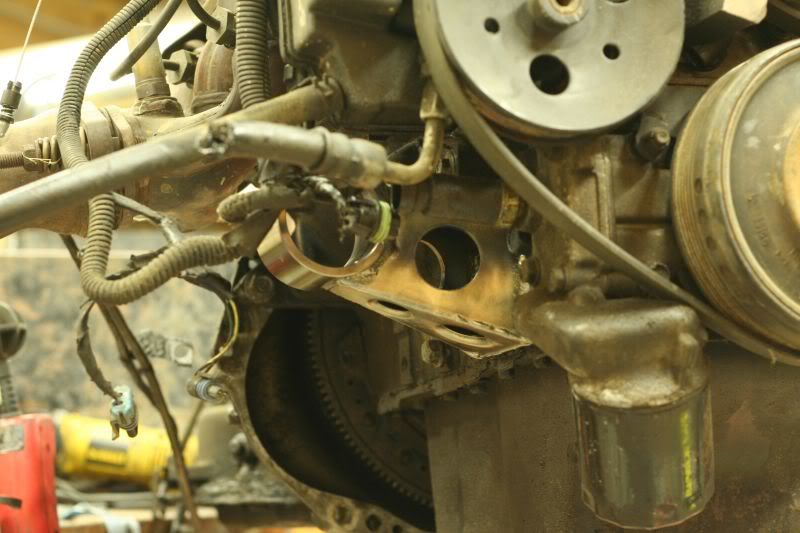
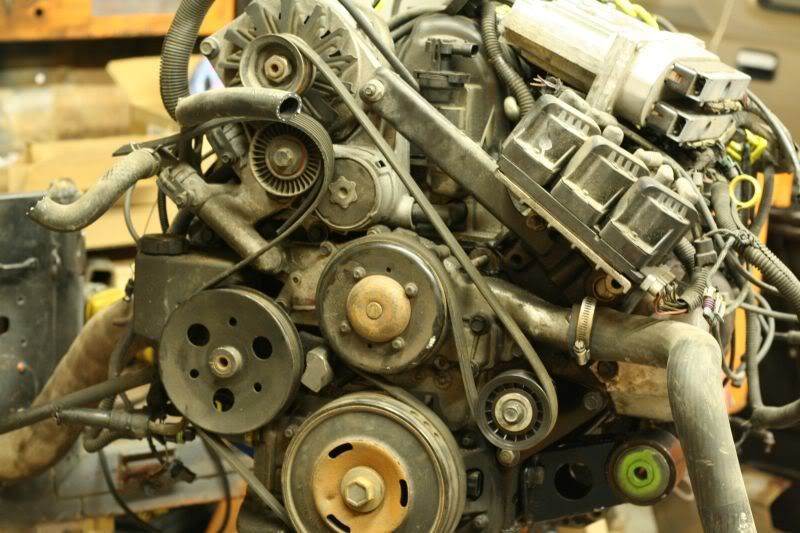
Here's my engine and tranny:

IMG_1712.jpg


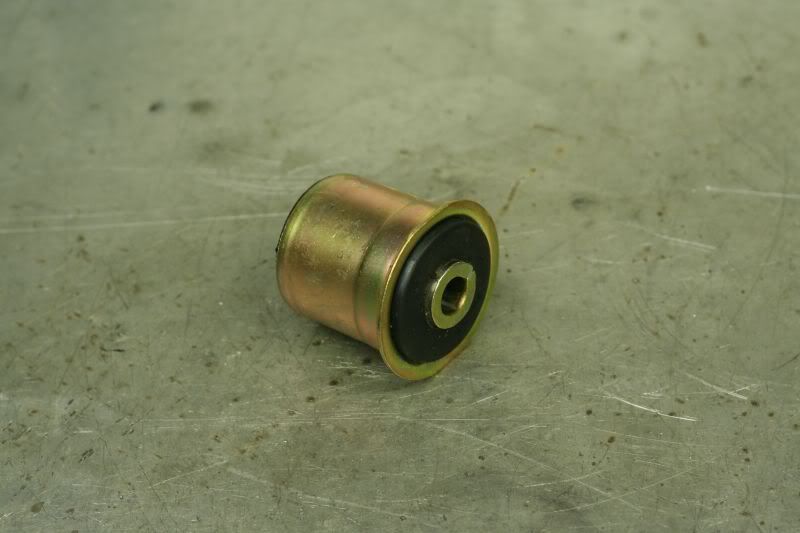
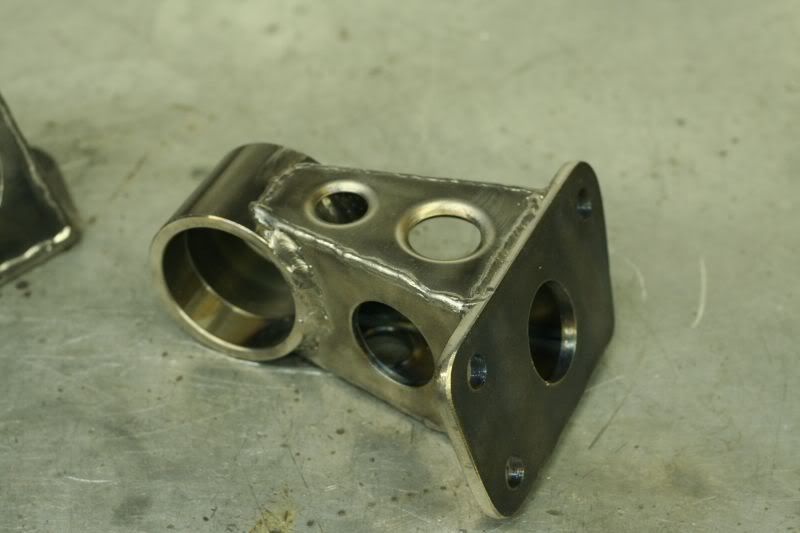
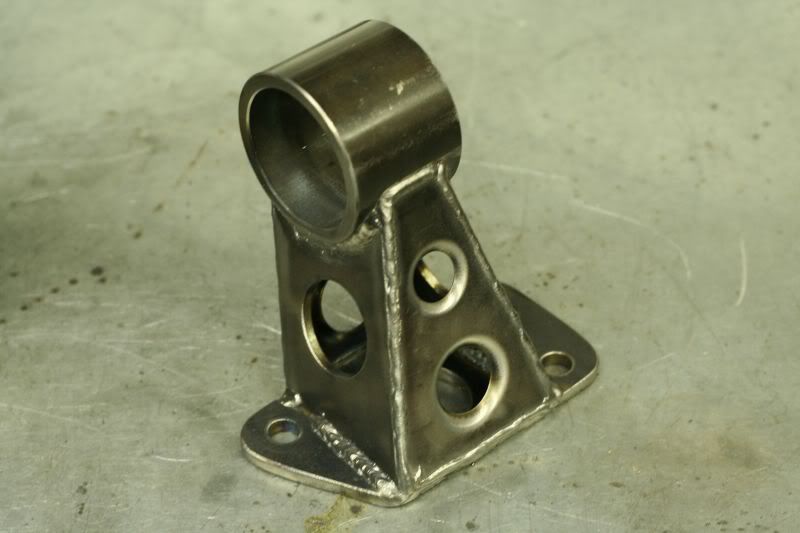
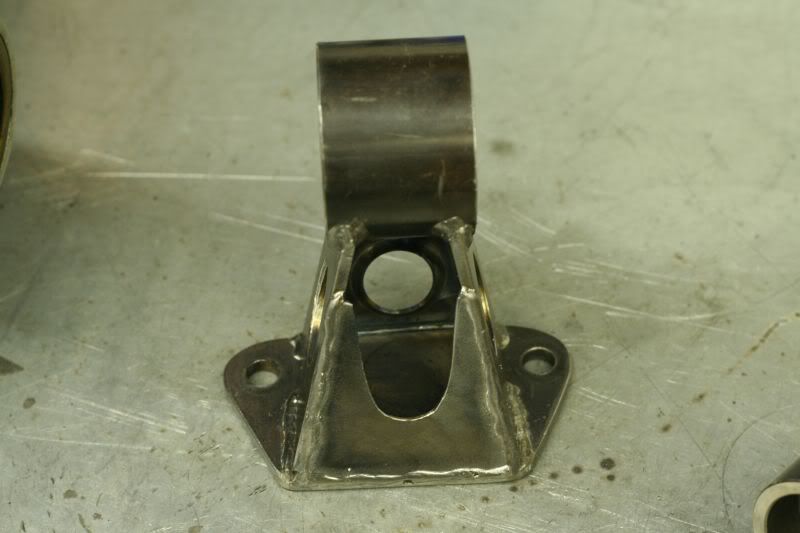
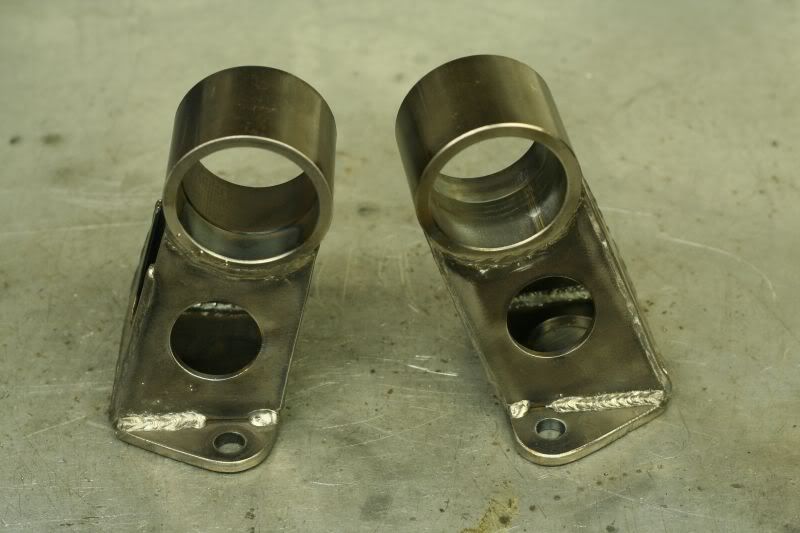
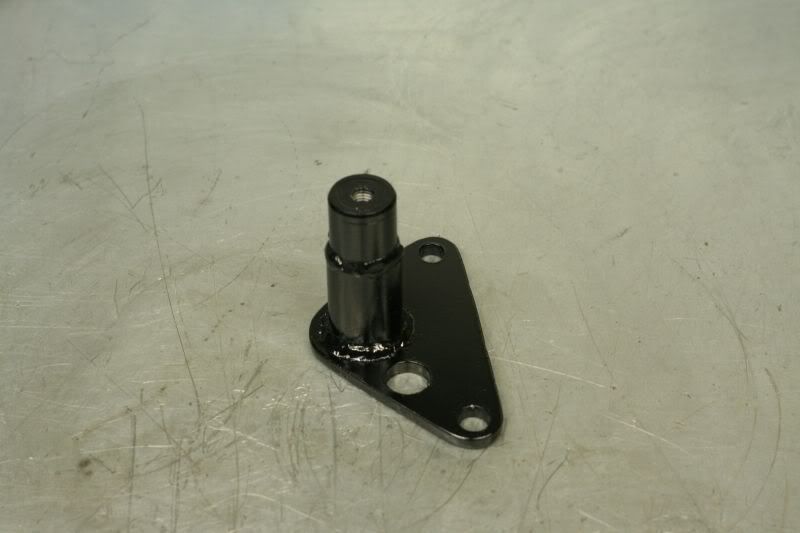
The engine block side of the motor mounts were built to accept this bushing:

IMG_1717.jpg
 

I Lean

Mbryson's hairdresser
Vendor
Location
Utah
The mounts. Passenger side:

IMG_1713.jpg


IMG_1715.jpg


Driver's side. Different gusset since the bolt hole is in the middle on this one.

IMG_1714.jpg


Bof o' dem:

IMG_1716.jpg


Installed on the block temporarily. Obviously I still need to paint them and press bushings in. The driver's side one has the socket in there to illustrate why the gusset looks the way it does. (cuz it has to)

IMG_1720.jpg


IMG_1722.jpg
 

I Lean

Mbryson's hairdresser
Vendor
Location
Utah
On the stretch section, I haven't filled in the top of the fenderwells since the new cut line goes above their level, and I don't know how far the tire will move up into the "tubbed" area, so that will come later. I also haven't filled in the floor, because I think there's a fair chance I'll have to build a raised section to allow upper control arm mounts to come up through the floor on full compression. That will have to come later also.
 

Greg

Make RME Rockcrawling Again!
Admin
Wow Carl, I always love seeing your fab work. Those motor mounts look great! The stretch of the tub looks real clean too, I don't think it will be visible. Looks great so far!
 

I Lean

Mbryson's hairdresser
Vendor
Location
Utah
Thanks! I'm actually fairly disappointed in how well my welds worked out. Happens every time I don't weld anything for quite a while, I forget how to do it. Plus my hands aren't as steady when I'm out of practice, so you get the inconsistency you can see.

Oh well, at least the motormounts aren't really going to be visible in the end, so they're a good place to warm up. :)
 

yellowbronco

Cuts Through Grease !!!
Location
Moab
I'm actually fairly disappointed in how well my welds worked out. Happens every time I don't weld anything for quite a while, I forget how to do it. Plus my hands aren't as steady when I'm out of practice, so you get the inconsistency you can see.

Your so called "bad welds" look better than my good ones any day.:hickey:
-_-
 

Corban_White

Well-Known Member
Location
Payson, AZ
Carl, on the Tcase, did you just fill that area in with weld and then mill it flat and drill/tap the hole or is it a piece you welded on? Also, those motor mount bushings look like they have more flex than the typical poly/rubber bushing-more along the lines of an OEM mount. If that is true, where did you get them? Everything looks great!
 

Badger

I am the Brute squad
Location
South Salt Lake
The motor mounts look to be Jeep front control arm bushings.

Looking really good Carl keep up the good work and post more pictures......!
 

I Lean

Mbryson's hairdresser
Vendor
Location
Utah
Carl, on the Tcase, did you just fill that area in with weld and then mill it flat and drill/tap the hole or is it a piece you welded on? Also, those motor mount bushings look like they have more flex than the typical poly/rubber bushing-more along the lines of an OEM mount. If that is true, where did you get them? Everything looks great!

I cut a piece of 3/8" plate to the triangular shape, then welded it on, ground it flat, drilled/tapped the hole.

Badger's pretty much right....Jeep TJ/XJ/ZJ/others front (or rear, if applicable) lower control arm bushing. There are several variations and brands, but for control arm use none last as long as the genuine Clevite bushings, which these are. I have a suspicion the motor mounts aren't going to see the same loads a control arm will, so a cheap knockoff bushing would work....but I had these bushings already and I don't want to have to replace them, so there you go.

The bushings themselves are around $13 each from Teraflex (same ones they use in the control arms as well as Hemi motor mounts), and the machined eyelets are around the same price as well, IIRC.
 

I Lean

Mbryson's hairdresser
Vendor
Location
Utah
I'm ready for more exciting pics....:bryson:

All right, these should provide all the excitement you can handle!

Since I deleted the A/C compressor in favor of an engine mount, I needed to put an idler pulley in to make the serpentine belt work. Pretty simple, just a piece of plate to bolt to the front of the block, a chunk of solid steel drilled and tapped in a lathe, and a piece of tubing in between. Plus a new idler pulley, and a bolt and spacer from a junkyard.

IMG_2066.jpg


IMG_2067.jpg


IMG_2068.jpg


IMG_2070.jpg


The new length of the belt measures 79 1/2". That's with no pressure on the spring tensioner, just holding the old (cut) belt in place. Any experience with what length I might need? I'm guessing maybe an inch shorter than what I measured?
 
Last edited:
Top