Exalted 4x4
So. U Crew
- Location
- Salt Lake/So,UT
I read about your rip off dana 60 on pirate, that sucks man. I just got jipped on a "rebuilt perfect tranny" I know how you feel. Good luck on the build and i am excited to see the rest
I read about your rip off dana 60 on pirate, that sucks man. I just got jipped on a "rebuilt perfect tranny" I know how you feel. Good luck on the build and i am excited to see the rest
 ), and mock up the rear axle and links so I can get the rear driveline ordered. Oh, and the front 60 should be done (knuckle welded up) as well.... The front driveline should be fine to make it road worthy. Actually, it was correct when I was goign to put the mounts where I thought I was. But now I'm going to use the Rubicon Express crossmember, which changed my mount location forward about 9". The new mounts, I could not get the numbers to come out. So for the heck of it, I tried the old mount (RE crossmember), and the numbers came out nearly perfect! 0* roll and about 87% anti squat. Before I couldn't get less than 9* roll and less than 107% anti squat. So now I have too short of arms
 WOW, it's really coming along. Keep up the great work and good luck.
Looks good Wayne!
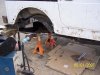
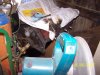
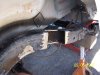
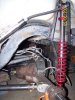
Those poly performance shock towers are nice. I wish I would have gone with them instead of my POS Ford brackets.
Look forward to seing it on the trail in Idaho.
Marcus
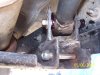
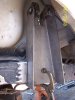
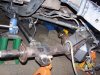
My only gripe with them is there is no way to get behind to weld, without taking the body off. One thing I could have done, that I ddint' try, is remove the body mounts and lift one side of the tub off the frame. I attempted to weld up the driver side, but I didn't feel good about it, so I came up with the bud welds. I didn't even attempt to weld on the backside on the passenger side.... I did make sure to run my weld around from the sides to the back as much as possible though - to keep it from 'tearing' as much as possible.
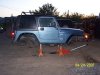
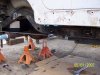
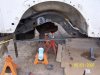
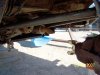
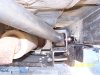
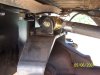
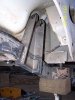
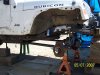
My other fear is since you cut out all of the frame, strength issues... So much so, if you look in the pictures, you will notice I had stands just under the bumpers. After notching (before starting) I added jack stands just under the door to keep the weight off the bumper stands for fear the frame would buckle.
Thats too bad about their CS.
Don't sweat the frame being too weak. I've cut and rewelded the crap out of mine without any issues. To gain welding access, I ended up getting some large screw jacks from a trailer supply store (state trailer/$30) and placing them under the rockers and lowering the frame down with a floorjack. Works like a champ!
HTH -Marcus