Here's a little mini project I did that turned out nice.
I'm starting to offer more of these LED upgrades for gauge clusters (as well as repairing them).
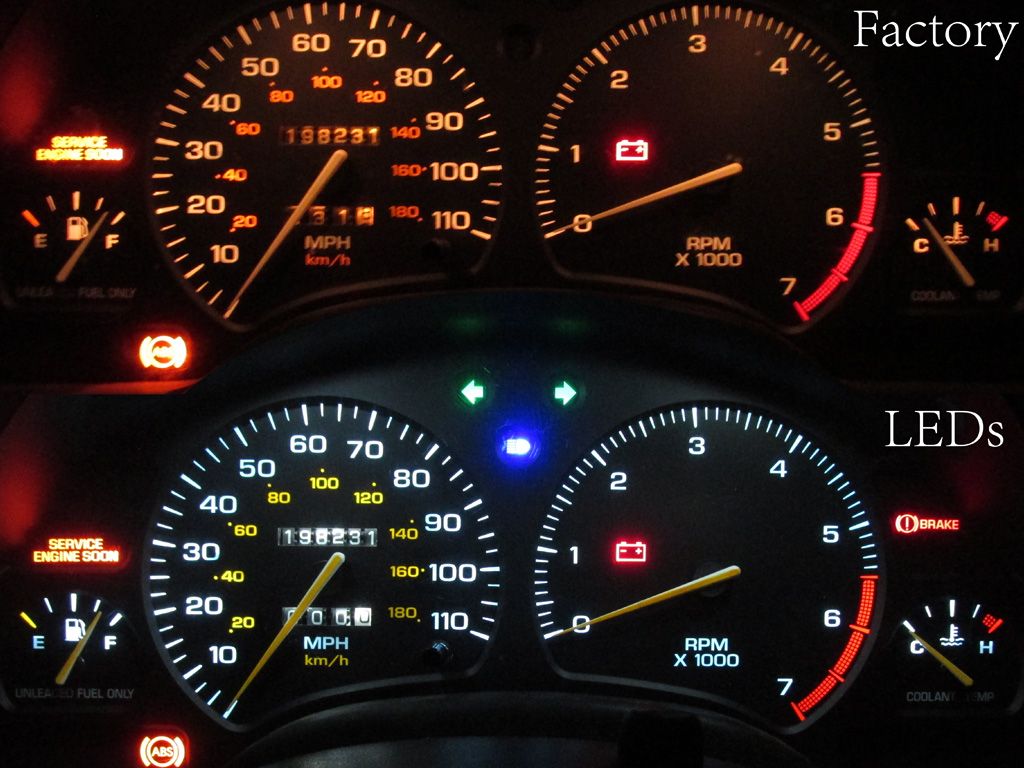
One of my cars had terrible looking incandescent bulbs for backlighting on the gauge cluster, and they only got more and more yellowish as you dimmed them.
I took the cluster apart and soldered in crisp, clean looking, white LEDs for the backlights, green for the turn signals, and blue for the high beam indicator. I also colored the face of the needles orange (they were pure white).
The difference is impressive; the car literally feels nicer and newer now since the gauge is the only part of the car you really see at night. And the gauges stay pure white as I dim them now.
These comparison pictures were taken with the same shutter speed, aperture, ISO, and white balance settings, so it is an accurate representation.
:thumbs:

")