
You are using an out of date browser. It may not display this or other websites correctly.
You should upgrade or use an alternative browser.
You should upgrade or use an alternative browser.
Project Hundy Build Thread - 2000 UZJ100 Land Cruiser
- Thread starter cruiseroutfit
- Start date
-
- Tags
- build thread
- Location
- Sandy, Ut
the 40 you're storing for me, you mean?hahahah I keep thinking I'm over it, until I see it again hahah Kidding aside, the 45 is sweet. I love how bare-bones it is, like a proper tool. I'm a huge fan of metal trucks-- no plasticky dashes!!!
Yeah, yeah... the 40 I'm storing. That said after I catch up on some maintenance on the others, its going to get a motor. Once it gets a motor its game on. We'll save that for another build thread.
My goal for the 45 is simple honest, keep it an honest & simple truck. Thusfar I've kept everything true to original and I don't plan to sway on that. Paint is my big hangup, I don't want (and can't afford) to give it the paint it deserves right now and I don't want to start replacing the weatherstipping it badly needs until I paint. I'm thinking of taking an auto-body class and I'll start priming and prepping the truck as well as address the dents and such. If I could get it near ready to paint I'd feel a lot better about paying to have it professionally shot and then spending the $500+ the w/s and trim is going to set me back, sadly I had a box full of it already, it melted
The 45 deserves its own build thread too but I'll post a picture so any others reading our drivel can follow along:
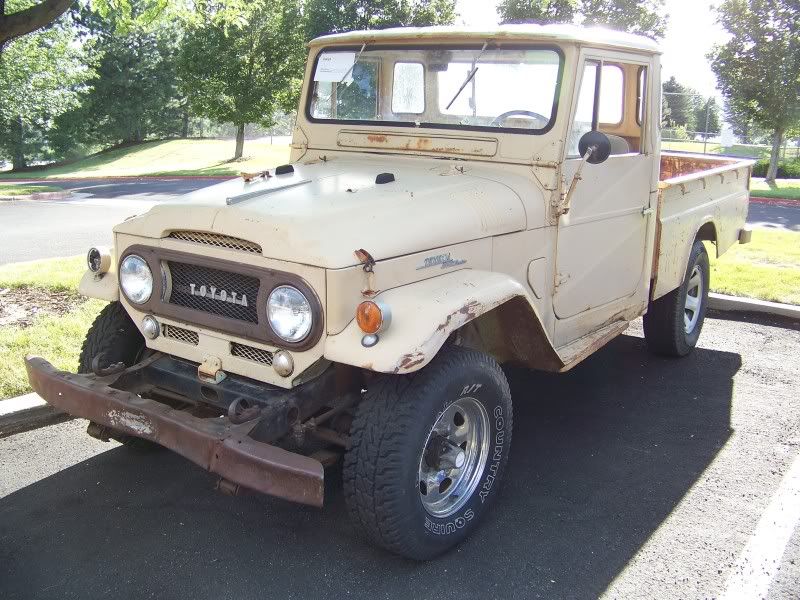
This is my wifes truck
, and we are slowly building it as a Sunday driver, road trip, Relic Runner, camp rig, trips to the hardware store, etc. One of these days I'll consolidate all my pics and such into its own build thread.- Location
- Sandy, Ut
WOW, very cool build. I love how clean and functional your rigs are.
Thanks Bart, I appreciate you following along and the kind words. I've learned from many of my own mistakes over the years
Rot Box
Diesel and Dust
- Location
- Smithfield Utah
Loving the build. The second battery kit should be well worth it.
Paint It would have to rot out worse than the Rot Box to require a paint job. Right now its building character
Paint is my big hangup, I don't want (and can't afford) to give it the paint it deserves right now
Paint
It would have to rot out worse than the Rot Box to require a paint job. Right now its building character - Location
- Sandy, Ut
Loving the build. The second battery kit should be well worth it.
Its already been nice with the fridge and the lack of miles it sees. For instance its been parked since the FYTO and I just took the fridge out yesterday. Start battery was still 'normal', aux battery which had been running the fridge (not that the compressor was spinning in this cold
) was still in the mid range. Paint
There was some serious talk about fixing the minor rust, pounding out the dents and priming and then rattle canning it all to match the current tan. I'm totally cool with that, I just hate the idea of gluing on a small fortune worth of weatherstripping if I'm going to have to pull it off again down the road. I guess when I really think about it the only stuff that is permanently glued on is the door w/s and I could salvage it or replace without too much loss? Rot Box does have character, I don't think I want to aspire to that much character
Armor Coatings
New Member
- Location
- 6068 south Redwood Road S.L.C UT
Just want to say thanks for all the kind words on here. We really had fun working on this build with you guys and always enjoy any RME work we get. We always try to put our members first. Thanks so much for the local support!!! Jeff Swain. Armor Coatings.
Definitely drooling over the 45 also. I think that's my favorite Toyota model of all time. Your idea of the auto body class is a good one, but be prepared for a long process. One night a week doesn't give you a lot of time, but if you supplement that with additional work at home, it goes much faster.
- Location
- Sandy, Ut
Just want to say thanks for all the kind words on here. We really had fun working on this build with you guys and always enjoy any RME work we get. We always try to put our members first. Thanks so much for the local support!!! Jeff Swain. Armor Coatings.
Thank you Jeff, you guys really did go above and beyond on this.
- Location
- Sandy, Ut
Definitely drooling over the 45 also. I think that's my favorite Toyota model of all time. Your idea of the auto body class is a good one, but be prepared for a long process. One night a week doesn't give you a lot of time, but if you supplement that with additional work at home, it goes much faster.
That was kinda my plan. I'm familiar enough with auto body to be dangerous, I've done some small dent repairs and have a small selection of tools, hammers, blocks, DA, things like that. I just want to get an actual legit foundation of repair rather than learn by beating some panels to death
- Location
- East Stabbington
ahem. Death Falcon.
- Location
- Sandy, Ut
ahem. Death Falcon.
Millenium Death Falcon Chicken Star is the full latin name. Death Star for short
- Location
- Sandy, Ut
Back from another road trip in the hundy. We had four adults and gear for a trip to King of the Hammers. We were serving as chase and pit support for Team Williams (John & Nate) in #4623 in the Every Man Challenge race. I finalized my HAM (Kenwood TM-D710 with MARS/CAP mod) prior to departing for the race and the setup proved 100% successful with communicating with their race radio as well as the race radio in the Raptor chase rig manned by Cody and Bryson. I ended up mounting the main unit to the drawer unit just behind the drivers side rear seat. All the wiring is under the carpet and trim with the face plate attached to a Panavise/Ram mount on the dash. We (Olly ) built a custom mic mount on the side of the center console, offers a real clean look when not in use and out of the way when in use.
We found one major need, more USB ports. I have two in the rear drawer side panels that were installed right next to the 12V outlet and fridge outlet, however when gear is stacked deep you can't have easy access to them. With 4 adults, i.e. phones, ipods, GPS's, etc... outlets become a premium and stretching cords from the front seat to the back seat is a pain and cluttery. I've got one more of the BlueSea USB twin outlet setups I had planned to install in the front dash somewhere but I think instead I'm going to install it in the back of the center console? Preferably in a fashion that doesn't interfere with the drink holders? I may play with that a bit tomorrow as I clean the funk out of the Cruiser.
Lastly, I'm still working on some build thread details for part# 4 of my formal write-up
) built a custom mic mount on the side of the center console, offers a real clean look when not in use and out of the way when in use. We found one major need, more USB ports. I have two in the rear drawer side panels that were installed right next to the 12V outlet and fridge outlet, however when gear is stacked deep you can't have easy access to them. With 4 adults, i.e. phones, ipods, GPS's, etc... outlets become a premium and stretching cords from the front seat to the back seat is a pain and cluttery. I've got one more of the BlueSea USB twin outlet setups I had planned to install in the front dash somewhere but I think instead I'm going to install it in the back of the center console? Preferably in a fashion that doesn't interfere with the drink holders? I may play with that a bit tomorrow as I clean the funk out of the Cruiser.
Lastly, I'm still working on some build thread details for part# 4 of my formal write-up
sixstringsteve
Well-Known Member
- Location
- UT
I'll get you an update very soon. I haven't forgotten you.
- Location
- Sandy, Ut
I'll get you an update very soon. I haven't forgotten you.
No sweat at all Steve. I've still got parts #4 & #5 to finish writing and post before I'm ready for your part
- Location
- Sandy, Ut
Updates and lack of updates
Still working on the next installment of the build thread with pics but I did install some new HIR low range bulbs from Candlepower. A very noticeable improvement over the dismal bulbs I had in there previously.
Had a nice weekend with the 100 in Great Salt Lake Desert this last weekend with the crew from ExpedtionUtah. One word summary of trip = cold
.jpg")
Still working on the next installment of the build thread with pics but I did install some new HIR low range bulbs from Candlepower. A very noticeable improvement over the dismal bulbs I had in there previously.
Had a nice weekend with the 100 in Great Salt Lake Desert this last weekend with the crew from ExpedtionUtah. One word summary of trip = cold
- Location
- Sandy, Ut
Death Star Build Part# 4: Go Time, the Build Day!
Why a single weekend? Well I'd like to think I'm a pretty busy guy and free weekends come at a premium. Quite honestly I'd much rather be bouncing around the desert on a Saturday than working on my vehicles. While lightly discussing the 100 Series build idea with my ARB sales rep (TR Burrus) & Jason Goates, one of my part-time helpers here in the shop, the idea came up, "Why not in a single day?". (Pretty sure we all have Jason to blame for the idea). The more I thought about it, why not? As I developed my Gaant chart and laid out the tasks in the build planning phase, it quickly became apparent that this wasn't going to be feasible in 24 hours proper, well not in the manner in which I wanted it installed that is. So instead we planned around a weekend, starting after we closed the shop and sent off our shipping on a Friday evening and culminating sometime on Sunday when everything was wrapped up and finalized.
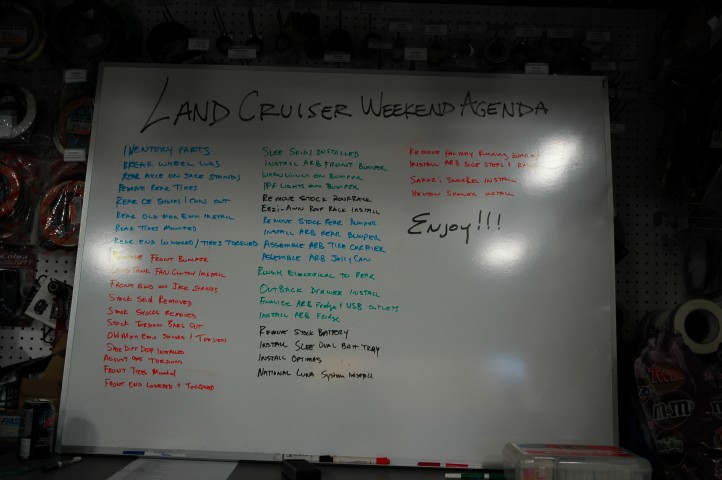
The Weekend Task List
The advantage of the Gantt chart was the ability to scale the project in any way we wanted. I knew we had approximately 150 man-hours of projects to complete, be it 15 guys working 10 hours each or 5 guys each working 30 hours. There is an obvious point of diminishing returns in terms of the number of people you can have practically working on one vehicle at one time, given that constraint we tried to plan not only the project timing but also the number of people on each project as well. Our 'staff' ranged from over a dozen people during the heat of things on Saturday to 3 people on Sunday afternoon. Practical for all? Perhaps not but plan some projects, buy some pizzas and you might be surprised not only how many show to help but how helpful they in fact are. Crucial for me was to not compromise the build quality in the name of getting it done in a weekend. By bringing in some 'ringers' that specialize in these projects I was able to ensure that the build quality was maintained throughout.
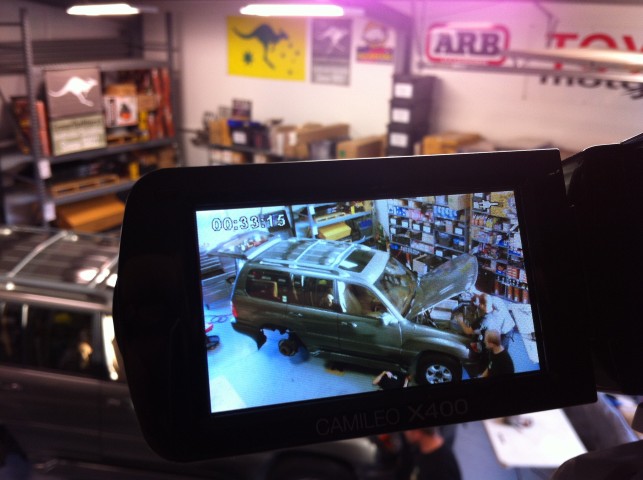
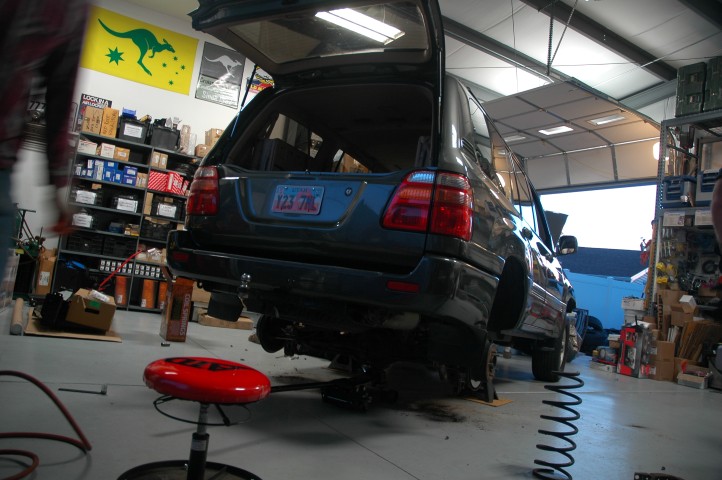
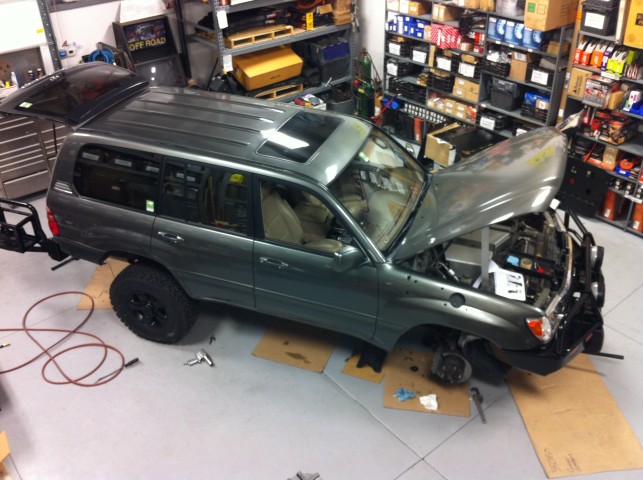
Capturing the first items of the build - stock rear suspension removal & removing the stock front bumper
Step one was to get the 100 in the shop and start tearing things off like mad men. Our first victim would be the front bumper and while one crew (Jake, Jason & Dan) was dismantling the factory front bumper a second crew (Johnny & Stephen) were pulling the suspension off the rear axle. With the stock coils and shocks removed, it was time to install the new Old Man Emu rear suspension components. Meanwhile, assembly on the front ARB bumper was underway and the front bumper crew installed the chassis mount, Warn winch, and buffers in preparation for mounting the bar to the chassis. With the front bumper installed and finalized, we could start the rear bumper/swing installation which needed to happen before the drawers could go on, seeing the trend here? Like pieces of a puzzle, we had to jump around to keep out of the way of the simultaneous projects all the while having projects completed before the next started. All part of the fun.
Build Pictures from Friday Evening:
OME rear suspension installation

Prepping the front end for the ARB winchbar
Assembling the ARB rear swings - fuel & tire carrier
Assembling the ARB rear bumper main bar
Installing the carriers on the rear bumper
Front bumper complete, the shop getting messy!
Rear end suspension complete, front bumper complete, snorkel holes drilled

Making progress!
By Friday night the winch was installed in the front bumper and the bumper was finish mounted. Now we could rock out the front suspension and start on the rear bumper as the rear suspension was finalized. Working through the night we finished up the bulk of the rear bumper and swings and the front suspension as well. Bouncing in between front and back tasks I started on the snorkel, we let the paint dry on the fender holes and grabbed some early morning brekky.
To Do List By End of Day 1 (Friday 6PM - Saturday 5AM):
Inventory Parts
Break wheel lug nuts
Rear End on Jack Stands
Remove Rear Tires
Rear Stock Shocks & Coils Removed
Rear OME Suspension Installation
Rear Tires Mounted
Rear End Lowered & Rear Tires Torqued
Remove Front Bumper
LandTank Fan Clutch Installation
Front End on Jack Stands
Stock Skid Plate Removed
Stock Shocks Removed
Stock Torsion Bars Removed
OME Shocks & Torsion Bars Installed
Slee Diff Drop Kit Installed
OME Torsion Bars Adjusted
Front Tires Mounted
Front End Lowered & Front Tires Torqued
Stock Trans Cross Member Removed
Slee Skid Plates Installed
Install ARB Front Bumper
Warn Winch Installed in Bumper
IPF Lights on Bumper
Remove Stock Roof Rack
Remove Stock Rear Bumper
Install ARB Rear Bumper
Assemble & Install ARB Wheel Carrier
Assemble & Install ARB Jerry Can Holder
Rough Electrical to Rear
Rear 3rd Row Seats & Seatbelts Removed
Outback Drawer System Installed
Finalize ARB Fridge Wiring & Aux power outlets
Install ARB Fridge
Remove Stock Battery
Install Slee Dual Battery Tray
Install Optima Battery's
National Luna Dual Battery System Installation
Remove Factory Running Boards
Install ARB Side Steps & Side Rails
Install Eezi-Awn K9 Roof Rack
Safari Snorkel Installation
Helton Hot Shower System Installation
Why a single weekend? Well I'd like to think I'm a pretty busy guy and free weekends come at a premium. Quite honestly I'd much rather be bouncing around the desert on a Saturday than working on my vehicles. While lightly discussing the 100 Series build idea with my ARB sales rep (TR Burrus) & Jason Goates, one of my part-time helpers here in the shop, the idea came up, "Why not in a single day?". (Pretty sure we all have Jason to blame for the idea
). The more I thought about it, why not? As I developed my Gaant chart and laid out the tasks in the build planning phase, it quickly became apparent that this wasn't going to be feasible in 24 hours proper, well not in the manner in which I wanted it installed that is. So instead we planned around a weekend, starting after we closed the shop and sent off our shipping on a Friday evening and culminating sometime on Sunday when everything was wrapped up and finalized.
The Weekend Task List
The advantage of the Gantt chart was the ability to scale the project in any way we wanted. I knew we had approximately 150 man-hours of projects to complete, be it 15 guys working 10 hours each or 5 guys each working 30 hours. There is an obvious point of diminishing returns in terms of the number of people you can have practically working on one vehicle at one time, given that constraint we tried to plan not only the project timing but also the number of people on each project as well. Our 'staff' ranged from over a dozen people during the heat of things on Saturday to 3 people on Sunday afternoon. Practical for all? Perhaps not but plan some projects, buy some pizzas and you might be surprised not only how many show to help but how helpful they in fact are. Crucial for me was to not compromise the build quality in the name of getting it done in a weekend. By bringing in some 'ringers' that specialize in these projects I was able to ensure that the build quality was maintained throughout.
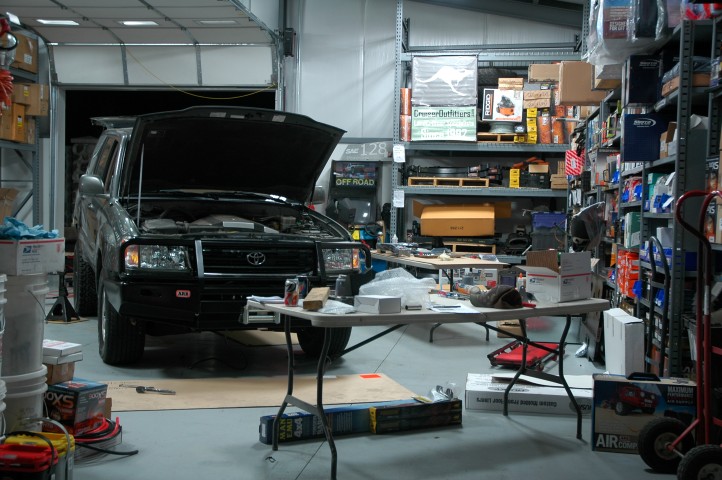
Capturing the first items of the build - stock rear suspension removal & removing the stock front bumper
Step one was to get the 100 in the shop and start tearing things off like mad men. Our first victim would be the front bumper and while one crew (Jake, Jason & Dan) was dismantling the factory front bumper a second crew (Johnny & Stephen) were pulling the suspension off the rear axle. With the stock coils and shocks removed, it was time to install the new Old Man Emu rear suspension components. Meanwhile, assembly on the front ARB bumper was underway and the front bumper crew installed the chassis mount, Warn winch, and buffers in preparation for mounting the bar to the chassis. With the front bumper installed and finalized, we could start the rear bumper/swing installation which needed to happen before the drawers could go on, seeing the trend here? Like pieces of a puzzle, we had to jump around to keep out of the way of the simultaneous projects all the while having projects completed before the next started. All part of the fun.
Build Pictures from Friday Evening:
OME rear suspension installation
Prepping the front end for the ARB winchbar
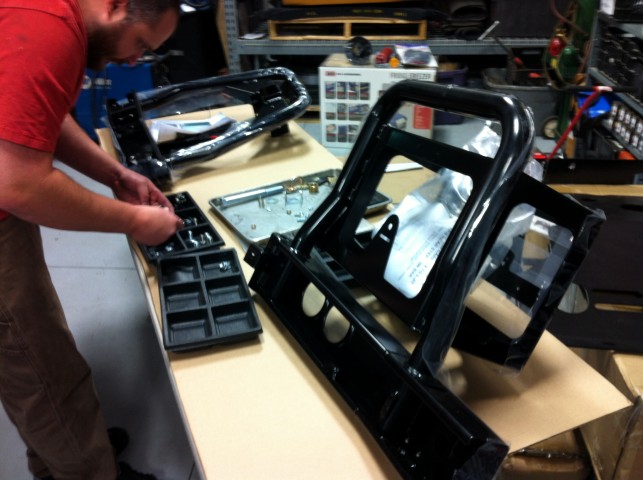
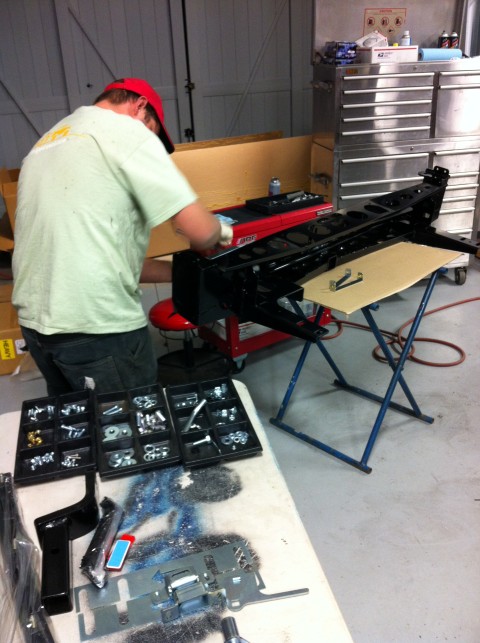
Assembling the ARB rear swings - fuel & tire carrier
Assembling the ARB rear bumper main bar
Installing the carriers on the rear bumper
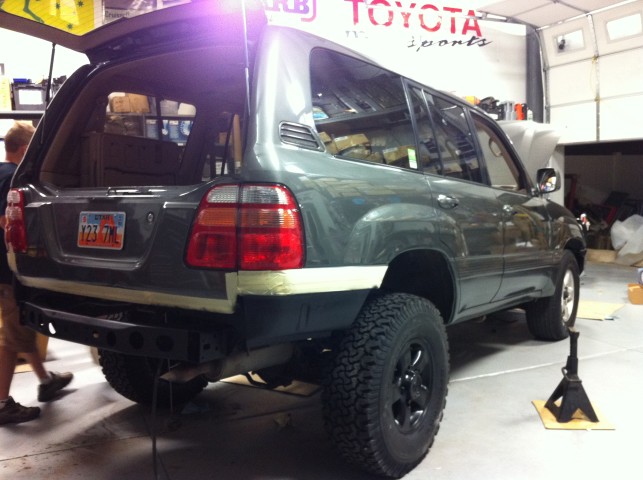
Front bumper complete, the shop getting messy!
Rear end suspension complete, front bumper complete, snorkel holes drilled
Making progress!
By Friday night the winch was installed in the front bumper and the bumper was finish mounted. Now we could rock out the front suspension and start on the rear bumper as the rear suspension was finalized. Working through the night we finished up the bulk of the rear bumper and swings and the front suspension as well. Bouncing in between front and back tasks I started on the snorkel, we let the paint dry on the fender holes and grabbed some early morning brekky.
To Do List By End of Day 1 (Friday 6PM - Saturday 5AM):
LandTank Fan Clutch Installation
Front End on Jack Stands
Stock Shocks Removed
Stock Torsion Bars Removed
OME Shocks & Torsion Bars Installed
Slee Diff Drop Kit Installed
OME Torsion Bars Adjusted
Front Tires Mounted
Front End Lowered & Front Tires Torqued
Stock Trans Cross Member Removed
Slee Skid Plates Installed
Rough Electrical to Rear
Rear 3rd Row Seats & Seatbelts Removed
Outback Drawer System Installed
Finalize ARB Fridge Wiring & Aux power outlets
Install ARB Fridge
Remove Stock Battery
Install Slee Dual Battery Tray
Install Optima Battery's
National Luna Dual Battery System Installation
Remove Factory Running Boards
Install ARB Side Steps & Side Rails
Install Eezi-Awn K9 Roof Rack
Helton Hot Shower System Installation
Last edited:
- Location
- Sandy, Ut
A few more Friday build shots:
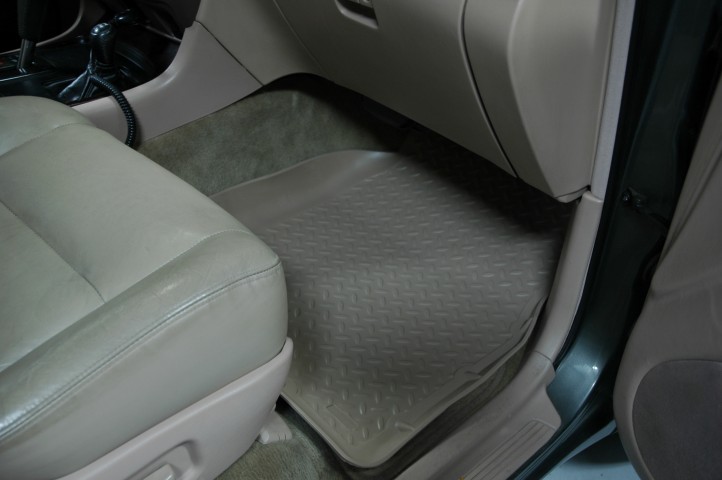
The hardest install of all
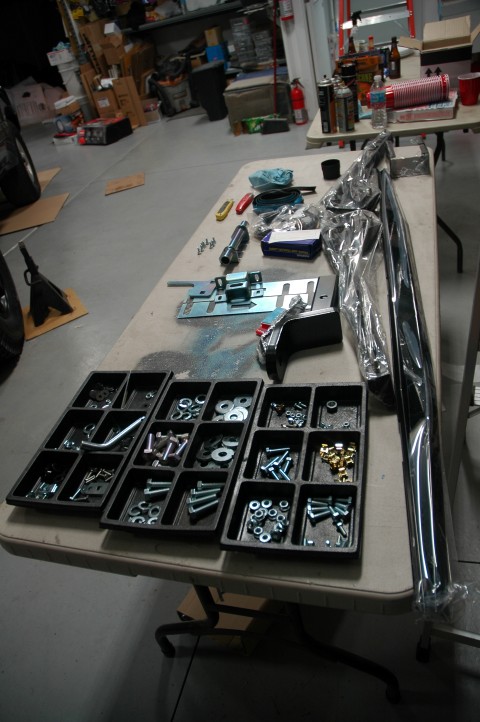
Organizing the rear bumper hardware
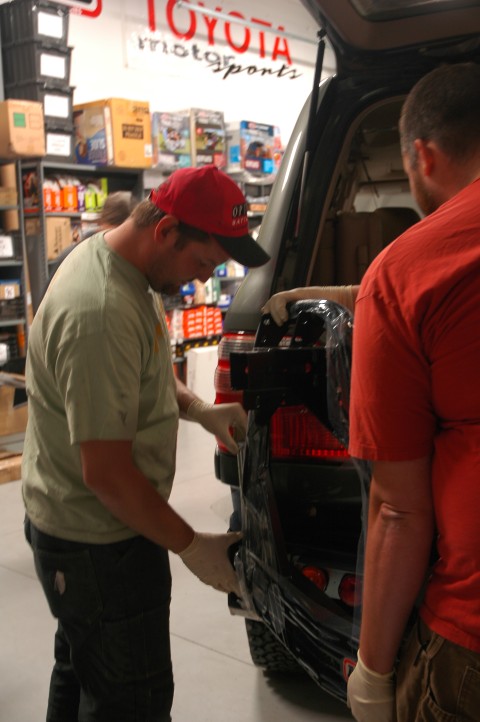
Blacking out the body underneath the rear bumper
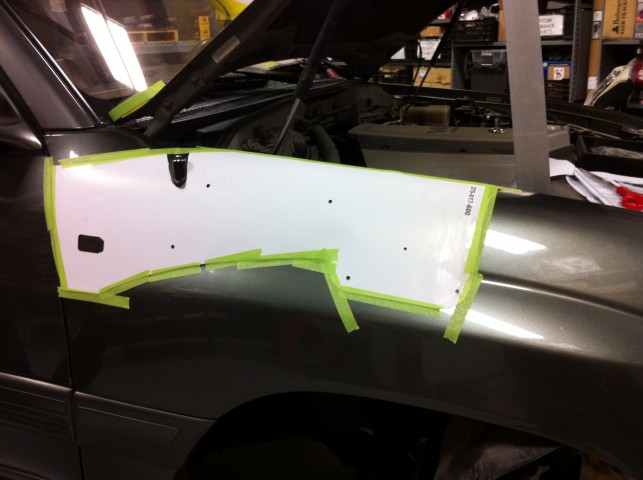
Snorkel template in place, ready for holes!
The hardest install of all
Organizing the rear bumper hardware
Blacking out the body underneath the rear bumper
Snorkel template in place, ready for holes!
Sawtooth
Hagisch
- Location
- Holladay,Utah
Very nice Kurt.The Hundy looks sweet!
- Location
- Sandy, Ut
Very nice Kurt.The Hundy looks sweet!
Thanks Matt!
Tacoma
Et incurventur ante non
- Location
- far enough away
let's not forget the 2nd hardest install: the REAR floormats. They should have arrows marked "FRONT". hahahah
I can say without reservation that the Death Falc..Star is the most comfortably capable rig I've had the pleasure to pilot and ride in. With the addition of more power outlets, as per Kurt's KOH trip, I can't think of anything else it would really need. Any other upgrades would be very minor.
I can say without reservation that the Death Falc..Star is the most comfortably capable rig I've had the pleasure to pilot and ride in. With the addition of more power outlets, as per Kurt's KOH trip, I can't think of anything else it would really need. Any other upgrades would be very minor.