
You are using an out of date browser. It may not display this or other websites correctly.
You should upgrade or use an alternative browser.
You should upgrade or use an alternative browser.
Project Hundy Build Thread - 2000 UZJ100 Land Cruiser
- Thread starter cruiseroutfit
- Start date
-
- Tags
- build thread
- Location
- Sandy, Ut
The animation at the beginning as done very nicely.
Agreed!
sixstringsteve
Well-Known Member
- Location
- UT
Jason, you are the man. Sorry you saw that before we could give credit where credit is due. I'll get that added asap. There are over 3500 images in that video, and you did a great job managing and filming everything. I know what a nightmare that is.
All credit for the intro animation goes to my brother Brian. He does fantastic graphic design/animation work.
All credit for the intro animation goes to my brother Brian. He does fantastic graphic design/animation work.
Last edited:
TJDukit
I.Y.A.A.Y.A.S.
- Location
- Clearfield
That is a fantastic video.
sixstringsteve
Well-Known Member
- Location
- UT
Thanks for the plug Kurt, it was a fun project.
Rot Box
Diesel and Dust
- Location
- Smithfield Utah
Awesome 
ckkone
Member
- Location
- West Jordan
Great video!
- Location
- Sandy, Ut
Thanks for the kind words every one, all credit goes to Jason and Steve on the video... I iust supplied the parts
sawtooth4x4
Totally Awesome
- Location
- Land of East Laytonshire
nice truck and build, i can only imagine how much money went into it. I've been looking at the Lexus LX470's. do most of the land cruiser parts fit the Lexus?
Does yours have a factory rear locker or center diff locker? do the Lexus versions have that as well?
Thanks. I keep thinking about ditching my Range Rover for something a bit more reliable.
Does yours have a factory rear locker or center diff locker? do the Lexus versions have that as well?
Thanks. I keep thinking about ditching my Range Rover for something a bit more reliable.
sixstringsteve
Well-Known Member
- Location
- UT
agreed on all counts, especially if he's getting a supercharger.
First of all great Hundy! And love the video. I bought a stock LX470 recently, so thanks for the daydream material. The weekend build is one of the most aggressive schedules I have seen!
My .02 on gears, from a guy whose Hundy is stock, but I have a Jeep that has had several evolutions of gear ratios and tire sizes and been on some trails. The jump from 4.30 to 4.88 is small, true. I have read about a 3.1:1 transfer case kit, that might make more sense for Hundy's with 4.30 gears. But do think about what else lower gears might do for you off road.
Before I regeared the Jeep, even with tires that were only +2" diameter over stock, I was wishing for a gear between 1st and 2nd when in low range on the trail. 1st was too slow, not enough wheel speed. 2nd needed more torque. I took descents in 1st and it was a little too fast for technical stuff. I went from 4.10 gears to 4.88 gears and +4" over stock on tire diameter. Great functionality off road! 2nd had torque and wheel speed to bump things, 1st was there for rough climbs or when I hadn't dropped tire pressures enough for the terrain. Felt much more natural on the trail, better options.
This year before I bought the Hundy as my DD, I swapped to a Muncie transmission on the Jeep. It has a 6.8:1 unsynchronized granny gear for crawling. On my first trail ride the light bulb came on - crawl gears were made for descents! It had never occurred to me that it would work out this way, but the granny gear made gnarly descents so calm and natural. You almost never need the brake, just work the steering and pick your line while the engine maintains speed for you. If you are going to slide on really vertical surfaces, feather the throttle a little to keep the wheels turning and control the slide. Something to think about.
Keep the pics and vids coming, what a great rig man
- Location
- Sandy, Ut
nice truck and build, i can only imagine how much money went into it. I've been looking at the Lexus LX470's. do most of the land cruiser parts fit the Lexus?
For the most part the chassis are the same, just minor trim differences, thus most parts fit both. There are a couple of specific items that don't fit certain years, etc and should be investigated.
Does yours have a factory rear locker or center diff locker? do the Lexus versions have that as well?
Factory center diff lock is standard, rear was an early model option only, not avail OE in 2000. I'm planning to either install or factory locked axle or more likely install an ARB and use the factory switch.
- Location
- Sandy, Ut
First of all great Hundy! And love the video. I bought a stock LX470 recently, so thanks for the daydream material. The weekend build is one of the most aggressive schedules I have seen!
Thanks!
My .02 on gears, from a guy whose Hundy is stock, but I have a Jeep that has had several evolutions of gear ratios and tire sizes and been on some trails. The jump from 4.30 to 4.88 is small, true. I have read about a 3.1:1 transfer case kit, that might make more sense for Hundy's with 4.30 gears. But do think about what else lower gears might do for you off road.
Gears are still on the backburner, particularly while I decide on the supercharger install or not.
Keep the pics and vids coming, what a great rig man
Thanks, I have a few more parts waiting to be installed when I get back stateside and my time here in Southern Africa has given me some new ideas I plan to incorporate too
- Location
- Sandy, Ut
So I'm having a bit of a aux. lighting quandary. The 100 Series currently has a set of IPF 900XS lights on the front bumper at standard headlight height, one spot and one driving, no complaints there they work really well. Obviously it has the stock headlights with upgraded low beam bulbs (still dismal but more on that fix soon). I picked up a 36" LED light bar from Iron Moose, we've used a handful of their lights on projects here locally and they have been fantastic, figured it was time for me to try one on the 100 and I had always envisioned having a nice flood mounted up high, i.e. above the windshield. So I've got the mounting figured out for the light bar to fit in the gap between the rack and the roof, no heartache there, my quandary is how to wire it.
My front IPF's are triggered by the OEM fog lamp switch, it is modified to allow them in high beam or low beam operation, but the headlights must be on. Pro is I have flexibility with high/low, con is I have to switch them off on the highway when passing but the switch is on the factory lights stalk so it hasn't been an issue. So how do I set up the light bar?
Options 1 would be to trigger with the same OE fog lamp switch. That way I either have all my aux. lights blasting or none. When I pass I simply flip the one switch off and it kills both lights? Is there a scenario I would want to use the IPF's but not the higher LED? I just can't envision one in my mind but it's late and I'm tired
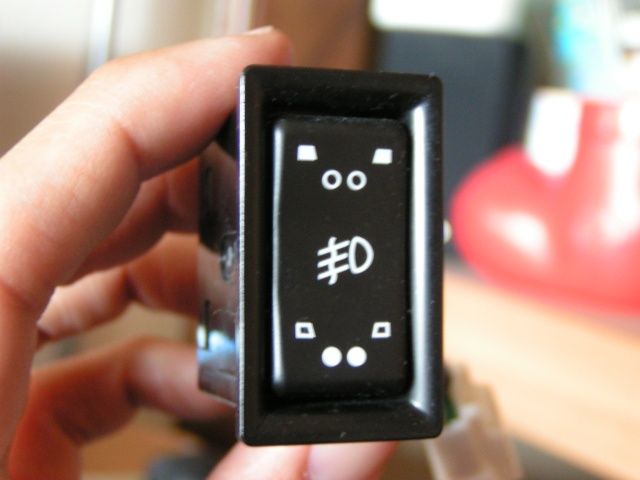
Option two is to install an OE switch in the blank. I have a Toyota switch here with the roof light icon, would be a clean install into the switch panel left of the steering column. Pro would be that I can independently control the LED separate of the IPF's, con is the passing scenario in which I'm now dealing with 3 switches in 2 locations. Boo.
Option 3 is a combo. I can make the LED switch on the dash triggered by the OE fog switch. So that I can turn on the IPF's and then the LED or just the IPF. In a pass scenario killing the IPF's kills the LED. Downside is the LED's can't be controlled separate but again I can think of less of a reason to be able to turn that light on separate of the headlights or IPF's.
Confusing enough? That is what is rolling through my head tonight
Any suggestions or experiences based on your setups?
My front IPF's are triggered by the OEM fog lamp switch, it is modified to allow them in high beam or low beam operation, but the headlights must be on. Pro is I have flexibility with high/low, con is I have to switch them off on the highway when passing but the switch is on the factory lights stalk so it hasn't been an issue. So how do I set up the light bar?
Options 1 would be to trigger with the same OE fog lamp switch. That way I either have all my aux. lights blasting or none. When I pass I simply flip the one switch off and it kills both lights? Is there a scenario I would want to use the IPF's but not the higher LED? I just can't envision one in my mind but it's late and I'm tired
Option two is to install an OE switch in the blank. I have a Toyota switch here with the roof light icon, would be a clean install into the switch panel left of the steering column. Pro would be that I can independently control the LED separate of the IPF's, con is the passing scenario in which I'm now dealing with 3 switches in 2 locations. Boo.
Option 3 is a combo. I can make the LED switch on the dash triggered by the OE fog switch. So that I can turn on the IPF's and then the LED or just the IPF. In a pass scenario killing the IPF's kills the LED. Downside is the LED's can't be controlled separate but again I can think of less of a reason to be able to turn that light on separate of the headlights or IPF's.
Confusing enough? That is what is rolling through my head tonight
Any suggestions or experiences based on your setups?
ttora4runner
Well-Known Member
- Location
- Colorado Springs, Again
Find this switch (P/N 84160-28010):

- Location
- Sandy, Ut
Find this switch (P/N 84160-28010):
Double throw? Unfortunately that looks like the ones older switch style so it won't fit in my blank.
ttora4runner
Well-Known Member
- Location
- Colorado Springs, Again
What about a switch like this? You'd have to find some place on your dash or center console then basterize your LC with a VW part
http://www.aliexpress.com/item/NEW-...ETTA-GOLF-MK4-EURO-1C0941531A/1292355963.html
Be kind of cool if you get it to work.
http://www.aliexpress.com/item/NEW-...ETTA-GOLF-MK4-EURO-1C0941531A/1292355963.html
Be kind of cool if you get it to work.
- Location
- Sandy, Ut
What about a switch like this? You'd have to find some place on your dash or center console then basterize your LC with a VW part
http://www.aliexpress.com/item/NEW-...ETTA-GOLF-MK4-EURO-1C0941531A/1292355963.html
Be kind of cool if you get it to work.
Negative
I think I'm going with option# 2. Hoping to have the LED mounting finalized tonight.
- Location
- Sandy, Ut
Let there be light!
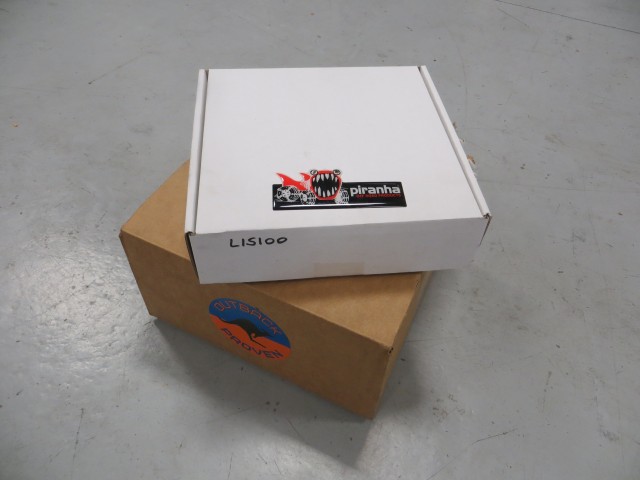
Outback Proven delivers the goods once again
The 100 Series Land Cruiser (like many other stock vehicles) badly suffers from the poor lighting performance out of the headlights. While both high and low beams benefit from the upgraded loom, the low beams stand to gain the most as they are just dismal at best in stock form. I added the 'upgrade' bulbs and that surely helped but it was still needing attention.
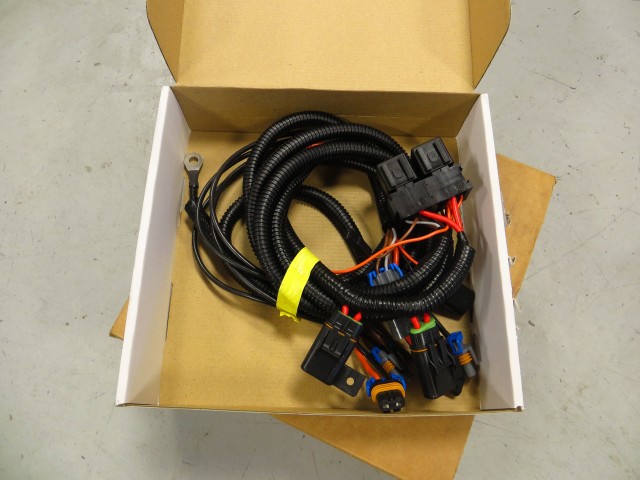
High quality connectors, harness, relays and fuse assemblies

Harness Arrangement & Layout
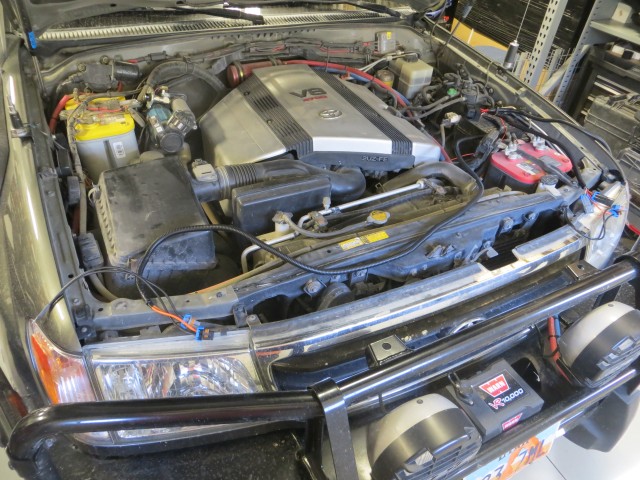
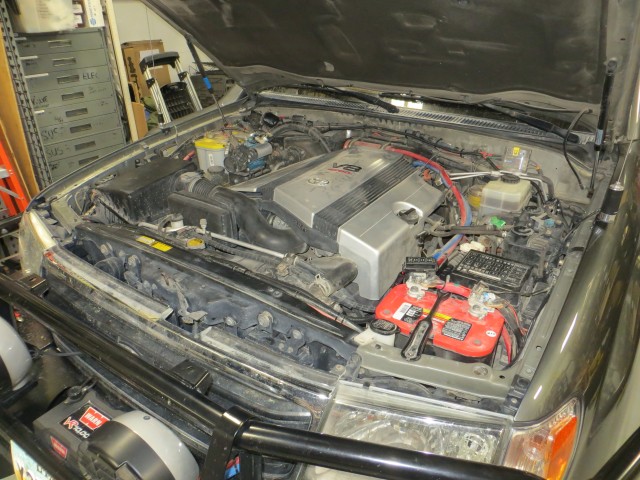
Rough Layout Under the Hood
Australian manufacture Piranha has a solution specific to the US specification 100 Series Land Cruiser with plugs that match the factory harness for a 'zero-splice' fit, Piranha part# LIS100. Simply unplug the factory harness from the headlamp bulbs and then plug the Piranha harness directly into the bulbs, they are plug specific so you can't go wrong. Depending how you mount the relays and fuse holders you will either plug the Piranha kit into your stock harness on the passenger side or drivers, doesn't really matter. One each side (driver/passenger) you will need to tie the ground into an existing bolt (which are present on both sides) and then last but not least, connect the power to the battery. As the battery is on the left-hand side, I chose to mount the relays and fuses on that side as well.
Relay & Fuse Bank
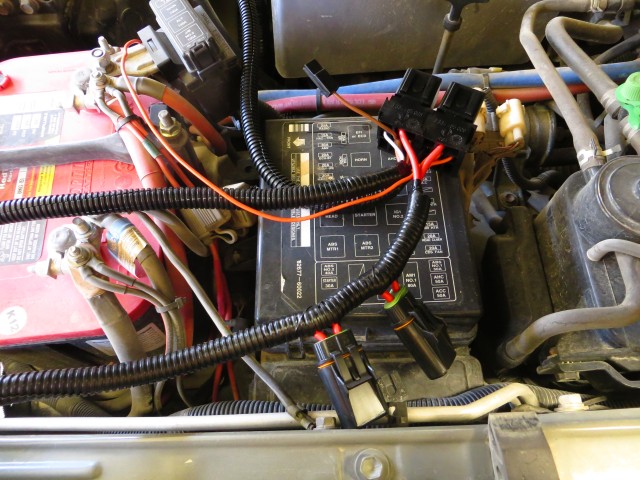
Installation is very straightforward and can be done in under an hour depending on your under hood setup. The engine bay of my 100 Series is getting quite stuff so I had to spend some extra time building a relay and fuse mount bracket. I could have placed them in the corner near the main battery but it would borderline require me to pull the battery to swap a fuse or relay in the Piranha harness. The bracket simply bolts to the inner fender well just inboard of the main system fuse block. It's an overkill solution but provides me instant access to the relays and fuses.
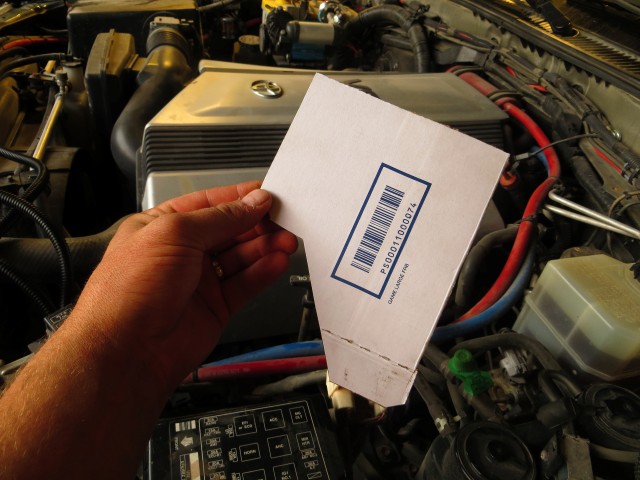
Template for Relay/Fuse Bracket
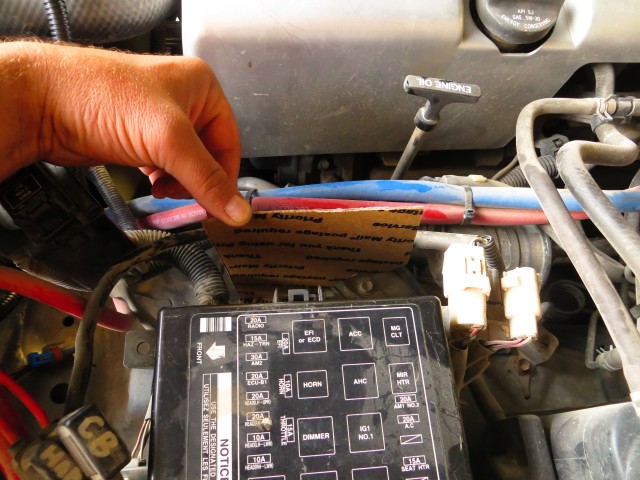
Test Fitting Template In Position
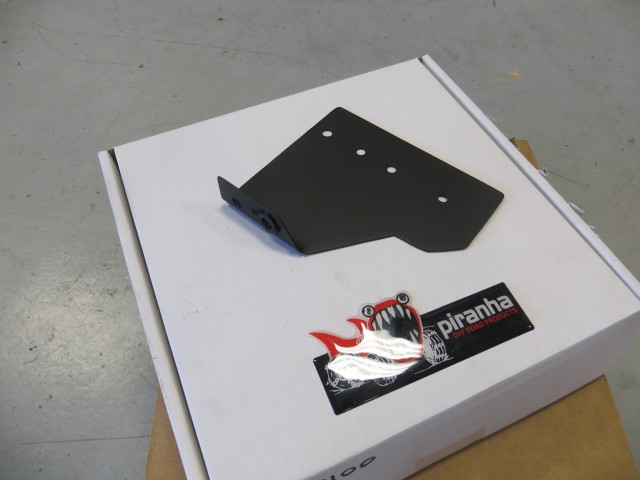
Completed Bracket Ready For Install
Once you have those mounted and everything connected. Test the system and then tidy up your wiring with a handful of zip ties. You shouldn't need to cut, lengthen or trim anything unless you rearrange things or require the relays/fuses to be in a specific spot.
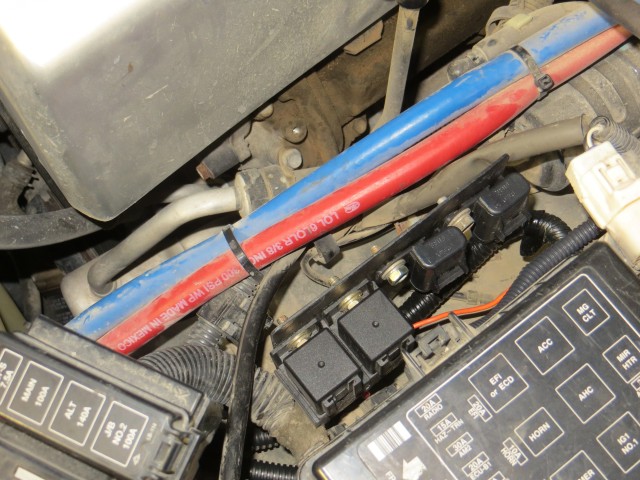
Bracket Mounted, Relay's & Fuse Holders In Place
Finished!
The Piranha harness has a light-on powered spare lead for both the high-beams and the low-beams. These allow perfect trigger points for auxiliary light kits if needed. I didn't utilize them for my setup but I zip tied them under the relays in the event I do need them in the future. I've got some before and after light shots I'm working on and will be headed on a trip soon to the desert to really get a feel for the improvement.
Outback Proven delivers the goods once again
The 100 Series Land Cruiser (like many other stock vehicles) badly suffers from the poor lighting performance out of the headlights. While both high and low beams benefit from the upgraded loom, the low beams stand to gain the most as they are just dismal at best in stock form. I added the 'upgrade' bulbs and that surely helped but it was still needing attention.
High quality connectors, harness, relays and fuse assemblies
Harness Arrangement & Layout
Rough Layout Under the Hood
Australian manufacture Piranha has a solution specific to the US specification 100 Series Land Cruiser with plugs that match the factory harness for a 'zero-splice' fit, Piranha part# LIS100. Simply unplug the factory harness from the headlamp bulbs and then plug the Piranha harness directly into the bulbs, they are plug specific so you can't go wrong. Depending how you mount the relays and fuse holders you will either plug the Piranha kit into your stock harness on the passenger side or drivers, doesn't really matter. One each side (driver/passenger) you will need to tie the ground into an existing bolt (which are present on both sides) and then last but not least, connect the power to the battery. As the battery is on the left-hand side, I chose to mount the relays and fuses on that side as well.
Relay & Fuse Bank
Installation is very straightforward and can be done in under an hour depending on your under hood setup. The engine bay of my 100 Series is getting quite stuff so I had to spend some extra time building a relay and fuse mount bracket. I could have placed them in the corner near the main battery but it would borderline require me to pull the battery to swap a fuse or relay in the Piranha harness. The bracket simply bolts to the inner fender well just inboard of the main system fuse block. It's an overkill solution but provides me instant access to the relays and fuses.
Template for Relay/Fuse Bracket
Test Fitting Template In Position
Completed Bracket Ready For Install
Once you have those mounted and everything connected. Test the system and then tidy up your wiring with a handful of zip ties. You shouldn't need to cut, lengthen or trim anything unless you rearrange things or require the relays/fuses to be in a specific spot.
Bracket Mounted, Relay's & Fuse Holders In Place
Finished!
The Piranha harness has a light-on powered spare lead for both the high-beams and the low-beams. These allow perfect trigger points for auxiliary light kits if needed. I didn't utilize them for my setup but I zip tied them under the relays in the event I do need them in the future. I've got some before and after light shots I'm working on and will be headed on a trip soon to the desert to really get a feel for the improvement.
Last edited:
- Location
- Sandy, Ut
The Piranha kit made a marked improvement in the stock headlight output but for high speed jaunts in in the desert, I still wanted something more, something with some spread. Kyle, a good friend and customer (and Cruiserhead) deals in high quality LED lighting with his Iron Moose 4x4 company. We had set up a handful of them for customers and the quality was fantastic and the pricing reasonable. I opted for a single row 30" light bar featuring 18 10W LED's (Part# SM-955). The single row was just the right dimensions to fit between the Eezi-Awn rack and the roof. Mounting was straight forward, I didn't want to drill through the rack and have bolts or nuts on top so instead I built a simple bracket that utilizes the bolt slide extrusions on the bottom of the roof rack. The light is securely mounted and I can still sleep on the rack without a bolt in my back or slide storage bins from side to side.
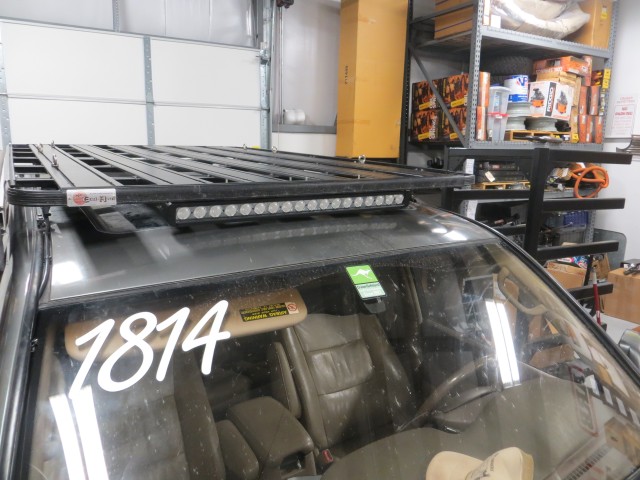
Iron Moose Lightbar Mounted
Getting power to a roof-rack is a conundrum in it's own right. Run the lines up the front? Route them out of the rear hatch? Drill a hole and come use a weather-tight fitting? All can and have been done with great success but the 100 has a 'lip' near the windshield that really lends itself well to the wiring. As the relay is mounted under the hood on the passenger inner fender, it made sense to shoot it right out of the cowl, up the w/s and tie it off cleanly to the rack and subsequent plug. I opted for 4 conductor insulated wire so that I have room for additional rack power needs in the future, I use a Weatherpack for the connection on the roof, using 2 conductors for this light and leaving the other two plugged for future use. I have a pretty good back up light in place but perhaps a camp light up high in the future? We'll see if a need develops.
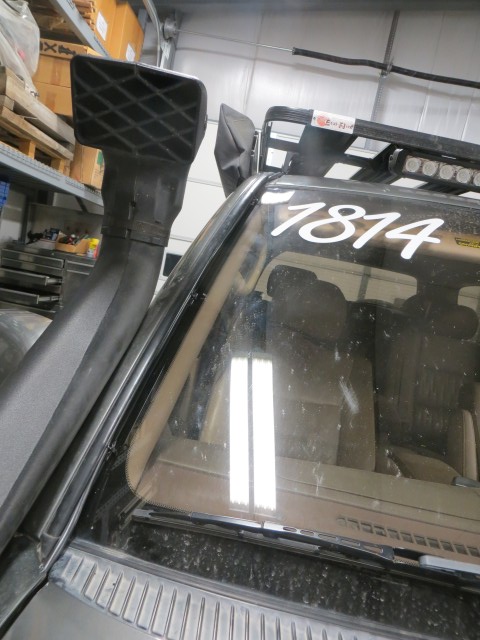
Wiring Routed Along W/S and Under Hood
I posted earlier about my lighting quandary, more specifically how to switch the LED bar. Options were aplenty but I was torn between having the freedom to operate the LED sans headlights and wanting to be able to dim the high beams and kill the LED in a single action. In the end I opted for an OE Toyota roof light switch constant powered so that I can run the LED under any scenario. I'll give it a go for a bit and if I decide to change, it is an easy swap. In the meantime, I'll run it as-is and see how it works out for me on some upcoming trips. I swapped out the bulbs so that the 'running' light is green to match the other switches (comes orange) and the 'on' light is now orange, very easy to notice you have it on.

OE Toyota Roof Light Switch On Dash
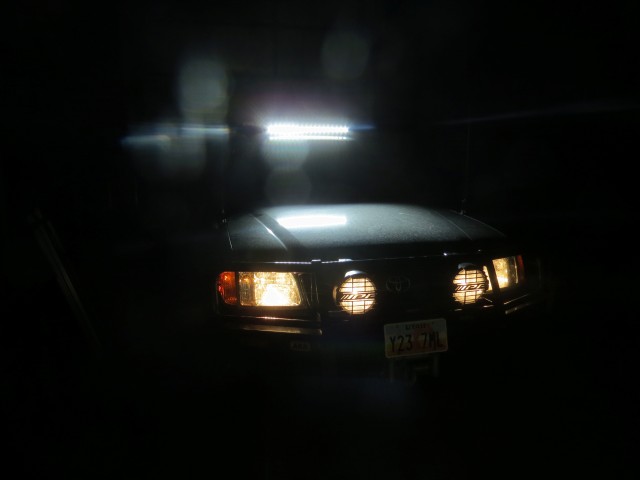
Finished Product
I'll get some better shots posted, I'll be in the dark desert soon enough!
Iron Moose Lightbar Mounted
Getting power to a roof-rack is a conundrum in it's own right. Run the lines up the front? Route them out of the rear hatch? Drill a hole and come use a weather-tight fitting? All can and have been done with great success but the 100 has a 'lip' near the windshield that really lends itself well to the wiring. As the relay is mounted under the hood on the passenger inner fender, it made sense to shoot it right out of the cowl, up the w/s and tie it off cleanly to the rack and subsequent plug. I opted for 4 conductor insulated wire so that I have room for additional rack power needs in the future, I use a Weatherpack for the connection on the roof, using 2 conductors for this light and leaving the other two plugged for future use. I have a pretty good back up light in place but perhaps a camp light up high in the future? We'll see if a need develops.
Wiring Routed Along W/S and Under Hood
I posted earlier about my lighting quandary, more specifically how to switch the LED bar. Options were aplenty but I was torn between having the freedom to operate the LED sans headlights and wanting to be able to dim the high beams and kill the LED in a single action. In the end I opted for an OE Toyota roof light switch constant powered so that I can run the LED under any scenario. I'll give it a go for a bit and if I decide to change, it is an easy swap. In the meantime, I'll run it as-is and see how it works out for me on some upcoming trips. I swapped out the bulbs so that the 'running' light is green to match the other switches (comes orange) and the 'on' light is now orange, very easy to notice you have it on.
OE Toyota Roof Light Switch On Dash
Finished Product
I'll get some better shots posted, I'll be in the dark desert soon enough!