- Location
- West Haven, UT
Thanks guys. That was a fun project.
Mike
Mike

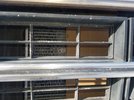
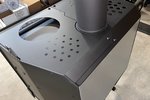
You wouldn't believe some of the places I've seen pigeons land and nest at our stores. 7" needles everywhere and they will thread it, get behind it, and almost prefer it.Its doubtful a bird can land on, or nest in this chimney cap. 😂 I guarantee they’ll try.


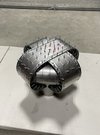
I have an old slide hammer that was cobbled together by someone many years ago. The handle is a different design than yours, but the 5/8 to 3/4" sloppy fit is the same as your old one. I need to mod mine for all of the same reasons. I like yours better for the ergonomics and drawer fitment.Placed back in the slide hammer and attachment drawer.
View attachment 144701
Thanks for looking.
Mike
I have an old slide hammer that was cobbled together by someone many years ago. The handle is a different design than yours, but the 5/8 to 3/4" sloppy fit is the same as your old one. I need to mod mine for all of the same reasons. I like yours better for the ergonomics and drawer fitment.
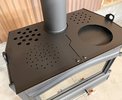
I was forced to wait a couple days for the roof to thaw out before wrapping up the final chimney stuff. This gave me another opportunity to open up another can of worms. 🤷♂️ Will anything be cooked on it? In a post-apocalyptic situation, still a hard maybe. 😂
That is one damn fine looking dust collector.I was forced to wait a couple days for the roof to thaw out before wrapping up the final chimney stuff. This gave me another opportunity to open up another can of worms. 🤷♂️ Will anything be cooked on it? In a post-apocalyptic situation, still a hard maybe. 😂
You might as well just start making wood burning stoves for the upper class at this point. Holy crap dude. Looks really niceI was forced to wait a couple days for the roof to thaw out before wrapping up the final chimney stuff. This gave me another opportunity to open up another can of worms. 🤷♂️ Will anything be cooked on it? In a post-apocalyptic situation, still a hard maybe. 😂
Your words hurt Chad…. but it’s mostly true. 😂That is one damn fine looking dust collector.
Thx man. 😎 Mental illness comes in many forms and varying amounts. 😉Your OCD/attention to detail always makes me smile.


Thanks for the machine work on the inserts!XJEEPER, nice job on the links. 👍