You are using an out of date browser. It may not display this or other websites correctly.
You should upgrade or use an alternative browser.
You should upgrade or use an alternative browser.
General Tech What did you work on Today?
- Thread starter Gravy
- Start date
SLC97SR5
IDIesel
- Location
- Davis County
22,700
- Location
- The Land Northward (Bountiful), Utah
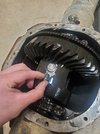
Ouch. I did that on the 8.8 in my Ranger. I sacrificed a 1/8 socket extension welded to the broken end to get mine out. I was about to torch the side gears to get the c-clips out so I could pull the carrier and drill it.
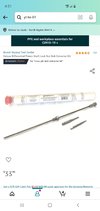
Maybe a 90° drill?
Maybe a 90° drill?
- Location
- The Land Northward (Bountiful), Utah
I've got a brand new full carrier 8.8 Detroit for sale... Just sayin' 
- Location
- Sandy, Ut
Wild there is a drill kit for that. We deal with that on Land Cruiser axles occasionally. Generally run with no fluid or super worn and they slightly spin the cross-shaft and bind the retainer. Fortunately we have spares around so we make a quick torch hole and kiss them goodby 
- Location
- The Land Northward (Bountiful), Utah
I'm pretty sure the guy who had my Ranger before me misread the torque spec on the cross pin retainer bolt and thought 7lb/ft meant 7 ugga duggas
NYCEGUY01
Well-Known Member
- Location
- Willard, UT
Ive had it running for about 30 min now with antifreeze and water in it and it appears i got away with it though. Only killed a hose and 2 belts.
Not bad at all, they needed replaced anyway.
Well, I was clearly wrong after today's ordeal.... LOL
Started with a heater that didn't seem to work yesterday afternoon and what I thought was a lower hose leaking, I thought I had the clamp a little screwy or may have gone a little overboard tightening it and killed the hose.
All said and done, ended up having to replace the hoses, heater core, water pump, Radiator, Thermostat, and then had to re-engineer the Radiator mount as it had a huge aluminum Radiator that was now junk ( several cracks, turned into a sprinkler once the system would actually hold pressure ) and I was replacing it with a Big block square body standard model.
It now has a couple successful test drives but the 160 degree thermostat needs to go, needs a 180 I think, and some cardboard in front of the radiator. The heater is working but not well....lol I made the wife ride in it to go to dinner tonight and she prefers her 2019 Jeep Trailhawk..lol
UNSTUCK
But stuck more often.
Corban_White
Well-Known Member
- Location
- Payson, AZ
The roads from Page to Mesa are no joke. Good luck. Let me know if you guys need a hand with anything.
- Location
- West Haven, UT
Well, I was clearly wrong after today's ordeal.... LOL
Started with a heater that didn't seem to work yesterday afternoon and what I thought was a lower hose leaking, I thought I had the clamp a little screwy or may have gone a little overboard tightening it and killed the hose.
All said and done, ended up having to replace the hoses, heater core, water pump, Radiator, Thermostat, and then had to re-engineer the Radiator mount as it had a huge aluminum Radiator that was now junk ( several cracks, turned into a sprinkler once the system would actually hold pressure ) and I was replacing it with a Big block square body standard model.
It now has a couple successful test drives but the 160 degree thermostat needs to go, needs a 180 I think, and some cardboard in front of the radiator. The heater is working but not well....lol I made the wife ride in it to go to dinner tonight and she prefers her 2019 Jeep Trailhawk..lol
Damn JJ. I didn't realize they had only put water in the cooling system. Sorry you've had to deal with that over the weekend. I was hoping that you would be out driving it rather than working on it.
Mike
- Location
- West Haven, UT
As you can tell by NYCEGUY01's posts, I finished the old square body Chevy last week.
I was hoping to have it completed well before New Year's Eve but I had to spend 3 hours each day last Thursday and Friday clearing the couple of inches of snow each day from my concrete. Thursday night I thought I'd finish the truck up after completing the hubs but as I was replacing the front brake hoses with extended reach stainless steel lines, the driver's side didn't want to cooperate as it was frozen/rusted into the fitting. After screwing with it for over 45 minutes the fitting on the rigid line broke off in the OE hose fitting. Well shit, that was after my local NAPA was closed so I was dead in the water until Friday.
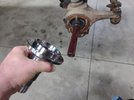
Assembling the hubs. Spindle being installed onto the knuckle after installing the front axle shafts.
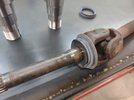
Outer axle shaft grease seals installed.
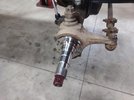
Spindle installed and ready for backing plate.
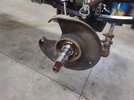
Backing plate installed and fasteners torqued to spec.
New Spicer Locking nut kit. This pin on the inner nut needs to be facing outboard.
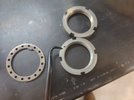
So the locking washer can engage with the locking pin before the outer nut goes on and torqued in place.
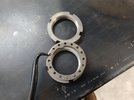
Inner nut installed and locking washer installed. Here you can see the pin is orientated into a hole. IF the pin does not engage with a hole try flipping the washer over as they are not drilled symmetrical and see if the pin will engage. If it still will not you will have to adjust the inner nut one direction or the other. Err on the loose side vs. too tight however. I generally install the inner nut to 30 ft/lbs. then back off 90-degrees. This will allow a very, very small amount of play in the hub/rotor assembly, barely enough to feel. Then when the outer locking nut is installed and torqued to spec the play just barely goes away yet is not so tight to create heat.
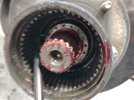
Torque the inner locking nut to 30 ft/lbs. then back off 90-degrees. Locate the locking washer on the pin then install and tighten the outer locking nut to 150 ft/lbs.
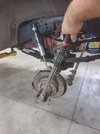
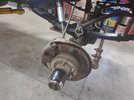
Hubs installed and brake calipers installed. Here you can still see the rubber brake lines and how tight they are at full droop.
More pictures to follow......
I was hoping to have it completed well before New Year's Eve but I had to spend 3 hours each day last Thursday and Friday clearing the couple of inches of snow each day from my concrete. Thursday night I thought I'd finish the truck up after completing the hubs but as I was replacing the front brake hoses with extended reach stainless steel lines, the driver's side didn't want to cooperate as it was frozen/rusted into the fitting. After screwing with it for over 45 minutes the fitting on the rigid line broke off in the OE hose fitting. Well shit, that was after my local NAPA was closed so I was dead in the water until Friday.
Assembling the hubs. Spindle being installed onto the knuckle after installing the front axle shafts.

Outer axle shaft grease seals installed.

Spindle installed and ready for backing plate.

Backing plate installed and fasteners torqued to spec.

New Spicer Locking nut kit. This pin on the inner nut needs to be facing outboard.

So the locking washer can engage with the locking pin before the outer nut goes on and torqued in place.

Inner nut installed and locking washer installed. Here you can see the pin is orientated into a hole. IF the pin does not engage with a hole try flipping the washer over as they are not drilled symmetrical and see if the pin will engage. If it still will not you will have to adjust the inner nut one direction or the other. Err on the loose side vs. too tight however. I generally install the inner nut to 30 ft/lbs. then back off 90-degrees. This will allow a very, very small amount of play in the hub/rotor assembly, barely enough to feel. Then when the outer locking nut is installed and torqued to spec the play just barely goes away yet is not so tight to create heat.

Torque the inner locking nut to 30 ft/lbs. then back off 90-degrees. Locate the locking washer on the pin then install and tighten the outer locking nut to 150 ft/lbs.

Hubs installed and brake calipers installed. Here you can still see the rubber brake lines and how tight they are at full droop.

More pictures to follow......
- Location
- West Haven, UT
New 3/16" brake line at the ready. Time to duplicate the old line, less the broken fitting.
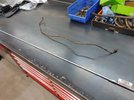
I started by marking the first bend, then the second and so on.
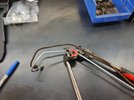
Until all of the bends were duplicated and then measuring for length of the last leg so the flare could be made.
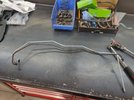
Tubing cut and deburred in preparation for the flare. I also cut the fitting off of the old line so I could use the shorter OEM fitting.
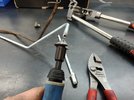
I used my Mastercool flaring tool for this job.
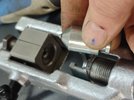
Line completed with fitting installed and ready to snake back into the chassis.
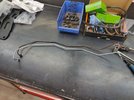
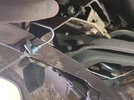
Rather than put a union in the line I opted to go all the way up to the proportioning valve to avoid any more potential leak points.
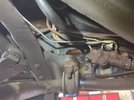
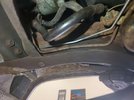
Brake line completed and installed. Brake lines bled and all new brake fluid throughout the truck.

I started by marking the first bend, then the second and so on.

Until all of the bends were duplicated and then measuring for length of the last leg so the flare could be made.

Tubing cut and deburred in preparation for the flare. I also cut the fitting off of the old line so I could use the shorter OEM fitting.

I used my Mastercool flaring tool for this job.

Line completed with fitting installed and ready to snake back into the chassis.


Rather than put a union in the line I opted to go all the way up to the proportioning valve to avoid any more potential leak points.


Brake line completed and installed. Brake lines bled and all new brake fluid throughout the truck.
- Location
- West Haven, UT
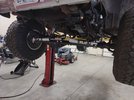
Lastly, after completing the brake line, bleeding the brakes, installing front tires/wheels and steering stabilizers I was able to set it back down on the ground for the first time in several weeks. Torqued the wheels on and took it for a test drive.
New stainless steel hoses installed.
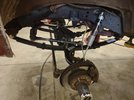
Brakes being bled and new fluid throughout.
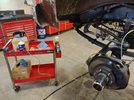
Tires/wheels installed.
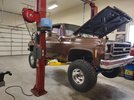
New Fox 2.0 steering stabilizers installed using BDS bracketry.
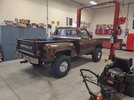
On the ground backed off the lift.
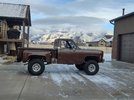
After returning from the test drive. Damn, this thing has a great stance.
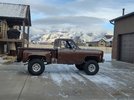
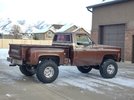
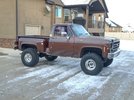
Loaded up on the trailer and heading home.
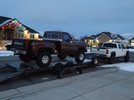
I finally finished up the truck late afternoon on New Year's Eve and called JJ to see when he wanted to pick it up. He eagerly stated he would be right over.
Truck loaded up on his new trailer and heading home.
Thanks for the opportunity to do the work JJ, this was a fun project and brought back some memories.
Mike
New stainless steel hoses installed.

Brakes being bled and new fluid throughout.

Tires/wheels installed.

New Fox 2.0 steering stabilizers installed using BDS bracketry.

On the ground backed off the lift.

After returning from the test drive. Damn, this thing has a great stance.


Loaded up on the trailer and heading home.

I finally finished up the truck late afternoon on New Year's Eve and called JJ to see when he wanted to pick it up. He eagerly stated he would be right over.
Truck loaded up on his new trailer and heading home.
Thanks for the opportunity to do the work JJ, this was a fun project and brought back some memories.
Mike
- Location
- Grantsville, Utah
So much Fall Guy vibe! 😎

