General Tech What did you work on Today?

moab_cj5

Well-Known Member
Supporting Member
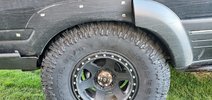
Tonight I went for a quick drive to document rpm and speed with the 37's and stock tcase.
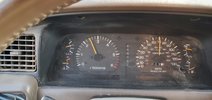
20210406_190303.jpg

Then I flexed it out as much as I could in my back yard to see it the new tires are going to rub. It will be close, but im quite pleased!
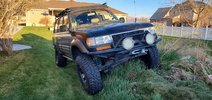
20210406_192005.jpg

20210406_192146.jpg

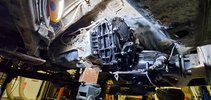
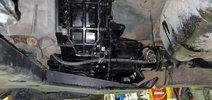
After a little play time, I pulled it into the shop to start the tcase swap. It took a while to get all the bolts and connections off, then pulled it out from under the truck. It's a heavy beast!

I swapped the sensors and center diff lock actuator from my old case to the rebuilt one, and got the rebuilt one ready to go back into the truck.
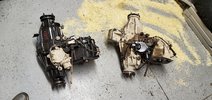
20210407_000918.jpg


Hopefully it'll go back together smoothly tomorrow and I can start breaking in the gears.
 
Last edited:

I Lean

Mbryson's hairdresser
Vendor
Location
Utah
Um, I don't think I've bedded the brakes. On the initial drive, it felt like it did before - adequate. I may try swapping the booster out, or maybe I set my expectations too high. Time will tell. I haven't put many miles on it since I wrapped it up Saturday.
Once the brakes get bedded in, they'll grab harder than when everything is new. Simply driving will probably bed them in eventually, but you can definitely speed the process up. http://www.blackmagicbrakes.com/instructions.html
 

DAA

Well-Known Member
^^^^ I've used Blaine's method on quite a few sets of new brakes now and it works really well. Put new Black Magic rear pads on the LJ not too long ago, but it hasn't been running since then so haven't even tried to bed them.

untitled-9W.jpg


- DAA
 

moab_cj5

Well-Known Member
Supporting Member
Another slow update...

Wednesday night last week I ran and grabbed some new hardware for my crossmember, then went to work getting the rebuilt case installed. I was again reminded how heavy it was when trying to lift it on a jack, maneuver it into place, and get everything lined up. Not wanting to drop it again, I ended up ditching the jack and just bench-pressing the case into place. I need to get back to the gym! It was awkward and HEAVY!

After getting the shaft and tabs aligned, I quickly got the 2 easy bolts started so it wouldn't slide off and fall while I worked on getting the other bolts in.
20210407_190240.jpg

I was then able to get the rest of the connections plugged in, bolts torqued, and cross member bolted up.
20210407_233157.jpg

With everything in place, I filled it with fluid and set out on a test drive. I went to an area they are grading for new homes and found some dirt mounds to play on. I freaking LOVE the low range gears! I know 3:1 is only 25% lower than stock, but when coupled with the underdrive I got another 10% lower. It is noticeably lower than before! I can't wait to really test it at CM next week!

I tested the CDL, and the new front hubs to ensure everything was engaging and disengaging as it should, then ran around the block to drive past the radar speed limit sign to see how close my Speedo was with the new gears. When the Speedo shows 30 (the speed limit on 200 N in Kaysville), the radar sign shows 33. Before the 37's and new Tcase gears, it was right on. I am content with the gearing being a little taller than stock with 37's and am glad I went with the underdrive gears after stepping up to 37's.

Impressions of all the changes:
  1. I love the gear changes! Really looking forward to seeing the impact on the trail!
  2. I am starting to notice the improved braking from the brake changes. It stops really well, and as the brakes bed on the rotors, I anticipate it will improve more.
  3. I need to get used to the Part Time handling. It feels a bit squirrely at 50+ mph. I need more time behind the wheel to feel the changes.
  4. I need to look at recalibrating my scanguage. It was THIRSTY on this tank of gas, only going about 240 miles before turning on the fuel light. I can't imagine i lost 4 mpg with 37's and new tcase gears, but maybe?
 

OCNORB

Well-Known Member
Supporting Member
Location
Alpine
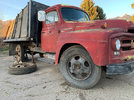
Steep learning curve with the wheels on this $500 dump truck! The right rear wheel keeps locking up like something is wedged in the drum- even with the adjusters backed off. To get it off the trailer my wife hooked up her Willys w/Warn 8274 and tugged the axle backwards while I drove. Just as it hit the ramps the wheel broke loose and I shot backwards in full panic, simultaneously trying to pump the brakes and jam into a forward gear to stop!! Fun times.
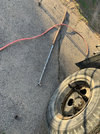
5B1D4D7B-C557-4B75-888A-37B2F250EE82.jpegUsed a 36” 3/4” drive breaker bar with about 4’ of additional pipe to bust the lug nuts off. I then learned about Budd studs and have ordered the 13/16” square drive socket needed to finish getting the wheels off. I’ve never worked on anything over a 1-ton so I’m in foreign territory here. Any hints, help or advice welcome.

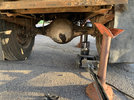
4D3345DF-B282-471C-8981-68D414F26909.jpeg

5CEFFB5A-7440-4F6D-841E-E71238CE9E9A.jpeg

6646B8EF-1604-4FEF-B3CF-A7F81F4279E7.jpeg

It looks like I have 4 split ring wheels and two 2-piece wheels. All are 8.25-20; first vehicle I’ve ever owned that came with 40” tall tires stock.
 

N-Smooth

Smooth Gang Founding Member
Location
UT
I've thought about de-badging my colorado. But I am scared. What kind of effort does it take?
Fishing line, some goof-off (or similar) and some elbow grease. Use the fishing line in a sawing motion between the badge and the adhesive, NOT THE BODY. Once the badge is off you can peel the adhesive off with your fingers and then wipe the remaining crap off with a rag and some goof-off. My BIL saw me doing mine and decided to do his brand new Sierra last night. He was amazed by how easy it is and how clean it made his truck look.
 

Greg

Make RME Rockcrawling Again!
Admin
Steep learning curve with the wheels on this $500 dump truck! The right rear wheel keeps locking up like something is wedged in the drum- even with the adjusters backed off. To get it off the trailer my wife hooked up her Willys w/Warn 8274 and tugged the axle backwards while I drove. Just as it hit the ramps the wheel broke loose and I shot backwards in full panic, simultaneously trying to pump the brakes and jam into a forward gear to stop!! Fun times.
View attachment 136496Used a 36” 3/4” drive breaker bar with about 4’ of additional pipe to bust the lug nuts off. I then learned about Budd studs and have ordered the 13/16” square drive socket needed to finish getting the wheels off. I’ve never worked on anything over a 1-ton so I’m in foreign territory here. Any hints, help or advice welcome.

View attachment 136497

View attachment 136498

View attachment 136499

It looks like I have 4 split ring wheels and two 2-piece wheels. All are 8.25-20; first vehicle I’ve ever owned that came with 40” tall tires stock.

Heavy equipment tire shops use a massive 1" drive impact for those type of lug nuts. I've had more than my share of time running one!

HF version - https://www.harborfreight.com/1-in-...7_owu0CK3Rydpux2t46577hxphxbkRSsaAqDWEALw_wcB

Don't mess with the split rims, pay a shop if you need to break them down. They're super dangerous, as I'm sure you know.
 

anderson750

I'm working on it Rose
Location
Price, Utah
Steep learning curve with the wheels on this $500 dump truck! The right rear wheel keeps locking up like something is wedged in the drum- even with the adjusters backed off. To get it off the trailer my wife hooked up her Willys w/Warn 8274 and tugged the axle backwards while I drove. Just as it hit the ramps the wheel broke loose and I shot backwards in full panic, simultaneously trying to pump the brakes and jam into a forward gear to stop!! Fun times.
View attachment 136496Used a 36” 3/4” drive breaker bar with about 4’ of additional pipe to bust the lug nuts off. I then learned about Budd studs and have ordered the 13/16” square drive socket needed to finish getting the wheels off. I’ve never worked on anything over a 1-ton so I’m in foreign territory here. Any hints, help or advice welcome.

View attachment 136497

View attachment 136498

View attachment 136499

It looks like I have 4 split ring wheels and two 2-piece wheels. All are 8.25-20; first vehicle I’ve ever owned that came with 40” tall tires stock.
I used to have a 1950 Ford dump truck that had a couple of the 2 piece wheels. Tire shops would not touch them. I sold the truck before I ever needed to do anything with them.
 

Gravy

Ant Anstead of Dirtbikes
Supporting Member
Despite using the 4 stock bumper mounts (with 2 bolts each) and an additional top strap with 3 bolt on each side, my rear tire carrier bumper had just the slightest wiggle. That annoyed me.

IMG_20210413_113927.jpgIMG_20210413_114110.jpg


So I added an additional bottom strap bolted to the frame. Then preloaded the tire carrier and welded the strap to the bottom of the bumper in tension.
No more wobble.

IMG_20210413_113940.jpg
 

pkrfctr

Registered User
Location
Spanish Fork, UT
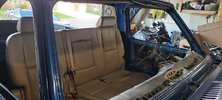
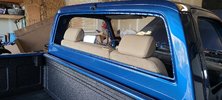
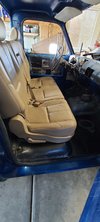
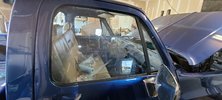
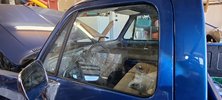
Getting close on buttoning up my dad's 1979 c10 for my son. Love when a plan comes together and actually works. I got the seats mounted and the factory sliders work! Also got the glass and rubber back in the doors.
 

Attachments

  • 20210417_153238.jpg
    20210417_153238.jpg
    236.7 KB · Views: 30
  • 20210417_153247.jpg
    20210417_153247.jpg
    296.4 KB · Views: 31
  • 20210417_153302.jpg
    20210417_153302.jpg
    195.1 KB · Views: 31
  • 20210417_171053.jpg
    20210417_171053.jpg
    201.5 KB · Views: 31
  • 20210417_173240.jpg
    20210417_173240.jpg
    220.7 KB · Views: 30

Tacoma

Et incurventur ante non
Location
far enough away
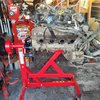
Not much, but I finally got this off the floor and onto the stand for teardown. Kind of a pain with one arm and a slightly inadequate hoist, but we got there. And this is where it's gonna stay until I get out of the slung I'm in for the next month. Facebook says I took this out of the donor a year ago yesterday, so I guess I ought to get to it. 6.0, getting bearings and gaskets and a couple small updates, hopefully does not require any major machining. We'll see.

the red bits on the sides are cool legs that let you sit a full drivetrain about 4" of the ground, and they slide over concrete pretty well. The transfer case did touch though.
20210418_192954.jpg
 
Top