General Tech What did you work on Today?

zmotorsports

Hardcore Gearhead
Vendor
Location
West Haven, UT
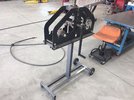
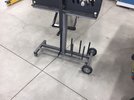
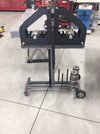
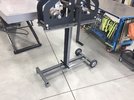
Last night I was able to finish up the cart for my tube roller as it's been sitting incomplete on the fabrication table for a couple of weeks now as I've addressed other priorities.

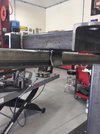
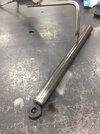
First items was to fabricate a guide for the handle. I took a piece of 1.5" square tubing, trimmed it to length and then cut one side off and flared the edges to guide the handle into the center as it is raised.
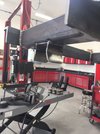
bender1.JPG

bender2.JPG

I noticed that the handle would slightly catch when raising so I took it to the disc sander and put a radius on the end.
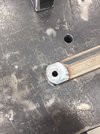
bender3.jpg

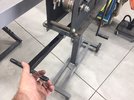
After the paint dried I bolted the tube roller to the cart permanently.
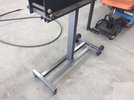
bender4.JPG


bender5.JPG

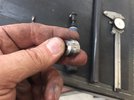
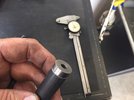
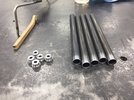
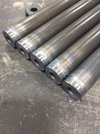
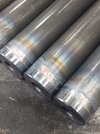
While I was waiting for the paint to dry I began machining the bungs to be used to bolt the die pegs to the base of the cart. These have a small step machined into them to fit into .750" tubing and accept a 1/4" socket head fastener.
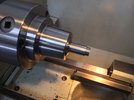
bender6.JPG

One down, four more to go.
bender7.jpg

This should work.
bender8.jpg

Handle paint dried and installed as well as the handles and grips installed onto the handle.
bender9.JPG

bender10.JPG


More to follow.
 

zmotorsports

Hardcore Gearhead
Vendor
Location
West Haven, UT
Prepping the bungs to be welded into the tubing. Scotchbrited the ends of the tubing and wiped everything down with acetone.
bender11.JPG

Slid up against a stop placed in the table and the 3rd hand holding it in place while also providing a good ground.
bender12.JPG

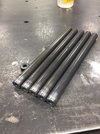
The 5 pegs for the dies completed.
bender13.JPG

bender14.JPG

bender15.JPG

Installed as a test fit.
bender16.JPG

Should work great and give me a little room to expand my die selection. Currently I have 3/4", 7/8" and 1" dies is all.
bender17.JPG


Now just need to remove the die pegs, paint them black to match the handle and this project is complete.

I've only been wanting to build a cart for this tube roller for about 5 or 6 years now so there obviously was no rush. :rolleyes:

Thanks for looking.

Mike
 
Last edited:

UNSTUCK

But stuck more often.
Loooooooow tech... haha:

Found a deal on a A.R.E. Offroad 7/16" x 100' synthetic winch rope and Factor55 Flatlink on RME (Thanks @StormRider) and a new fairlead on KSL for $30. And, although I already have a to-do list, I did this.

Before:

View attachment 139628

Pulled the wire and made a mess. Then I got a phone call and had nowhere to sit, haha.

View attachment 139629


Cleaned up the threaded hole on the drum and made a 1/4-20 the right length. 1/2" was too short and my other hardware was too long. While it was accessible, I cleaned the drum up a bit.

View attachment 139630

Put on the new fairlead with some nuts/bolts I found in a bin.

Wound it up and that's that. I'll head back out later and put a real hour's work on the to-do list.

View attachment 139631
You have that new rope wound up wrong. Your wire rope was wound up right though. Now it just looks like one of those "overlander" guys that just had to have a winch. What's next? A snorkel?


Too soon? :D
 

jeeper

DumpStor Owner
Location
So Jo, Ut
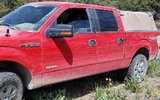
My truck has been hit twice in the drivers door. Once for sure while someone backed out of their driveway as I was parked across the street, the second time I think was a hard door smack in a parking lot. Add to that all the scratches I got on the GTT, and the truck was looking pretty rough for only being a year old 🤦🏼‍♂️
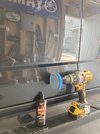
This Meguiars X and drill pad have made excellent work of removing all the scratches. Very happy with it.

F3B1E4BF-211E-4262-88FE-1C3EED15B3F6.jpeg
 

frieed

Jeepless in Draper
Supporting Member
Location
Draper, UT
come see if you can work that magic on mine :rofl:
20210626_095512_c.jpg
20210626_095512_c-jpg.139966
 
Last edited:

DAA

Well-Known Member
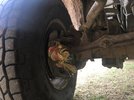
Preventative maintenance.

untitled-500W.jpg


untitled-501W.jpg


Gunked and pressure washed. With two light coats of Eastwood rust encapsulator and two light coats of chassis black.

untitled-504W.jpg


Going to Carl's soon. Front for new Artec trackbar and LCA brackets. Rear for a going through. Pinion nut keeps coming loose. Not making any noises, or anything, yet. But bearings have to hate that loose nut. And I want to get ahead of it before it becomes an issue. My jam is getting as far as literally possible from anything, usually by myself. Better to try and get ahead of something like that.

I'll have to touch them up where needed and another light coat of chassis black after the work. But clean parts are nicer to work on and it will save me time getting them reinstalled after the work by painting them now.

- DAA
 

Vonski

nothing to see here...
Location
Payson, Utah
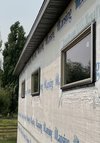
Trimming out windows on the 50’x60’ shop @Cascadia (Tyson) put up a few years back. He handled all the smart kid stuff and I’ve been busy ever since getting zero done. Anyway, once I install some trim along the soffit, I can start putting up the bare steel panels. Project Tetanus (as in, you better have had your shot with all the rust and sharp edges) is back underway.
 

Attachments

  • 50A8E8E7-C27B-4E5F-8973-9514C6A4C6E5.jpeg
    50A8E8E7-C27B-4E5F-8973-9514C6A4C6E5.jpeg
    234.9 KB · Views: 25
After my son left to head home and I cleaned the shop up for the evening my wife arrived home from work to inform me that she had a rock chip in her new windshield that we just replaced two weeks ago. I am getting really sick and tired of the shit roads we have around here and all of the construction leaving rocks and debris on our public roads. I have had more rock chips in the past 8 months than I've had in the past 8 years combined and now two brand new windshields in which I've already had to repair chips.

I got another rock chip this weekend on I-215. I'm thinking as much as this is happening that I need my own repair kit rather than going to a glass place every time. Any recommendation on a professional rock chip repair kit?
 

zmotorsports

Hardcore Gearhead
Vendor
Location
West Haven, UT
I got another rock chip this weekend on I-215. I'm thinking as much as this is happening that I need my own repair kit rather than going to a glass place every time. Any recommendation on a professional rock chip repair kit?

I have been impressed with the tools and supplies that I have gotten from Delta Products. Their aluminum bridge is the same one many professional shops use and their resin and UV light are also very good quality.

I can't believe how convenient having your own repair tools is. So much nicer than having to arrange with my wife and juggle schedules so I can get it to a shop for repair. Simply pull it in the shop and in less than about 15 minutes it's parked back in the garage and repaired.

Here is a link to a few of Delta's kits.
 

XJEEPER

Well-Known Member
Location
Highland Springs
Then I could begin on the bushings in which I actually had started on.


Machining the OD to .975" on the first cuts. Great surface finish on this bronze material.
View attachment 139567

Next steps in the first setup process were to machine a step down to .625". The drawing called out for this step to be .250" deep but I went .260" to allow for a facing the step to length after boring the ID which the drawing called out to be .400" prior to parting off.
View attachment 139568

A .400" gage pin will fit in the bore.
View attachment 139569

Whereas a .401" will not.
View attachment 139570

A couple bushings done with the first setup procedures. For the first setup I was able to produce about 4.5 bushings per hour.
View attachment 139571

Moving on to the second and final setup procedure was to face the major OD to length and chamfer the OD and ID.
View attachment 139572

Sixteen bushings completed. I have a seventeenth one also as I had a brain fart and faced one down too far by a bit so hopefully the gentleman can use the extra one as well.
View attachment 139573

After final checks I figured I'd clean up the mess. My lathe hasn't been that filthy in quite some time. Wondered if I'd ever get it clean again.
View attachment 139574

I really did a poor job of bidding this job but and lost my butt, but I learned a lesson so I guess it wasn't all bad.;)

I usually don't do production runs for this reason and only do onesie-twosie jobs. I bid this job based on about an hour and a half of actual machine time plus materials but it ended up taking me about four hours to complete the bushings. Yes, a huge learning experience on bidding piece work.

Thanks for looking.

Mike
Mike, thanks for doing this job and helping my neighbor out. Sorry that it didnt pencil well for you.
Jeff
 

zmotorsports

Hardcore Gearhead
Vendor
Location
West Haven, UT
Mike, thanks for doing this job and helping my neighbor out. Sorry that it didnt pencil well for you.
Jeff

I was happy to do them. Just because they didn't pencil out time wise doesn't mean that it wasn't a worthwhile job. There's always something to learn and benefit from doing just about any job.

Thank you for referring him to me Jeff. I hope he's happy with them and comes back if he needs something else.

Mike
 
Top